Pork Tenderloin Stuffed with Herbs and Capers

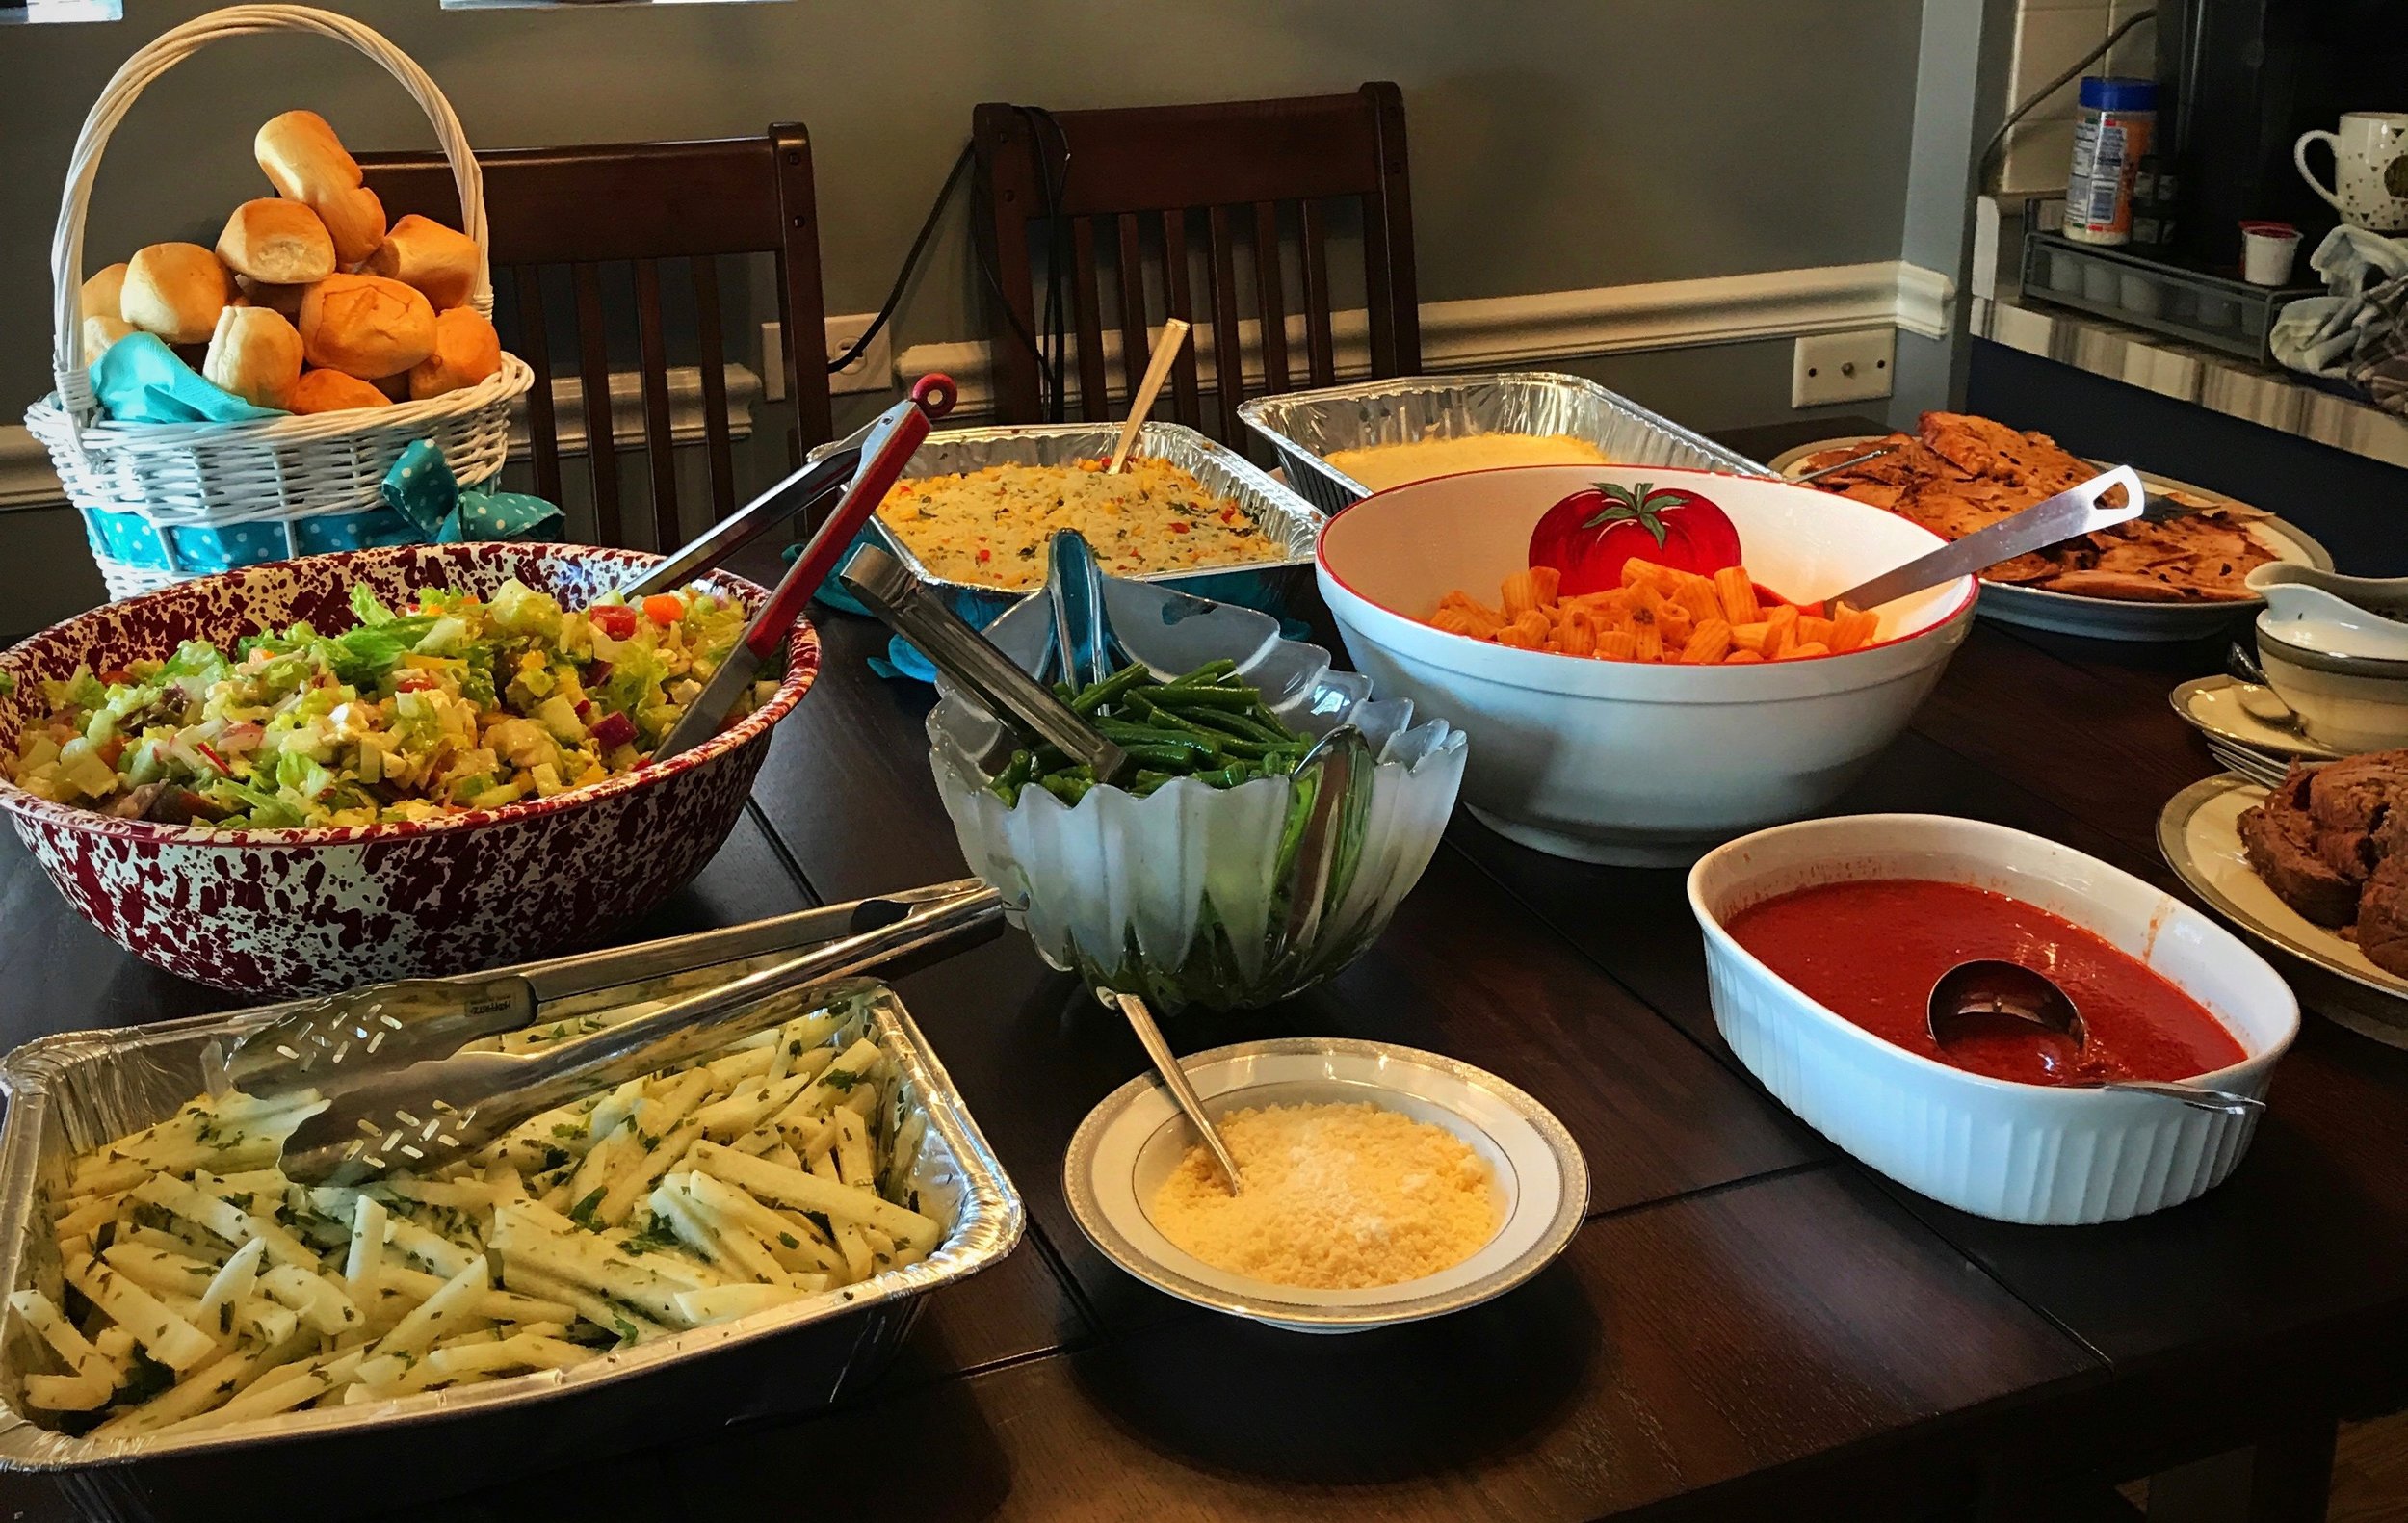
I love pork tenderloin, but I seem to gravitate to the same recipes over and over.  Luckily, as I was searching for something new, this recipe popped up from Melissa Clark.  Yes, I'm a bit of a fan of her, but this recipe was a mash up of two of my favorite things...braciole and pork tenderloin!

The hardest part of the receipt was the prep.  Lots of chopping on this one, so if you don't mind spending some time with the knife, this is the recipe for you!

Ingredients (my inspired version, of course):

  • 2 pork tenderloins
  • 8 shallots, minced
  • 1 1/2 tablespoons capers, minced plus a splash of their liquid
  • 2 1/2 tablespoons rosemary, chopped
  • 2 1/2 tablespoons thyme, chopped, plus a few additional sprigs 
  • 4 garlic cloves, grated or minced
  • 1/2 cup freshly squeezed orange juice
  • 1/2 cup chicken stock
  • Salt
  • Black pepper
  • Lemon
  • Unsalted butter
  • Olive oil
  • White wine (recipe called for Vermouth, but I was out!)

Directions:

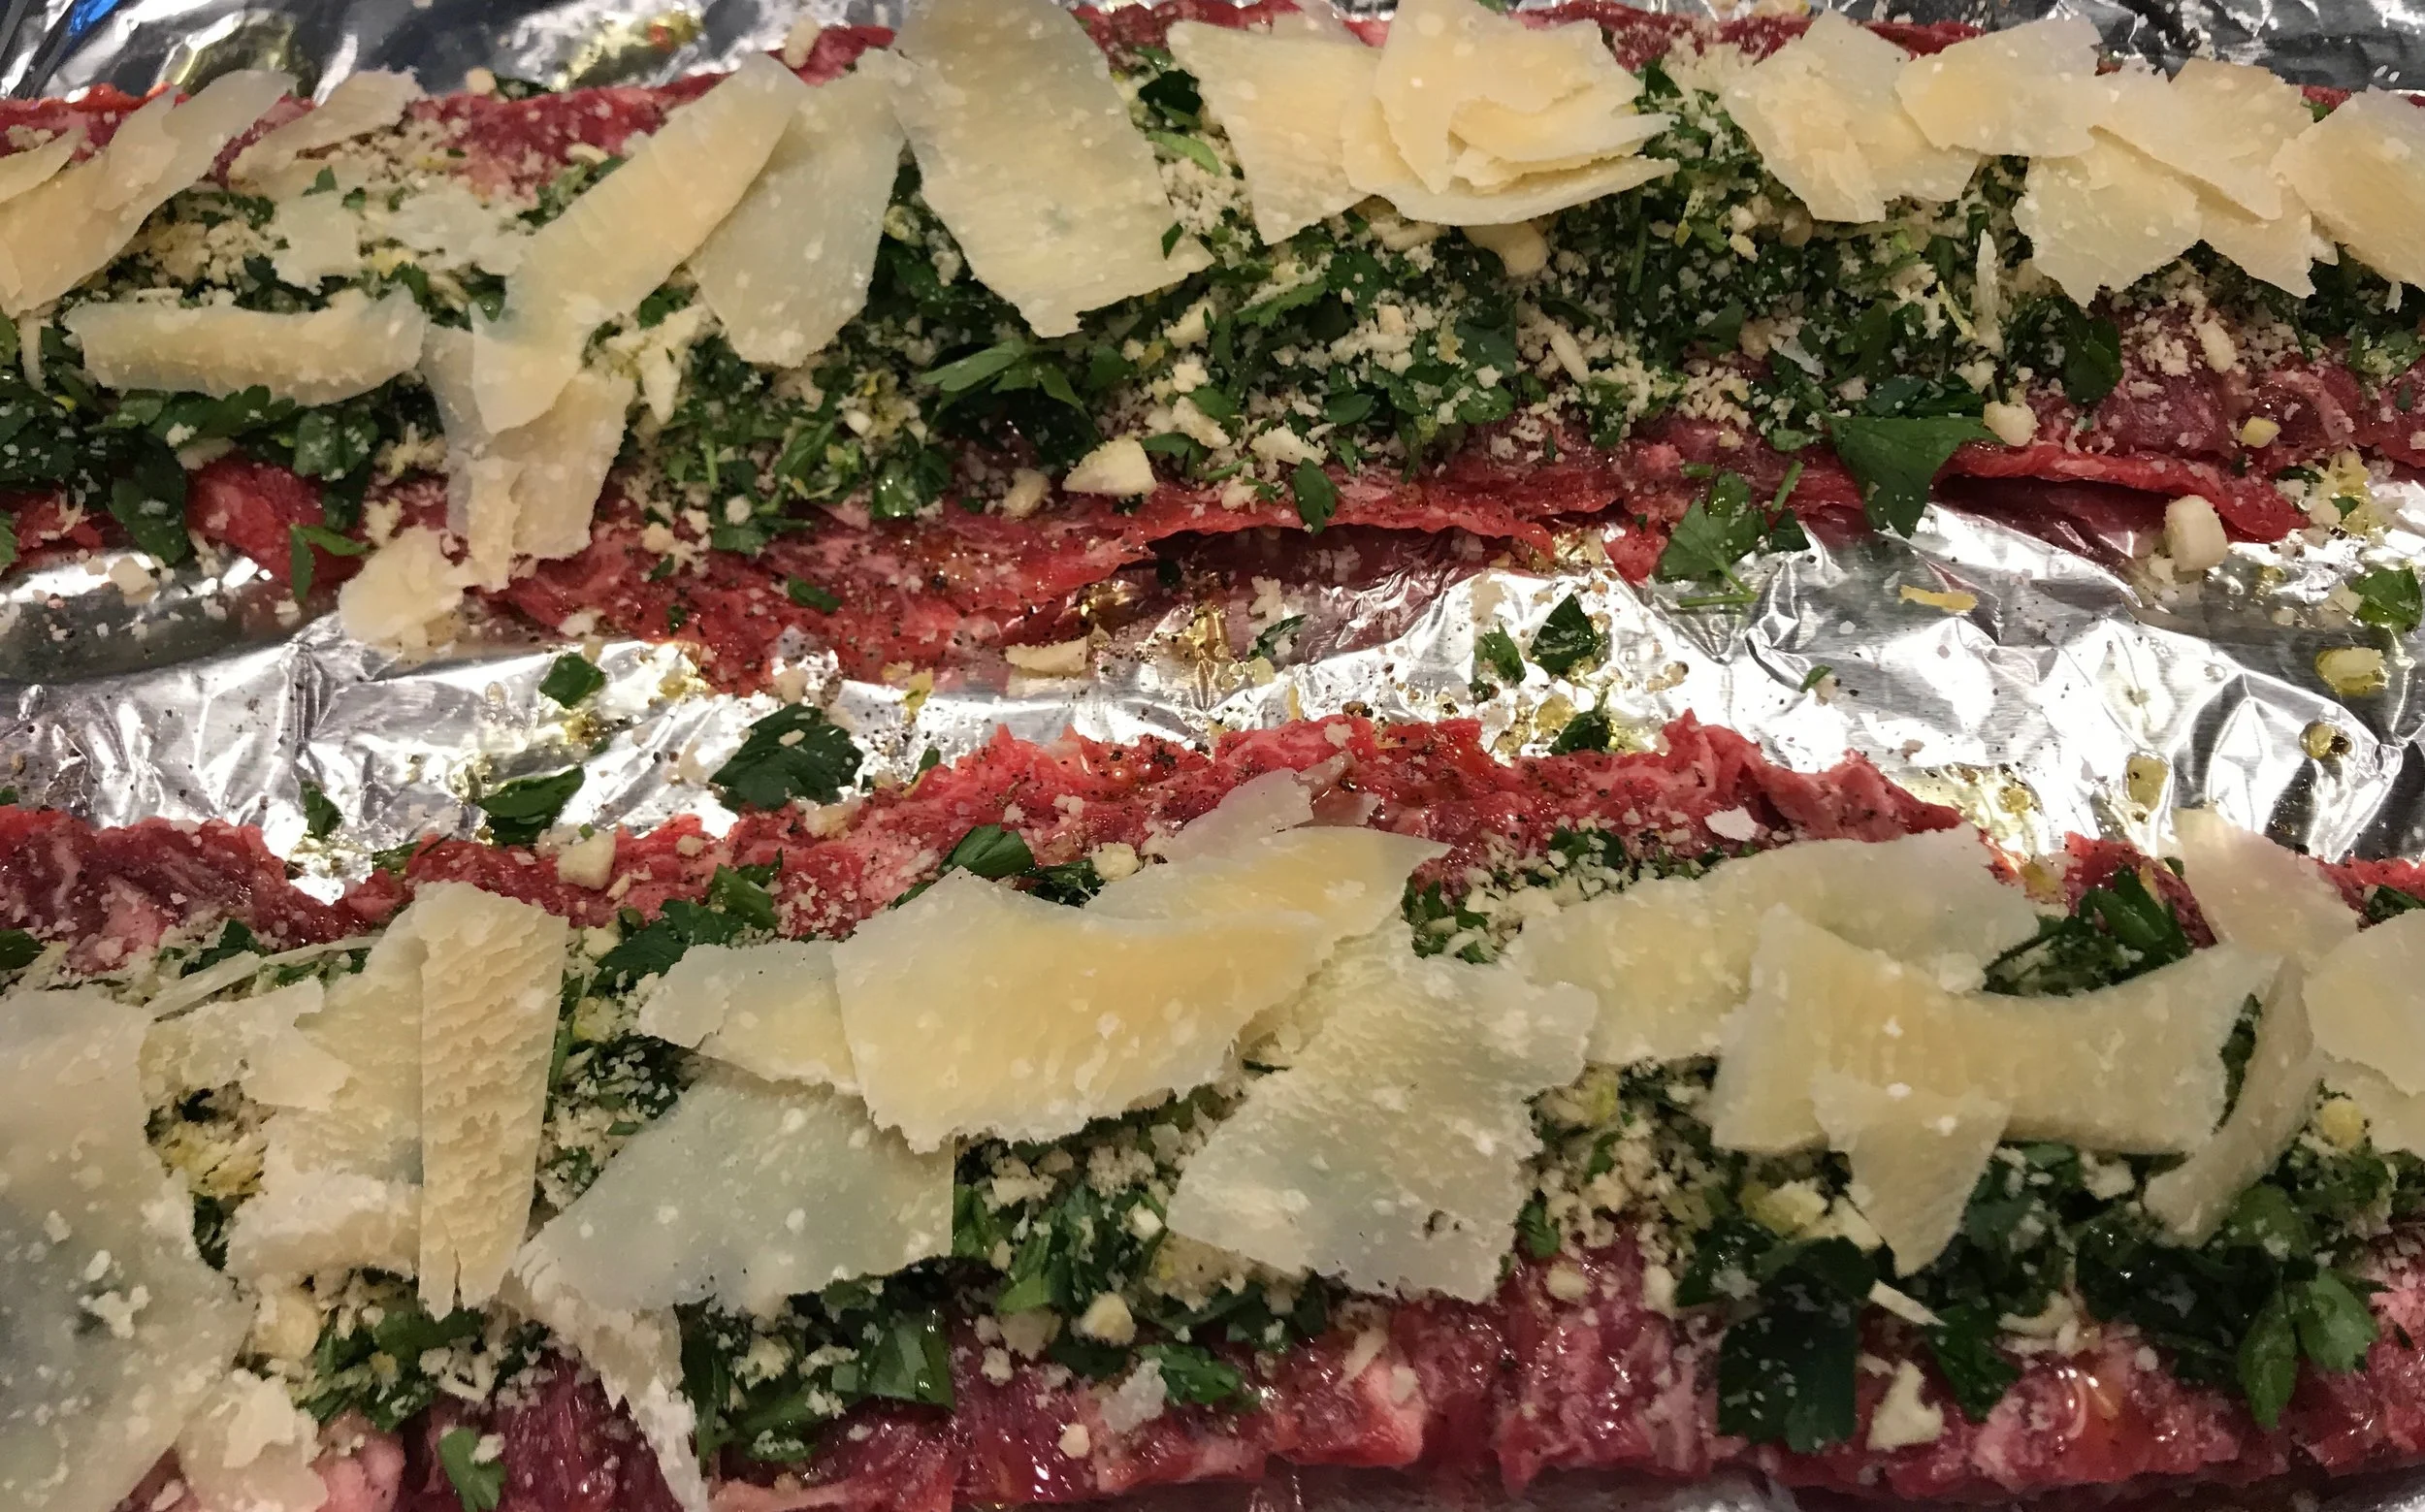
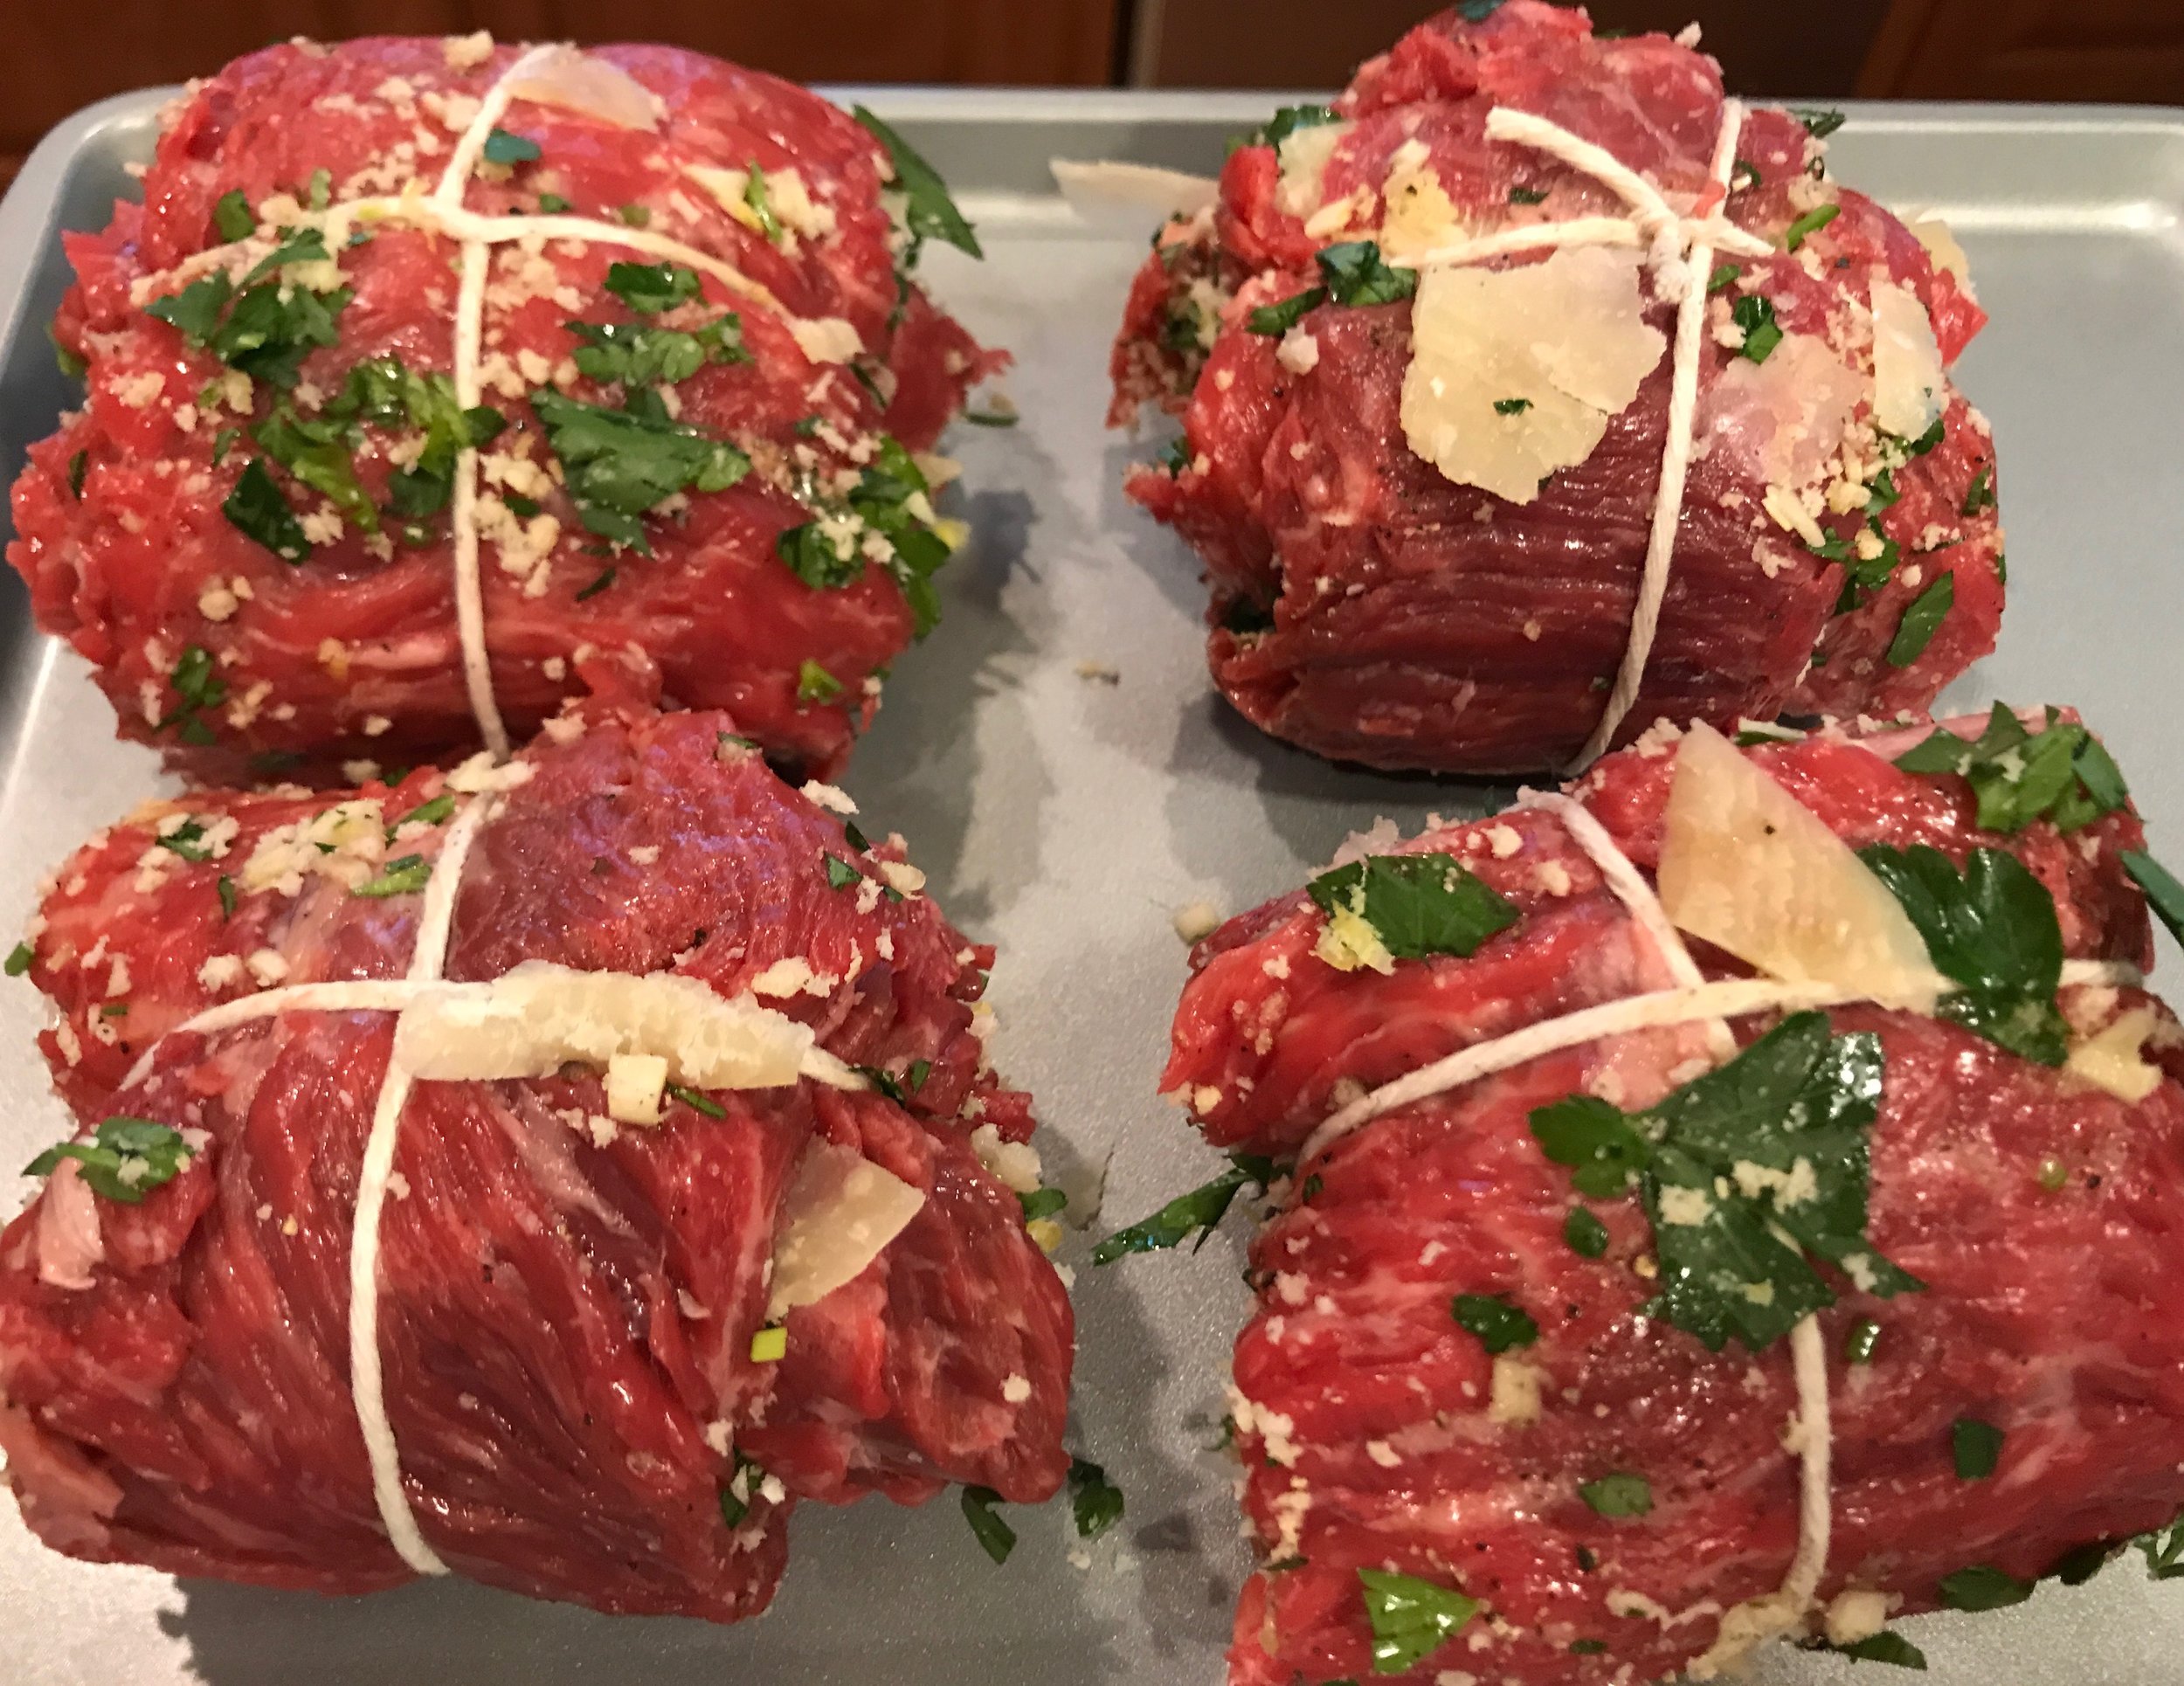
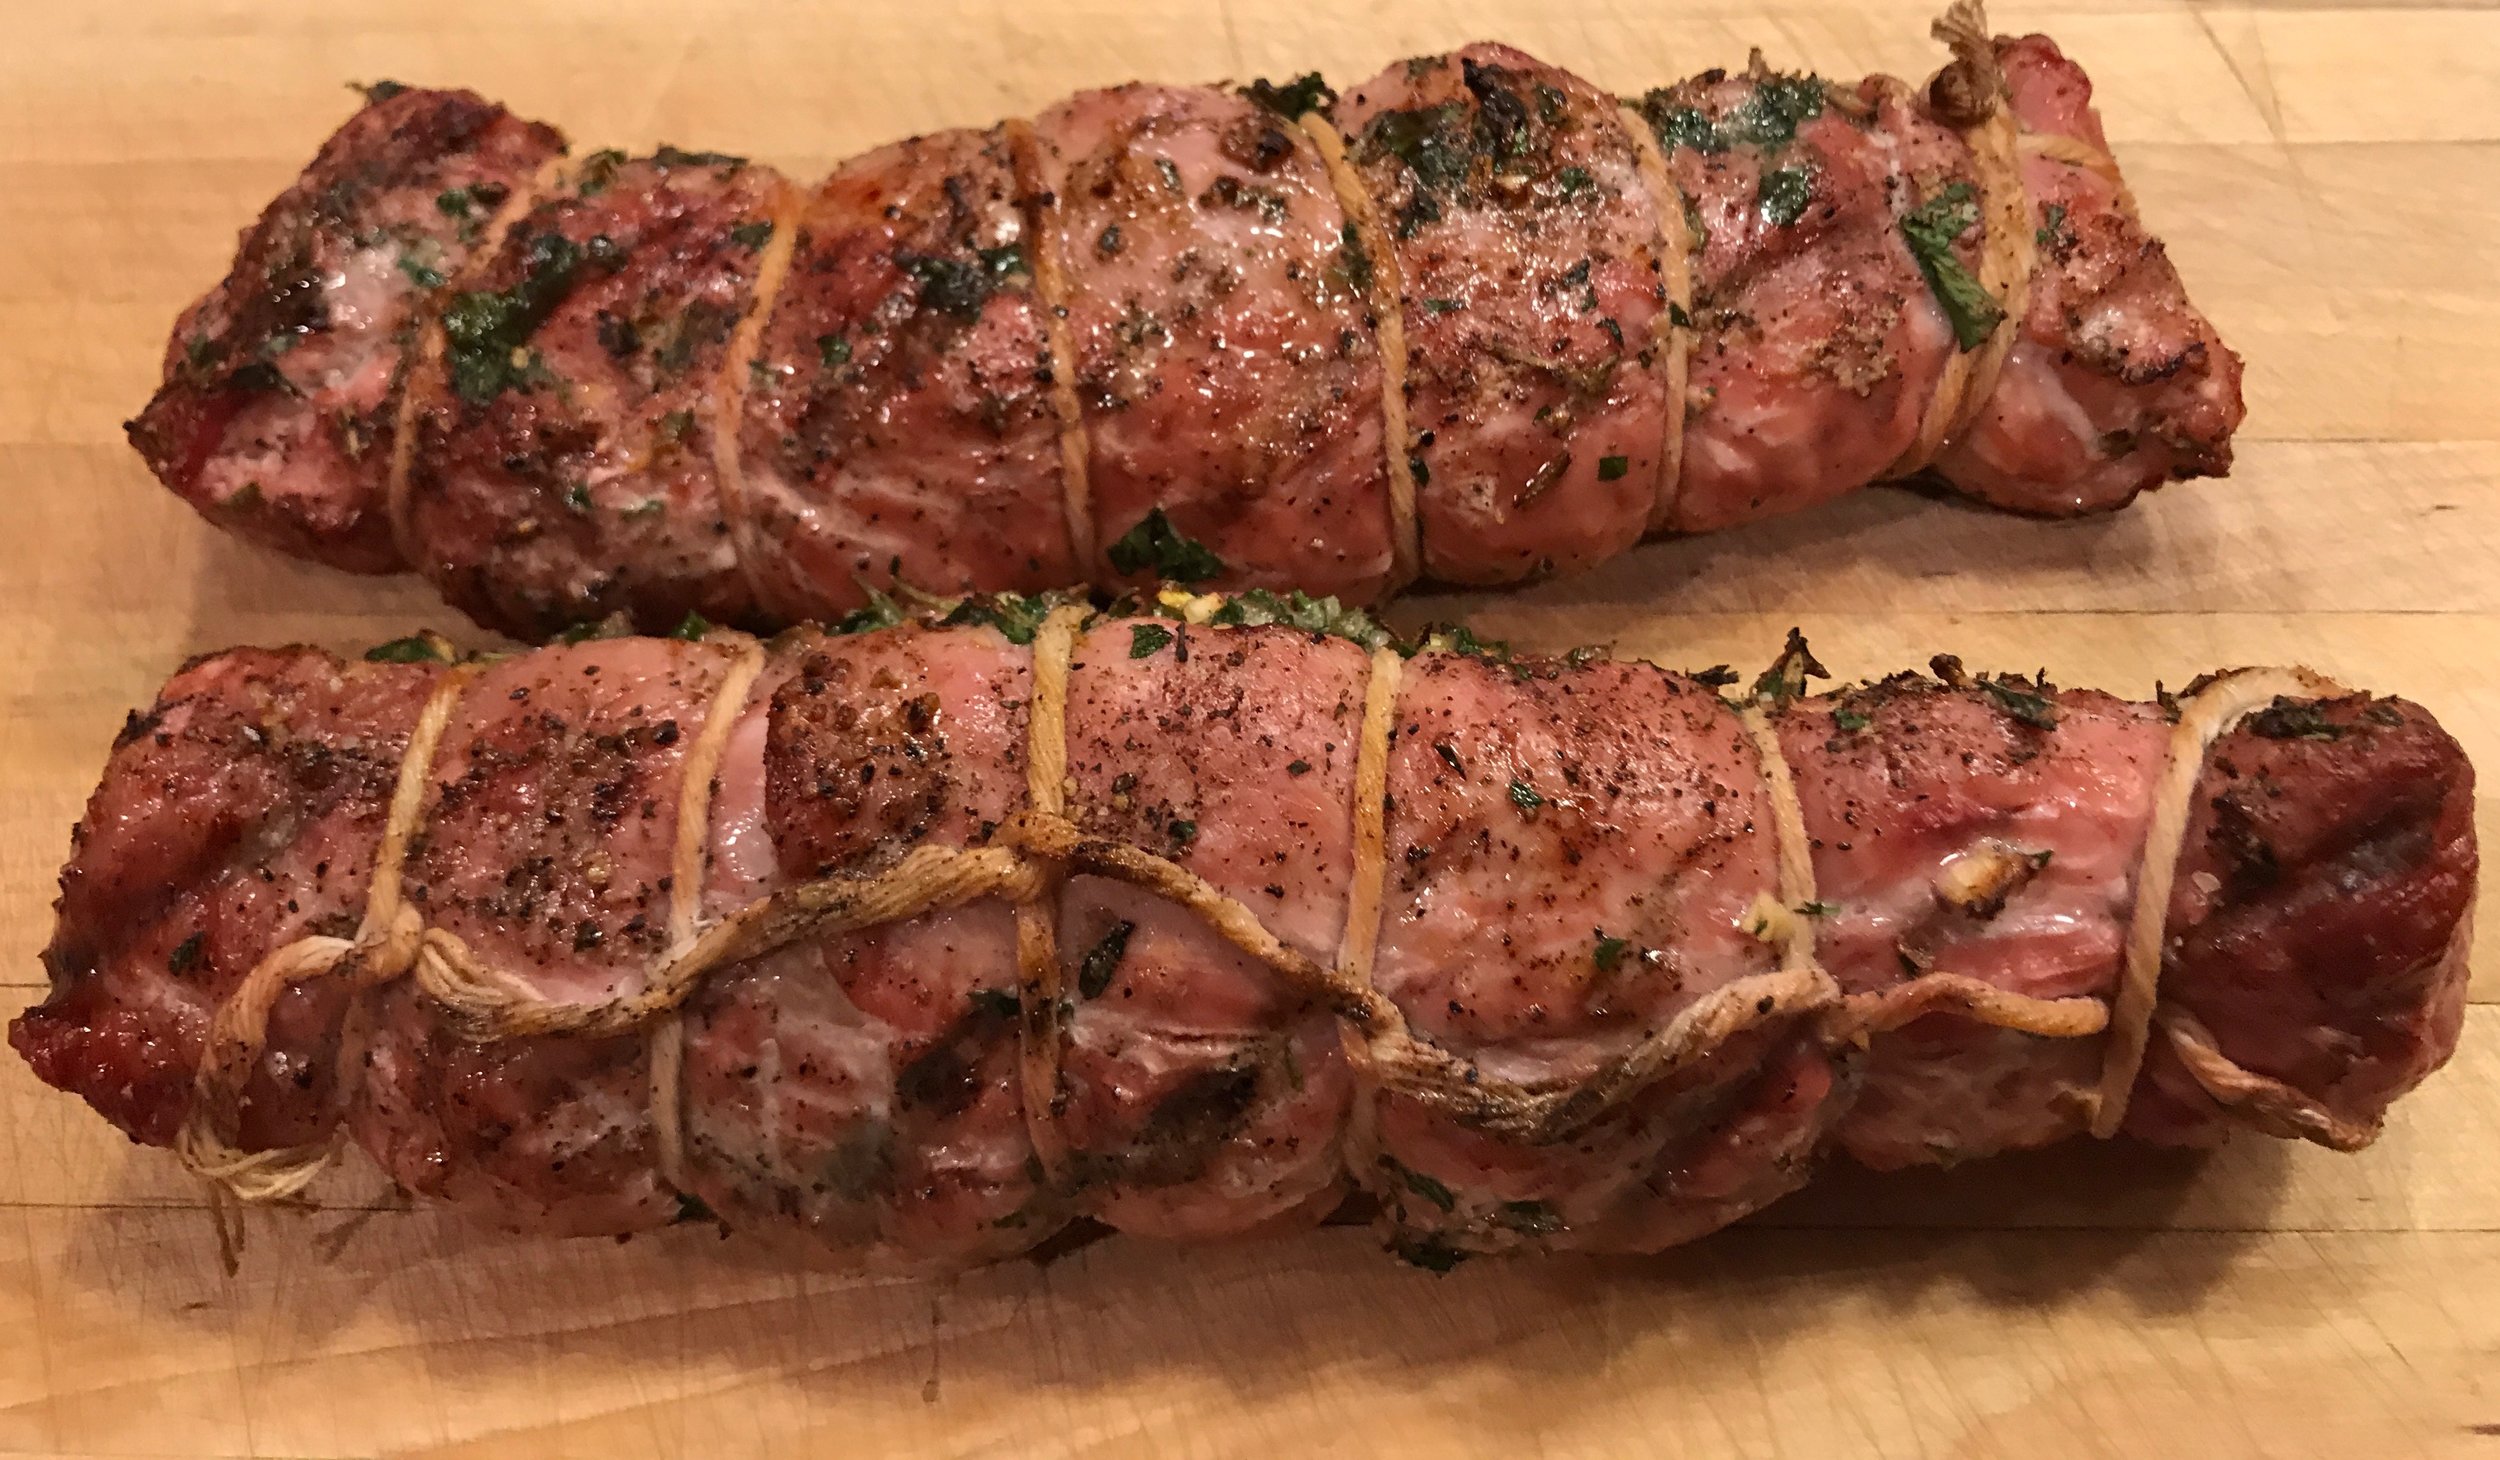
Heat oven to 350 degrees (or heat your grill to about 400 degrees - you will want to cook on indirect heat for most of this).  Slice the pork tenderloins lengthwise to butterfly it, but don't cut all of the way through.  Season the pork with salt and pepper.  Heat a pan on medium-high heat and add 2 tablespoons of olive oil.  Add the shallots, capers, rosemary, thyme, and some salt and pepper to the pan and let the mixture cook until the shallots start to turn brown.  Add the garlic and saute for 1 minute, then remove the mixture and let cool.

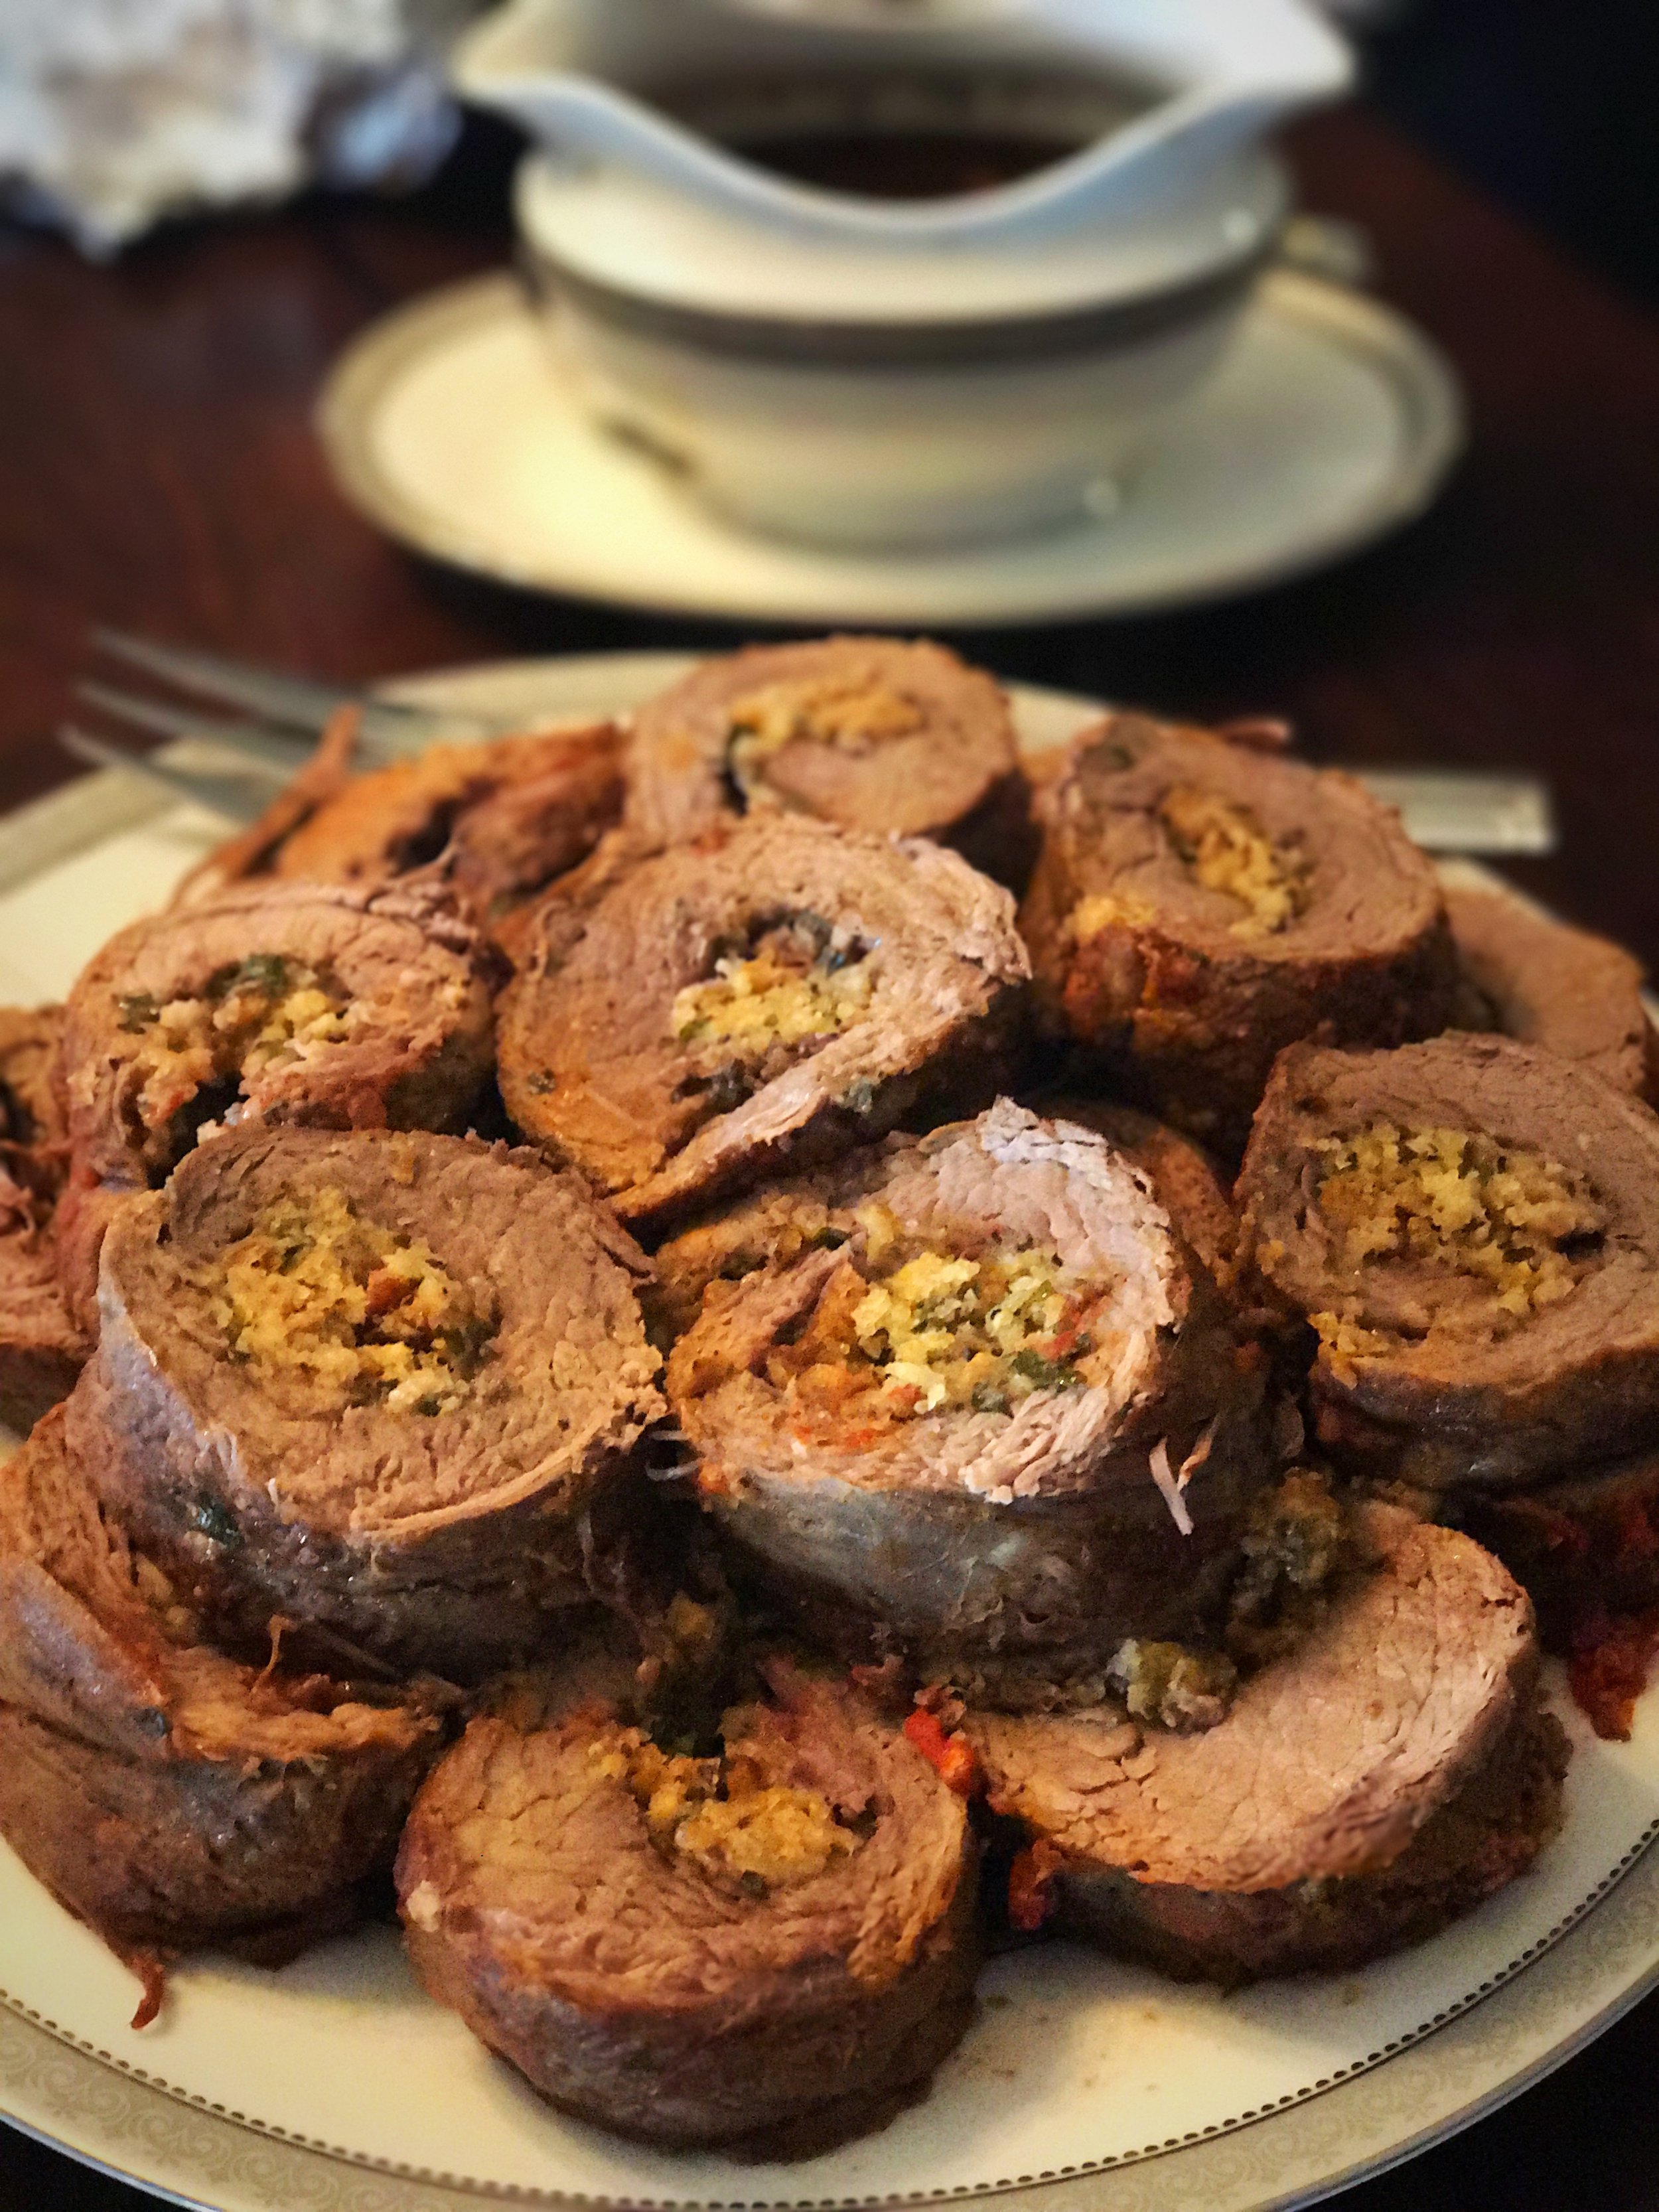
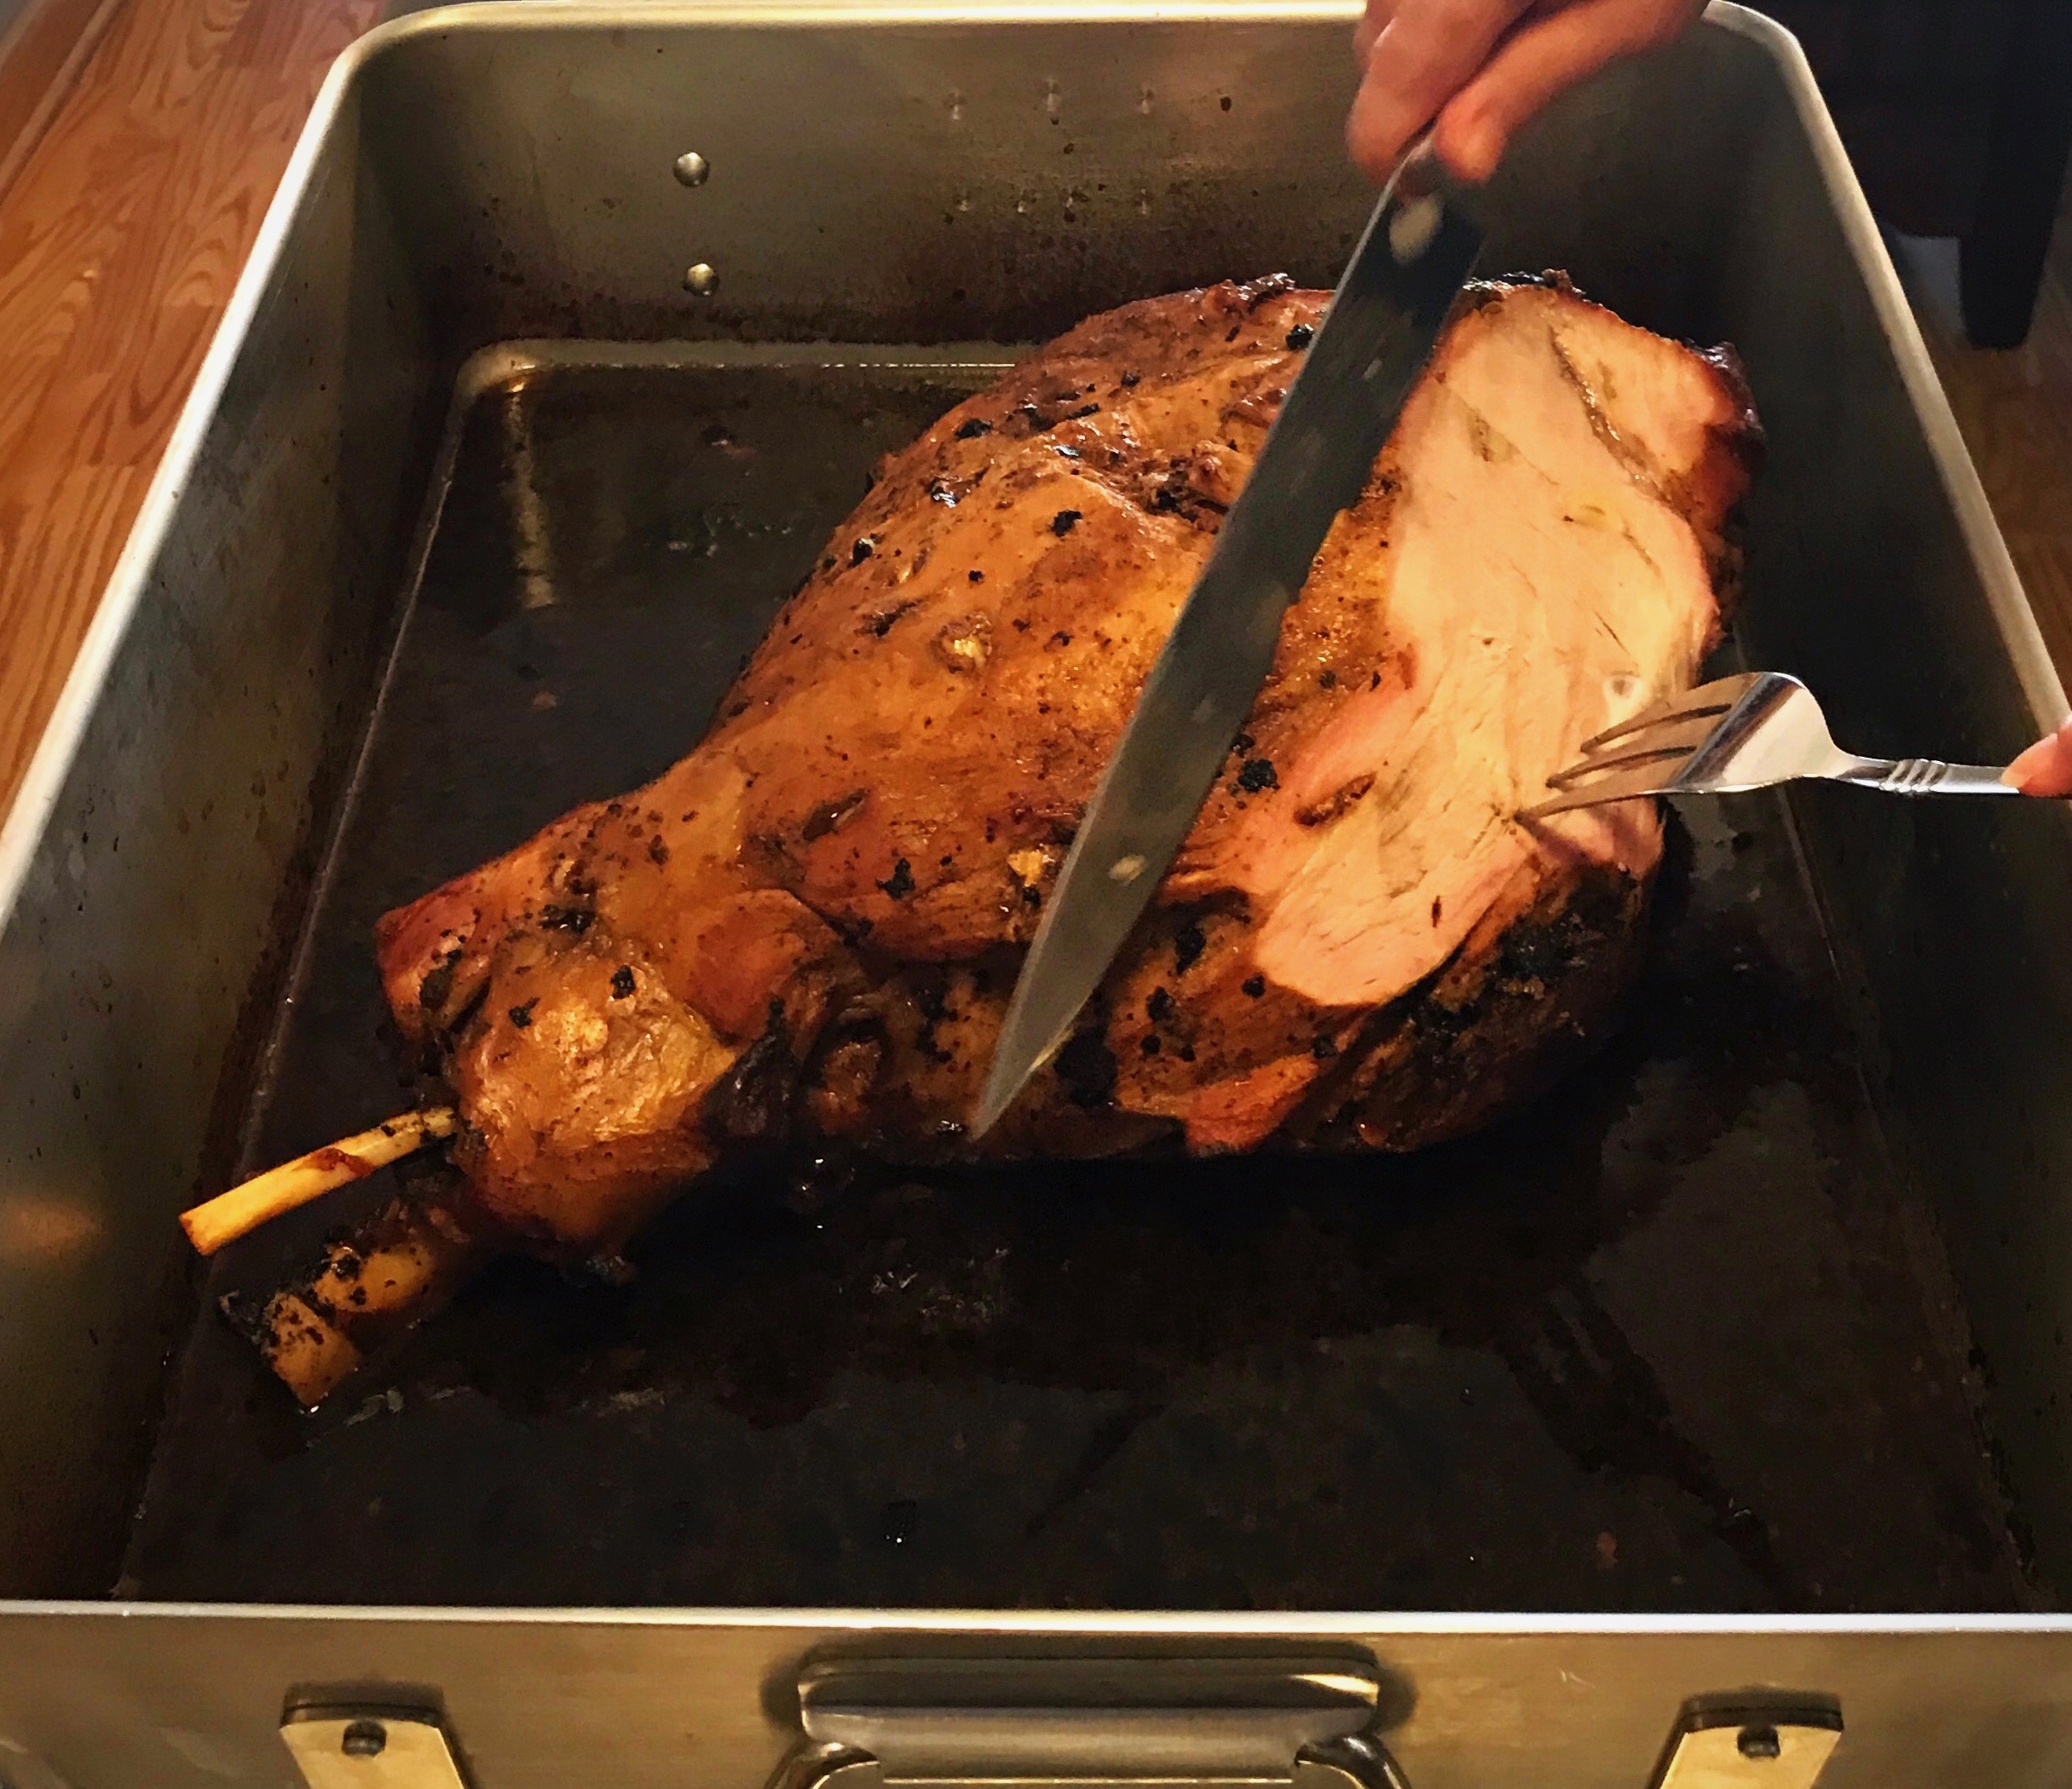
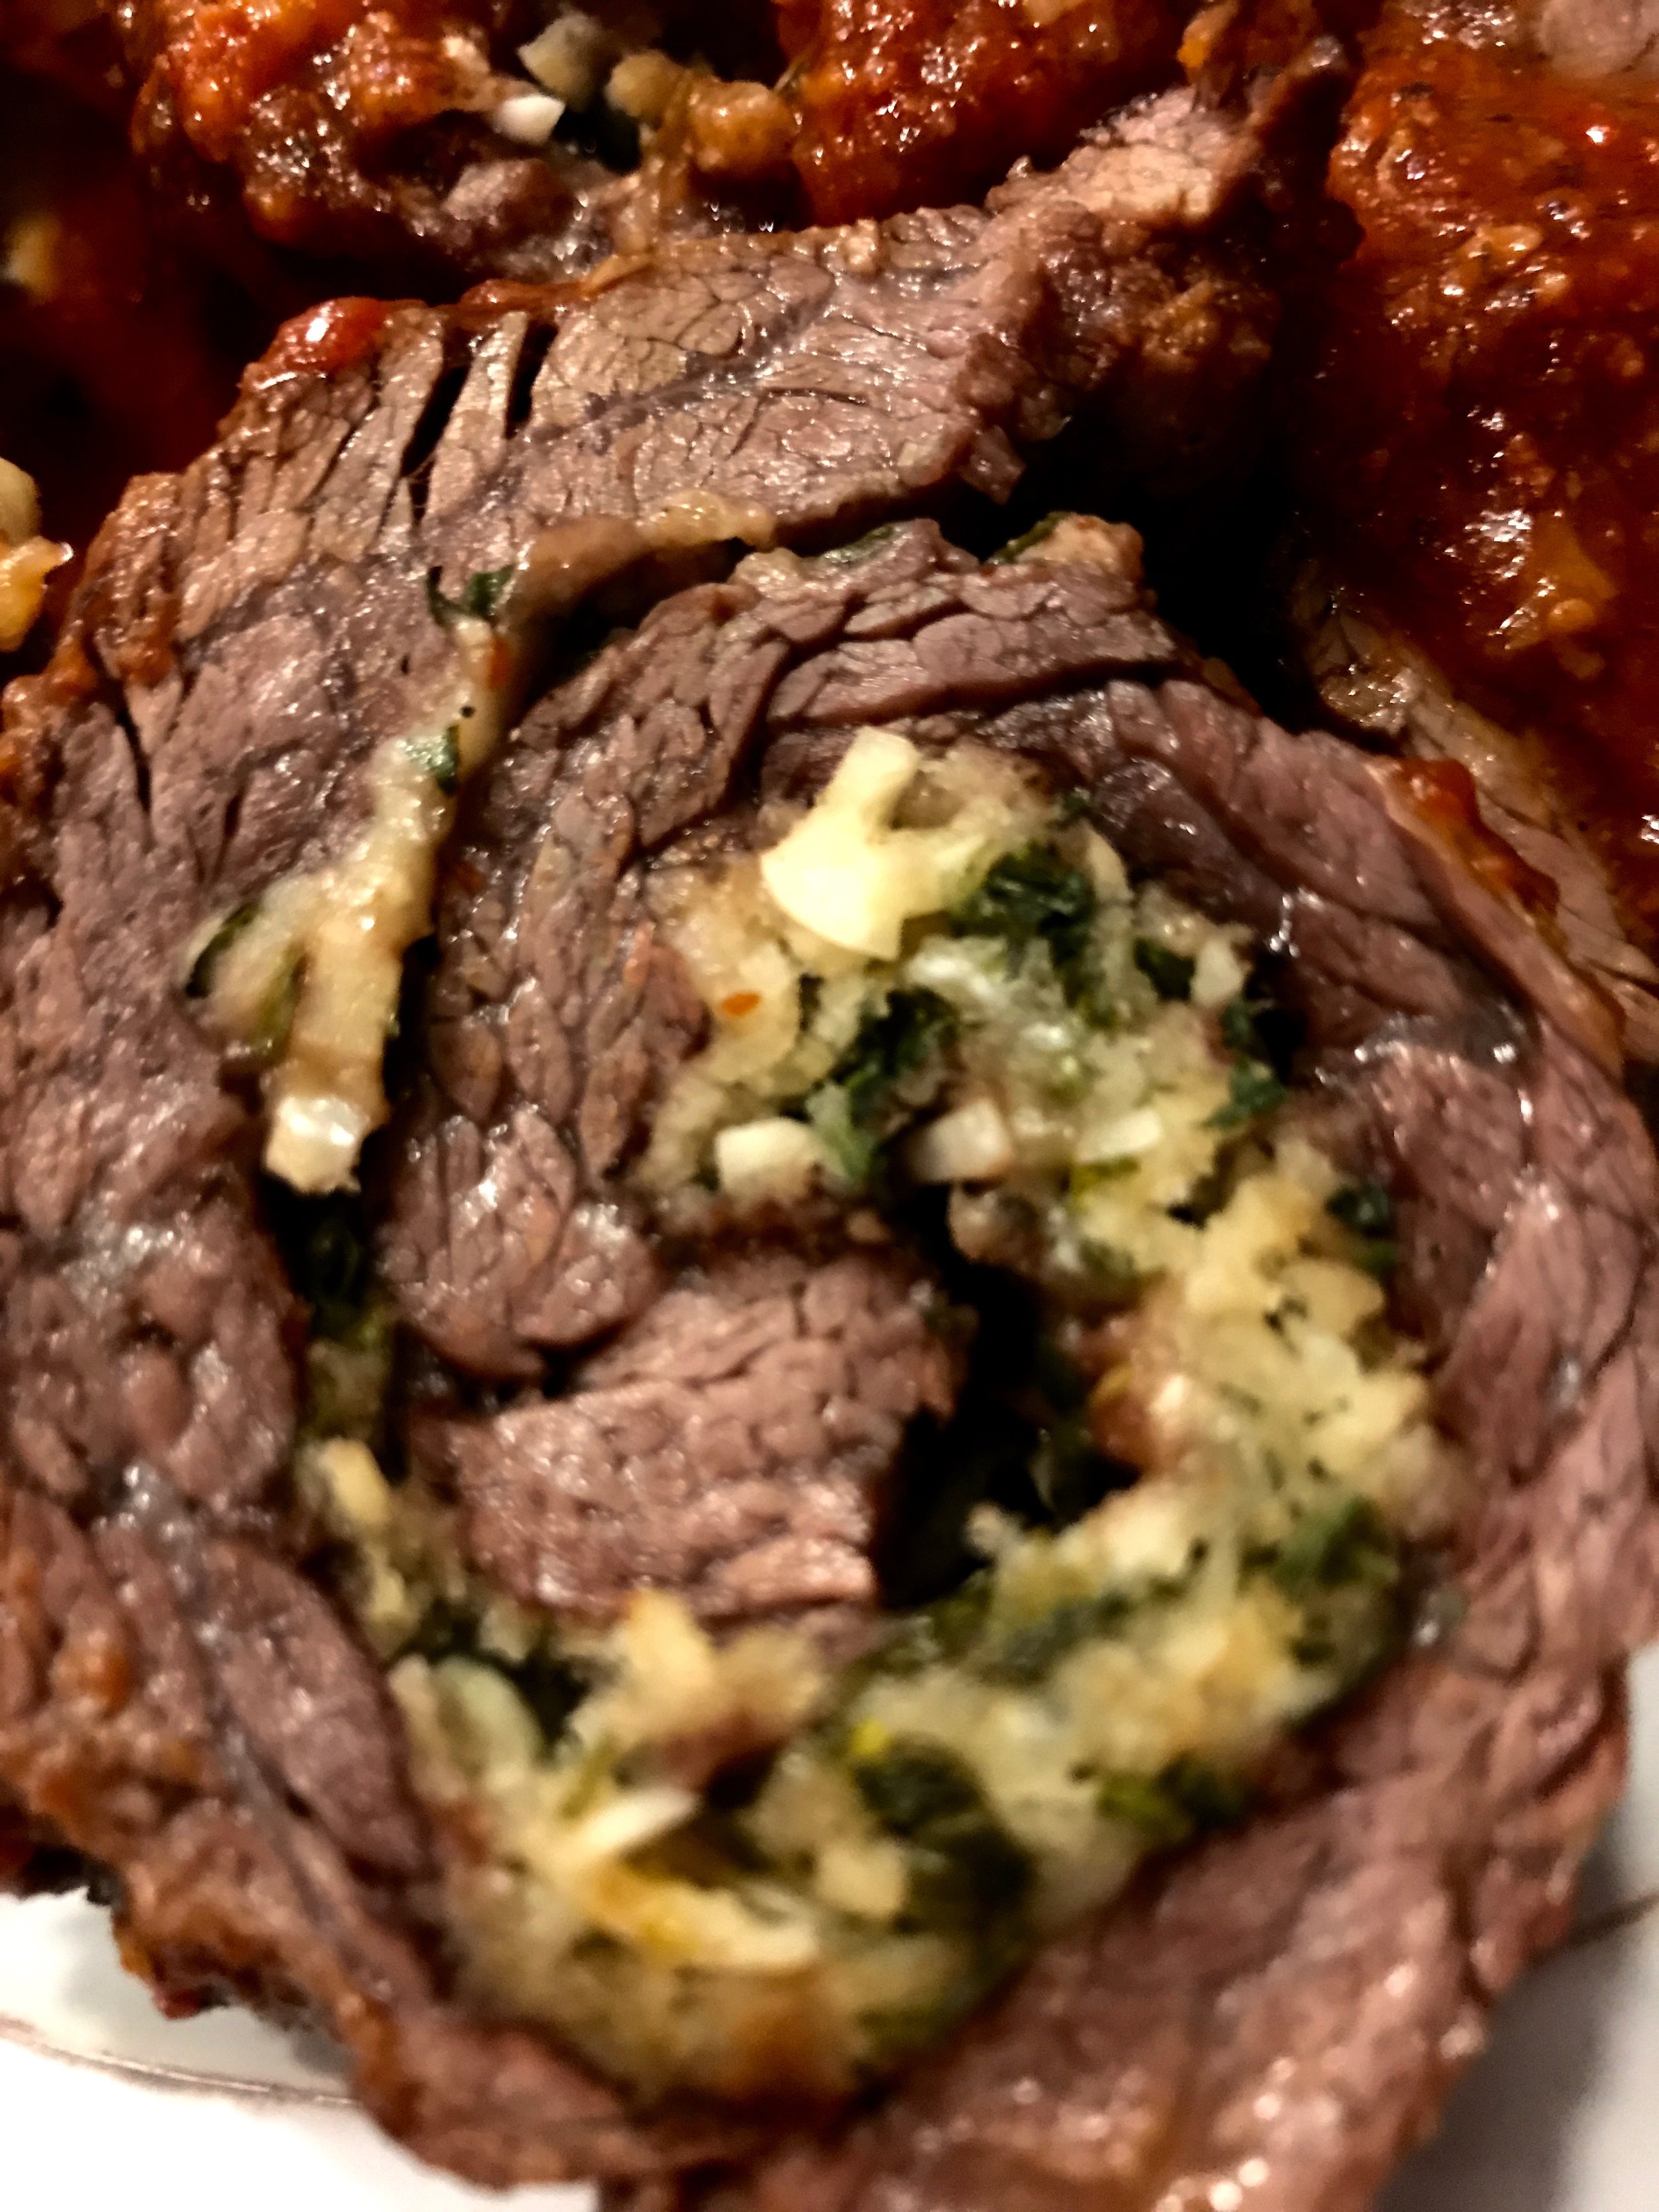
Preheat your oven to 400 degrees.  Spread about 3/4 of the cooled mixture over the pork, then fold the thin end up, and tie the pork with kitchen twine.  Heat a pan on medium-high heat on the stove top with some canola oil.  When the oil begins to shimmer, add the pork and sear it on all sides.  Add two tablespoons of unsalted butter and a couple of sprigs of thyme.  As the butter is melting, spoon it over the pork, then place the pork in the oven.  Let the pork cook until it reaches 145 degrees internal temperature.  Remove the pork from the pan and cover.  Discard the thyme.

Heat the pan with the cooking juices on the stove on medium-high heat.  Add about 2 tablespoons of white wine (I literally pour the wine in the pan and count "1, 2" and that is my 2 tablespoons) and scrape up the browned bits.  Add the remaining herb mixture, the orange juice, a splash of the caper liquid, and the chicken stock.  Let the mixture thicken, then add butter, salt and pepper to taste, and a squeeze or so of lemon. Taste the pan sauce and add more lemon if the sauce is too sweet.

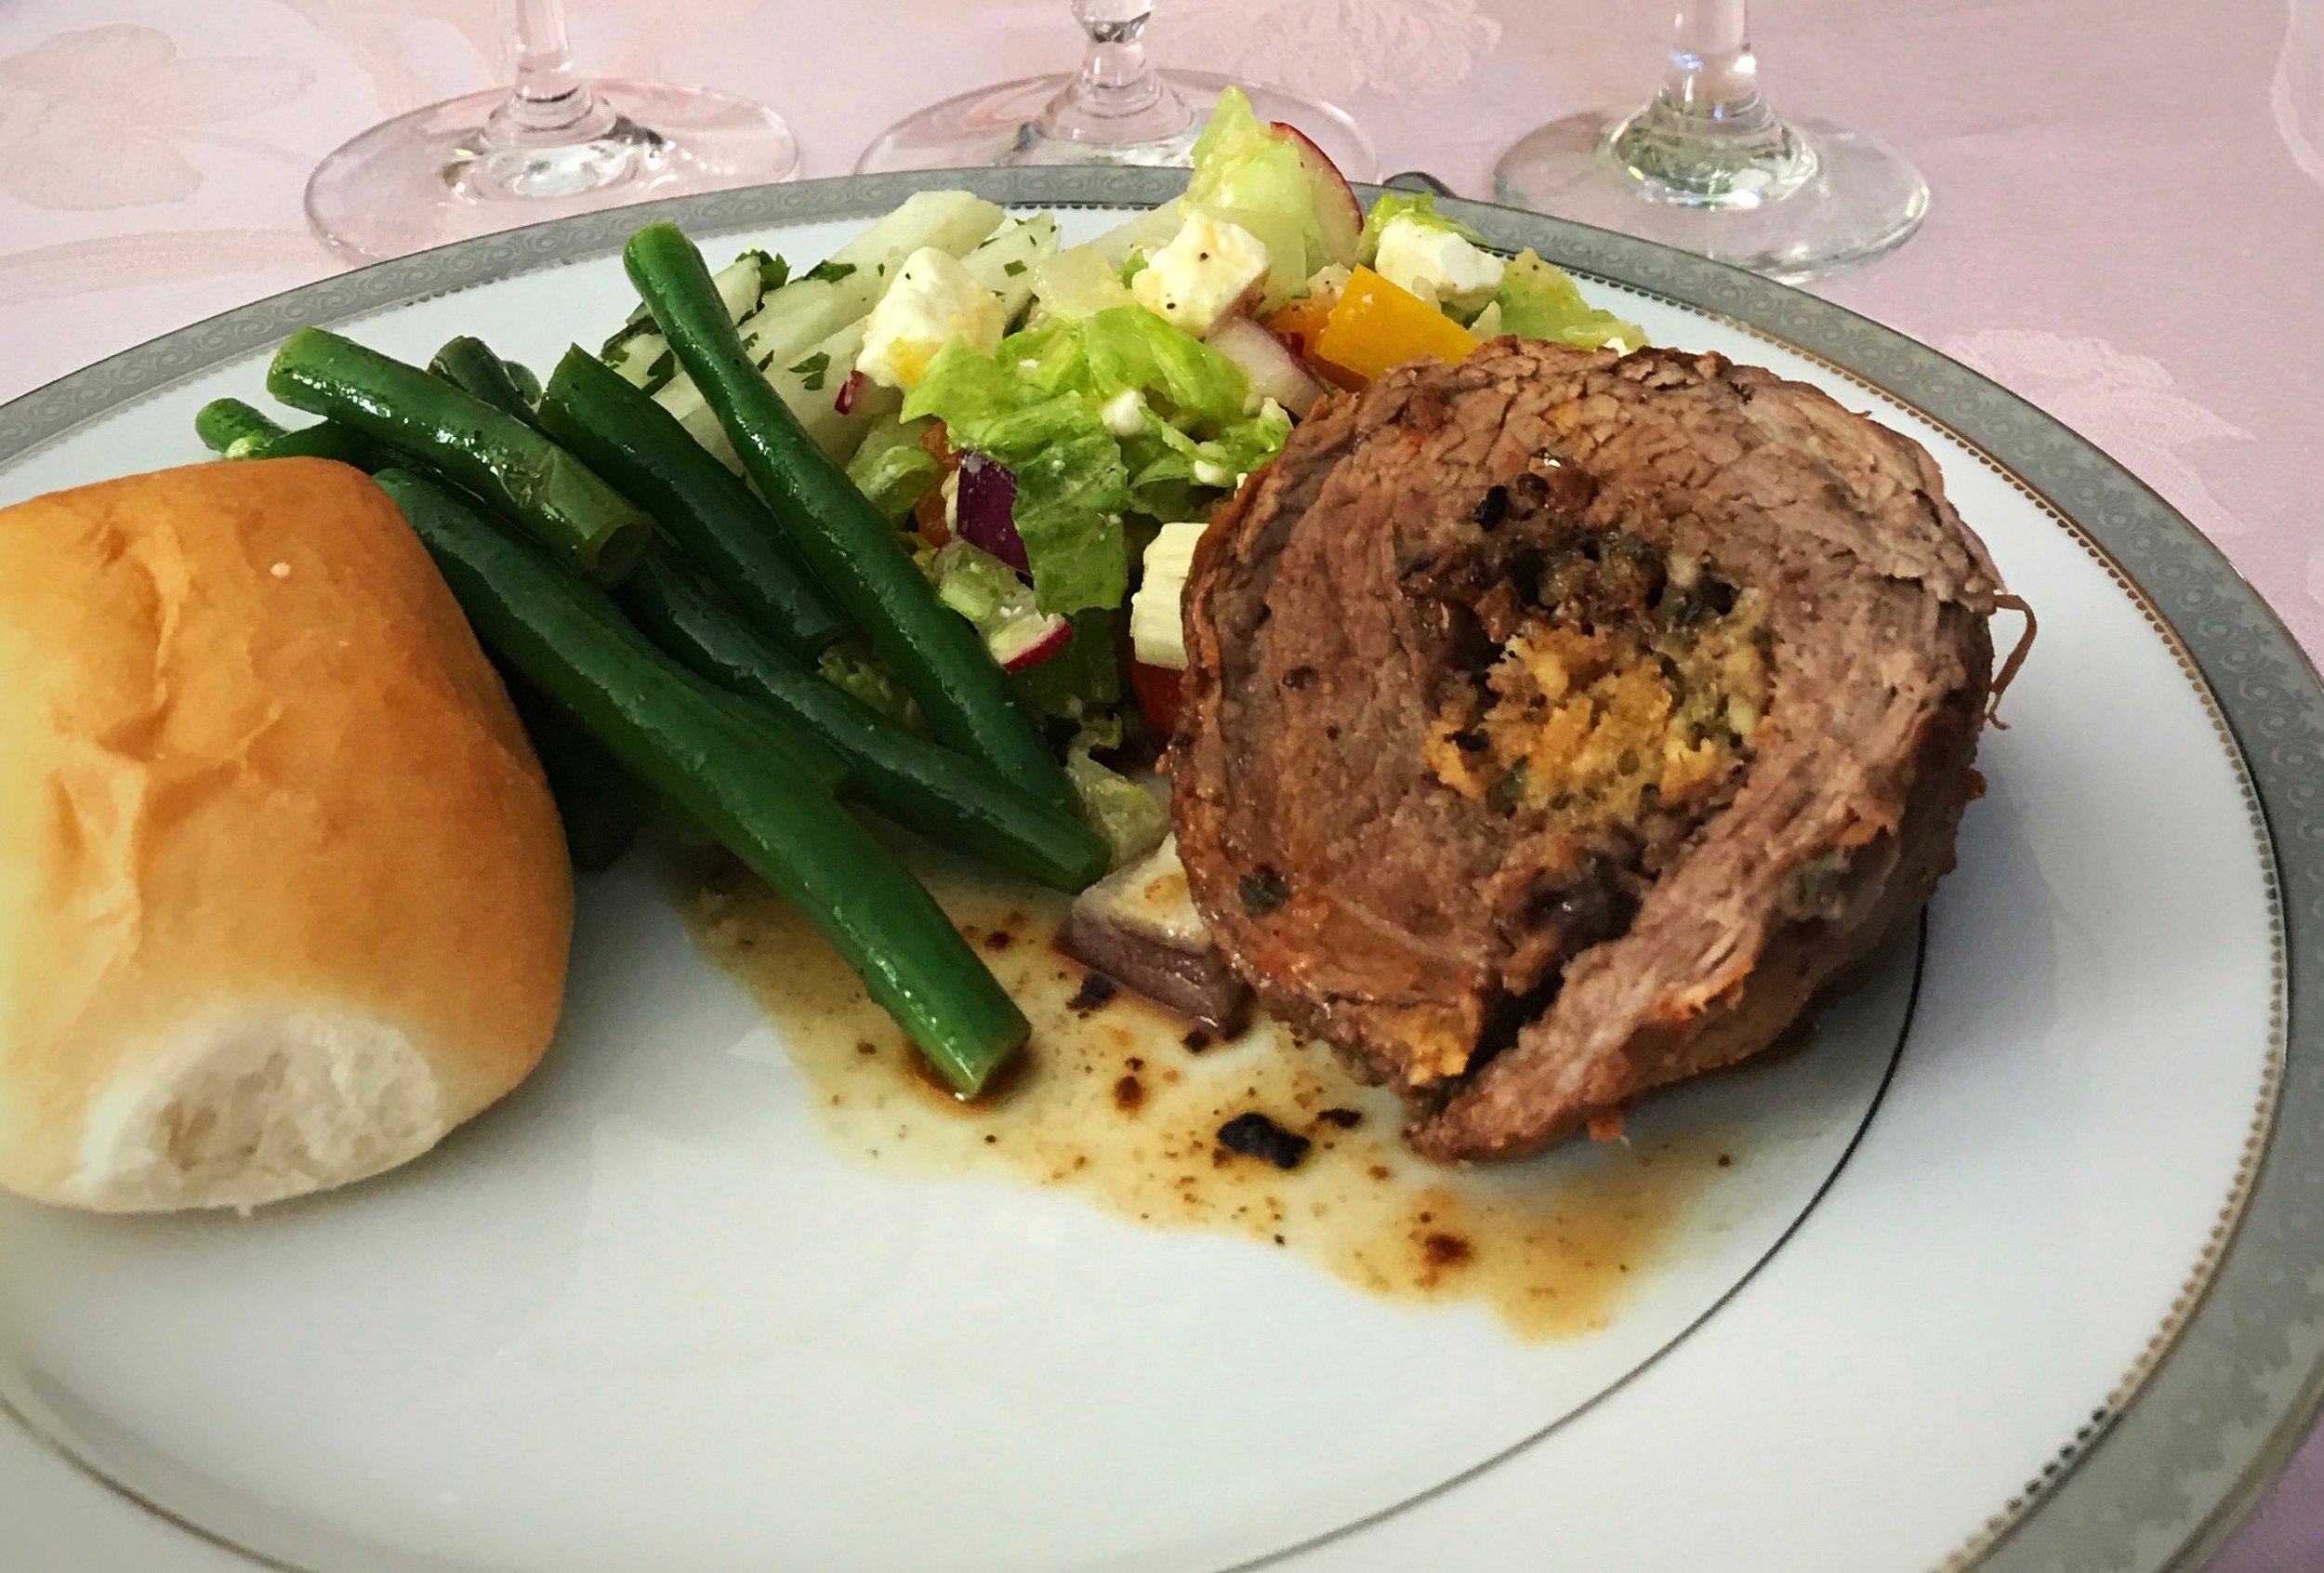
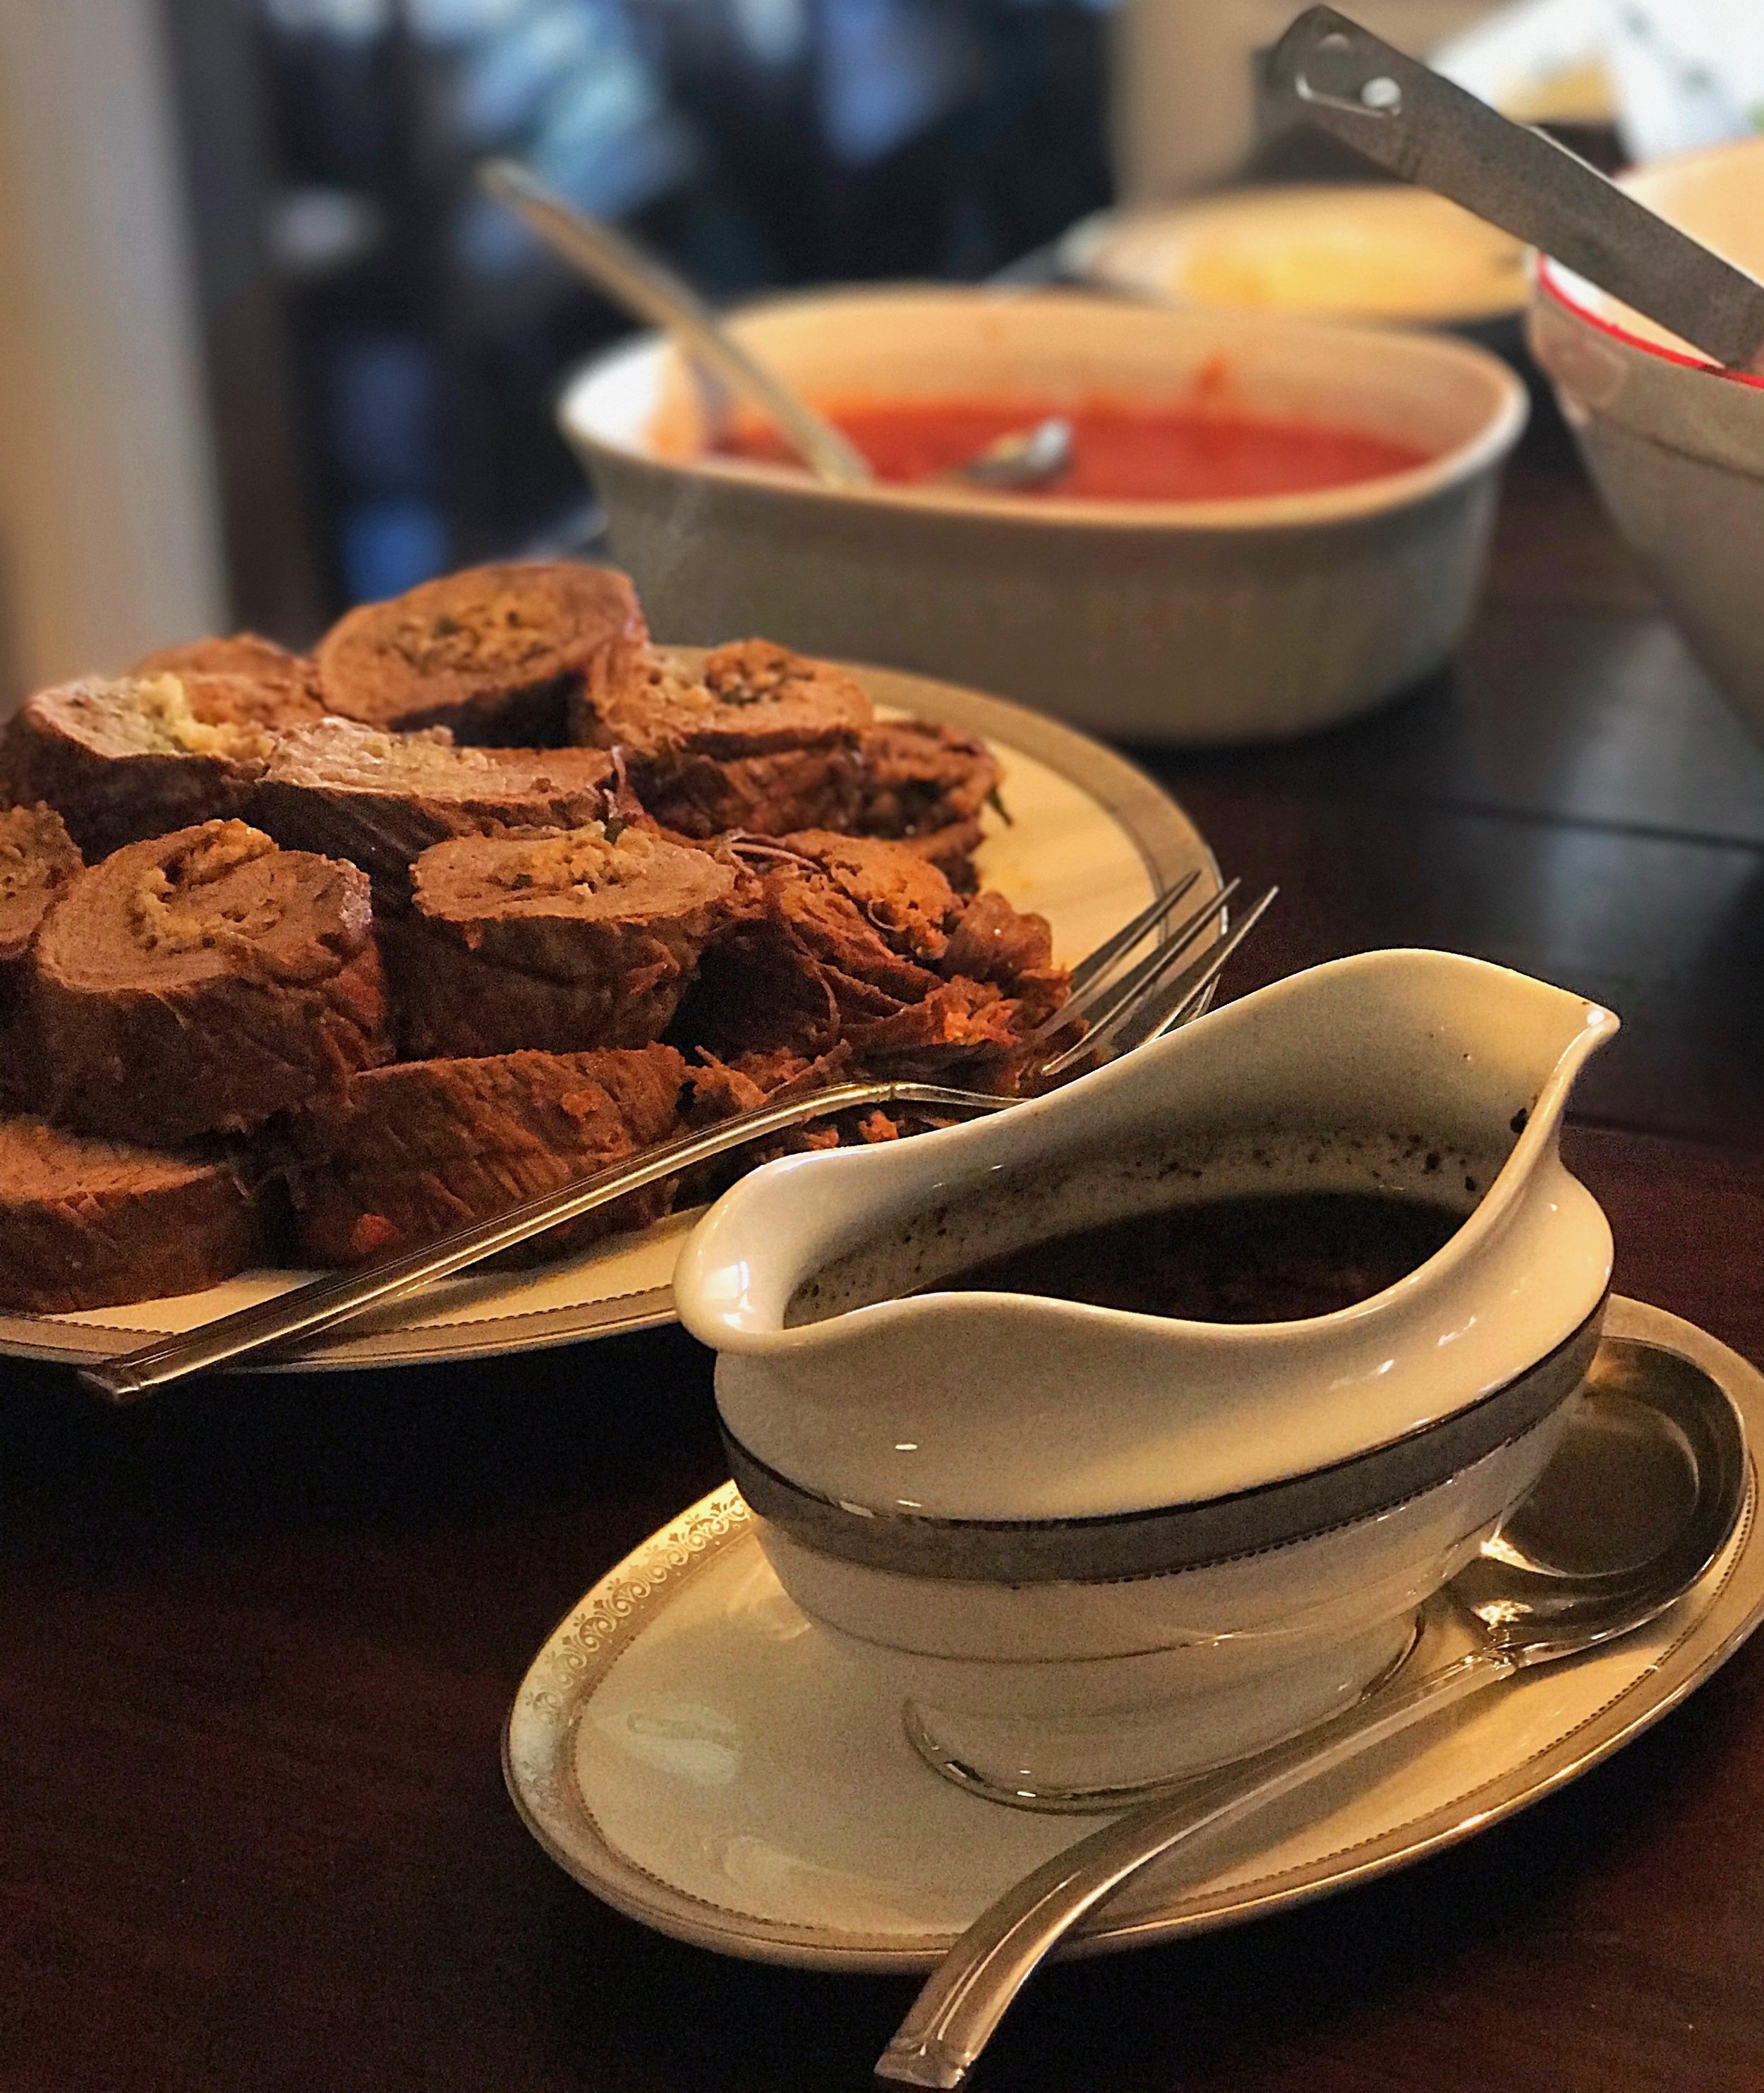
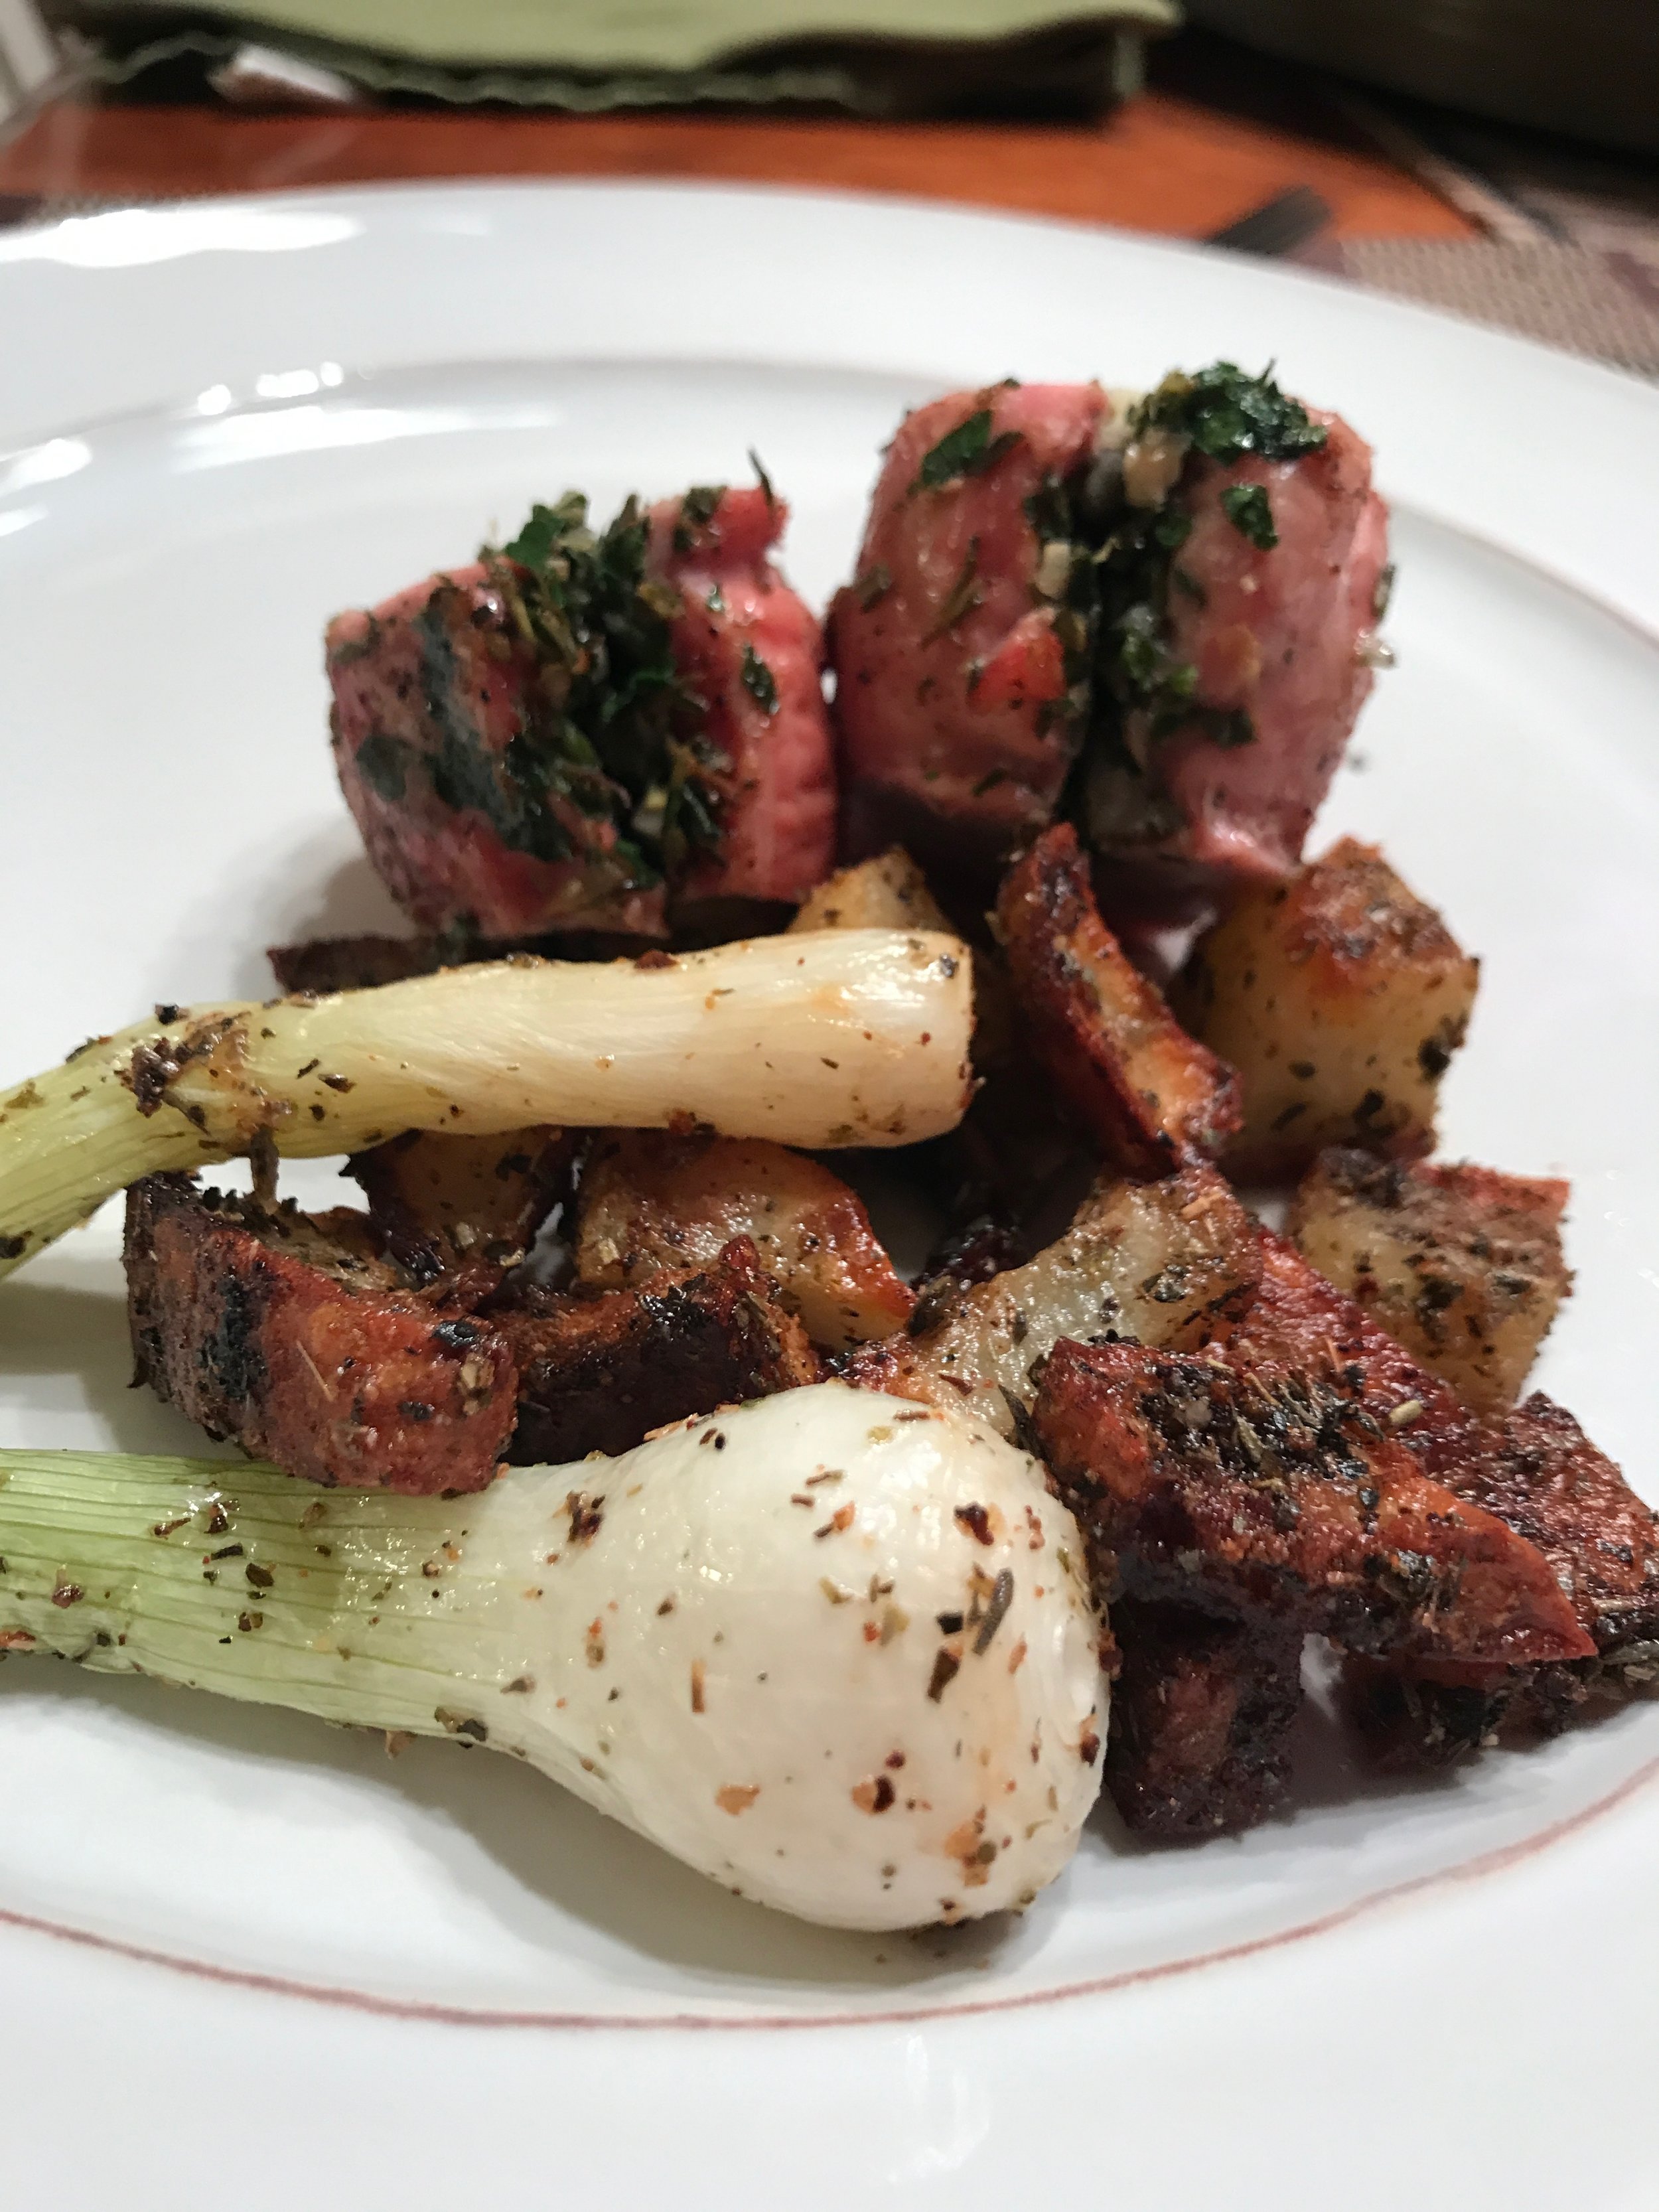
Remove the kitchen twine from the pork and cut the pork into 2 inch medallions.  Spoon the pan sauce over the pork, then serve!  I also roasted some potatoes and spring onions with canola oil, Italian seasoning, garlic powder, and salt and pepper.  Add a squeeze of lemon and some olive oil to the potatoes and onions before serving.

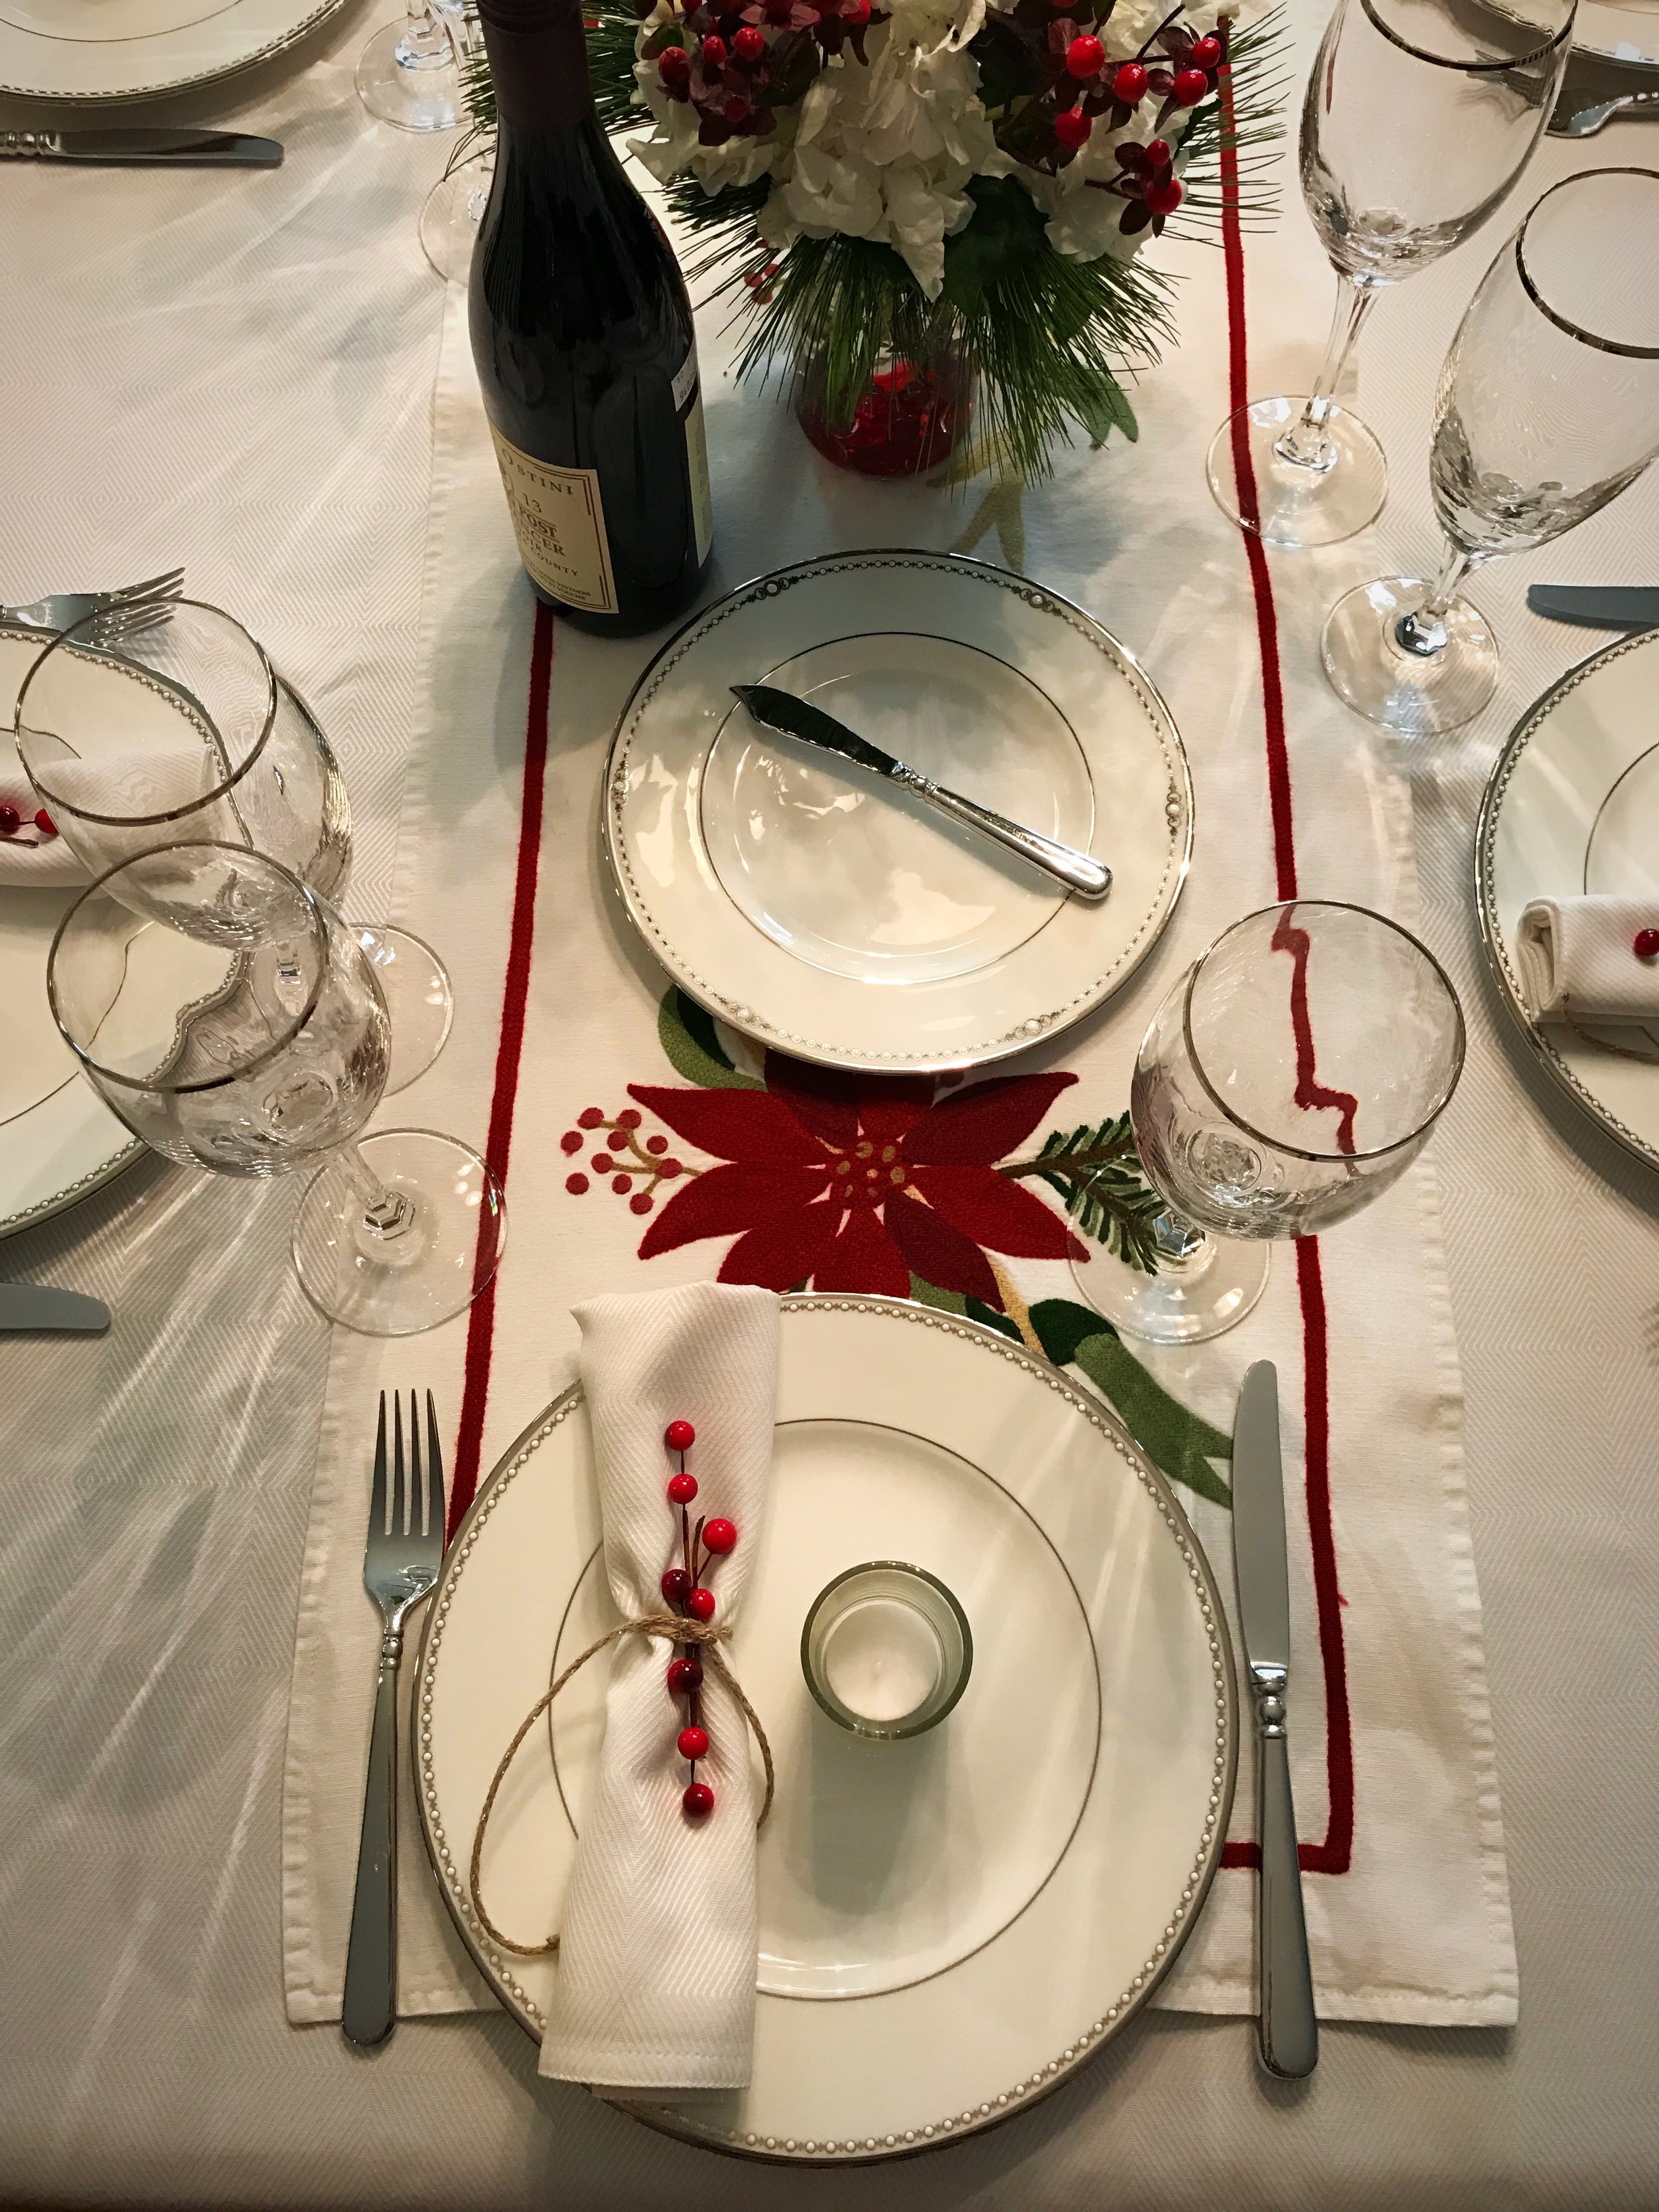
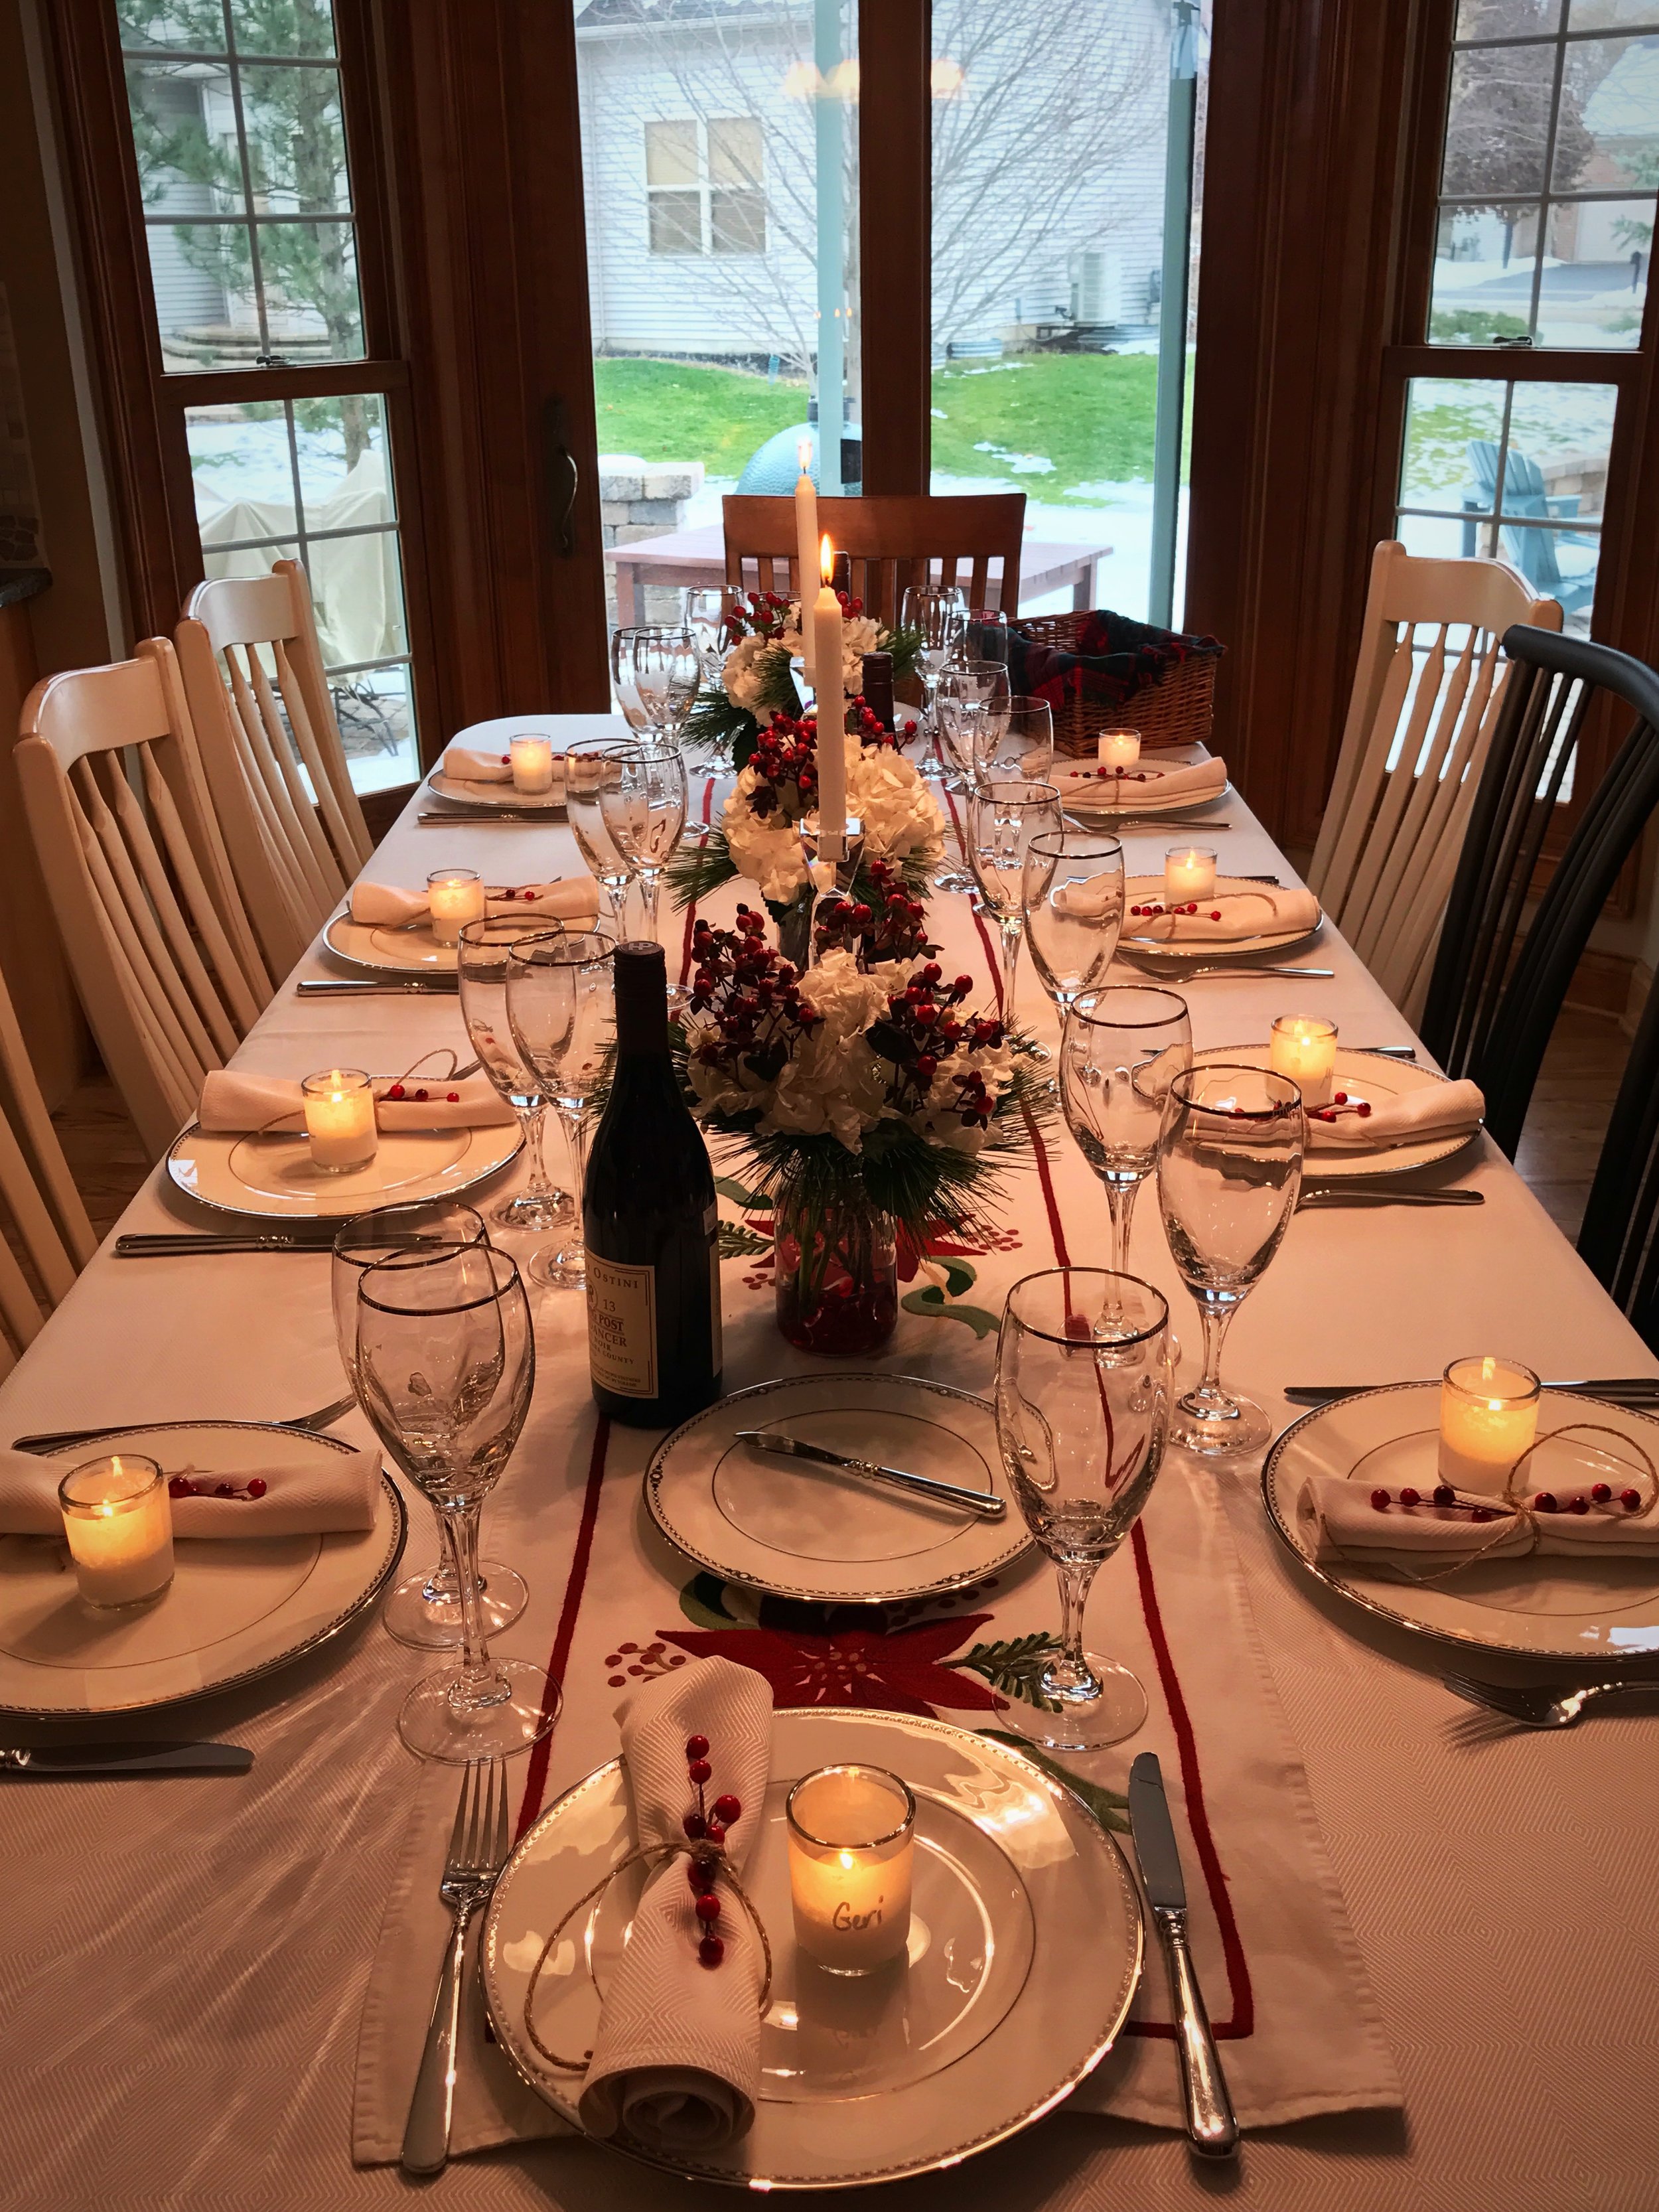
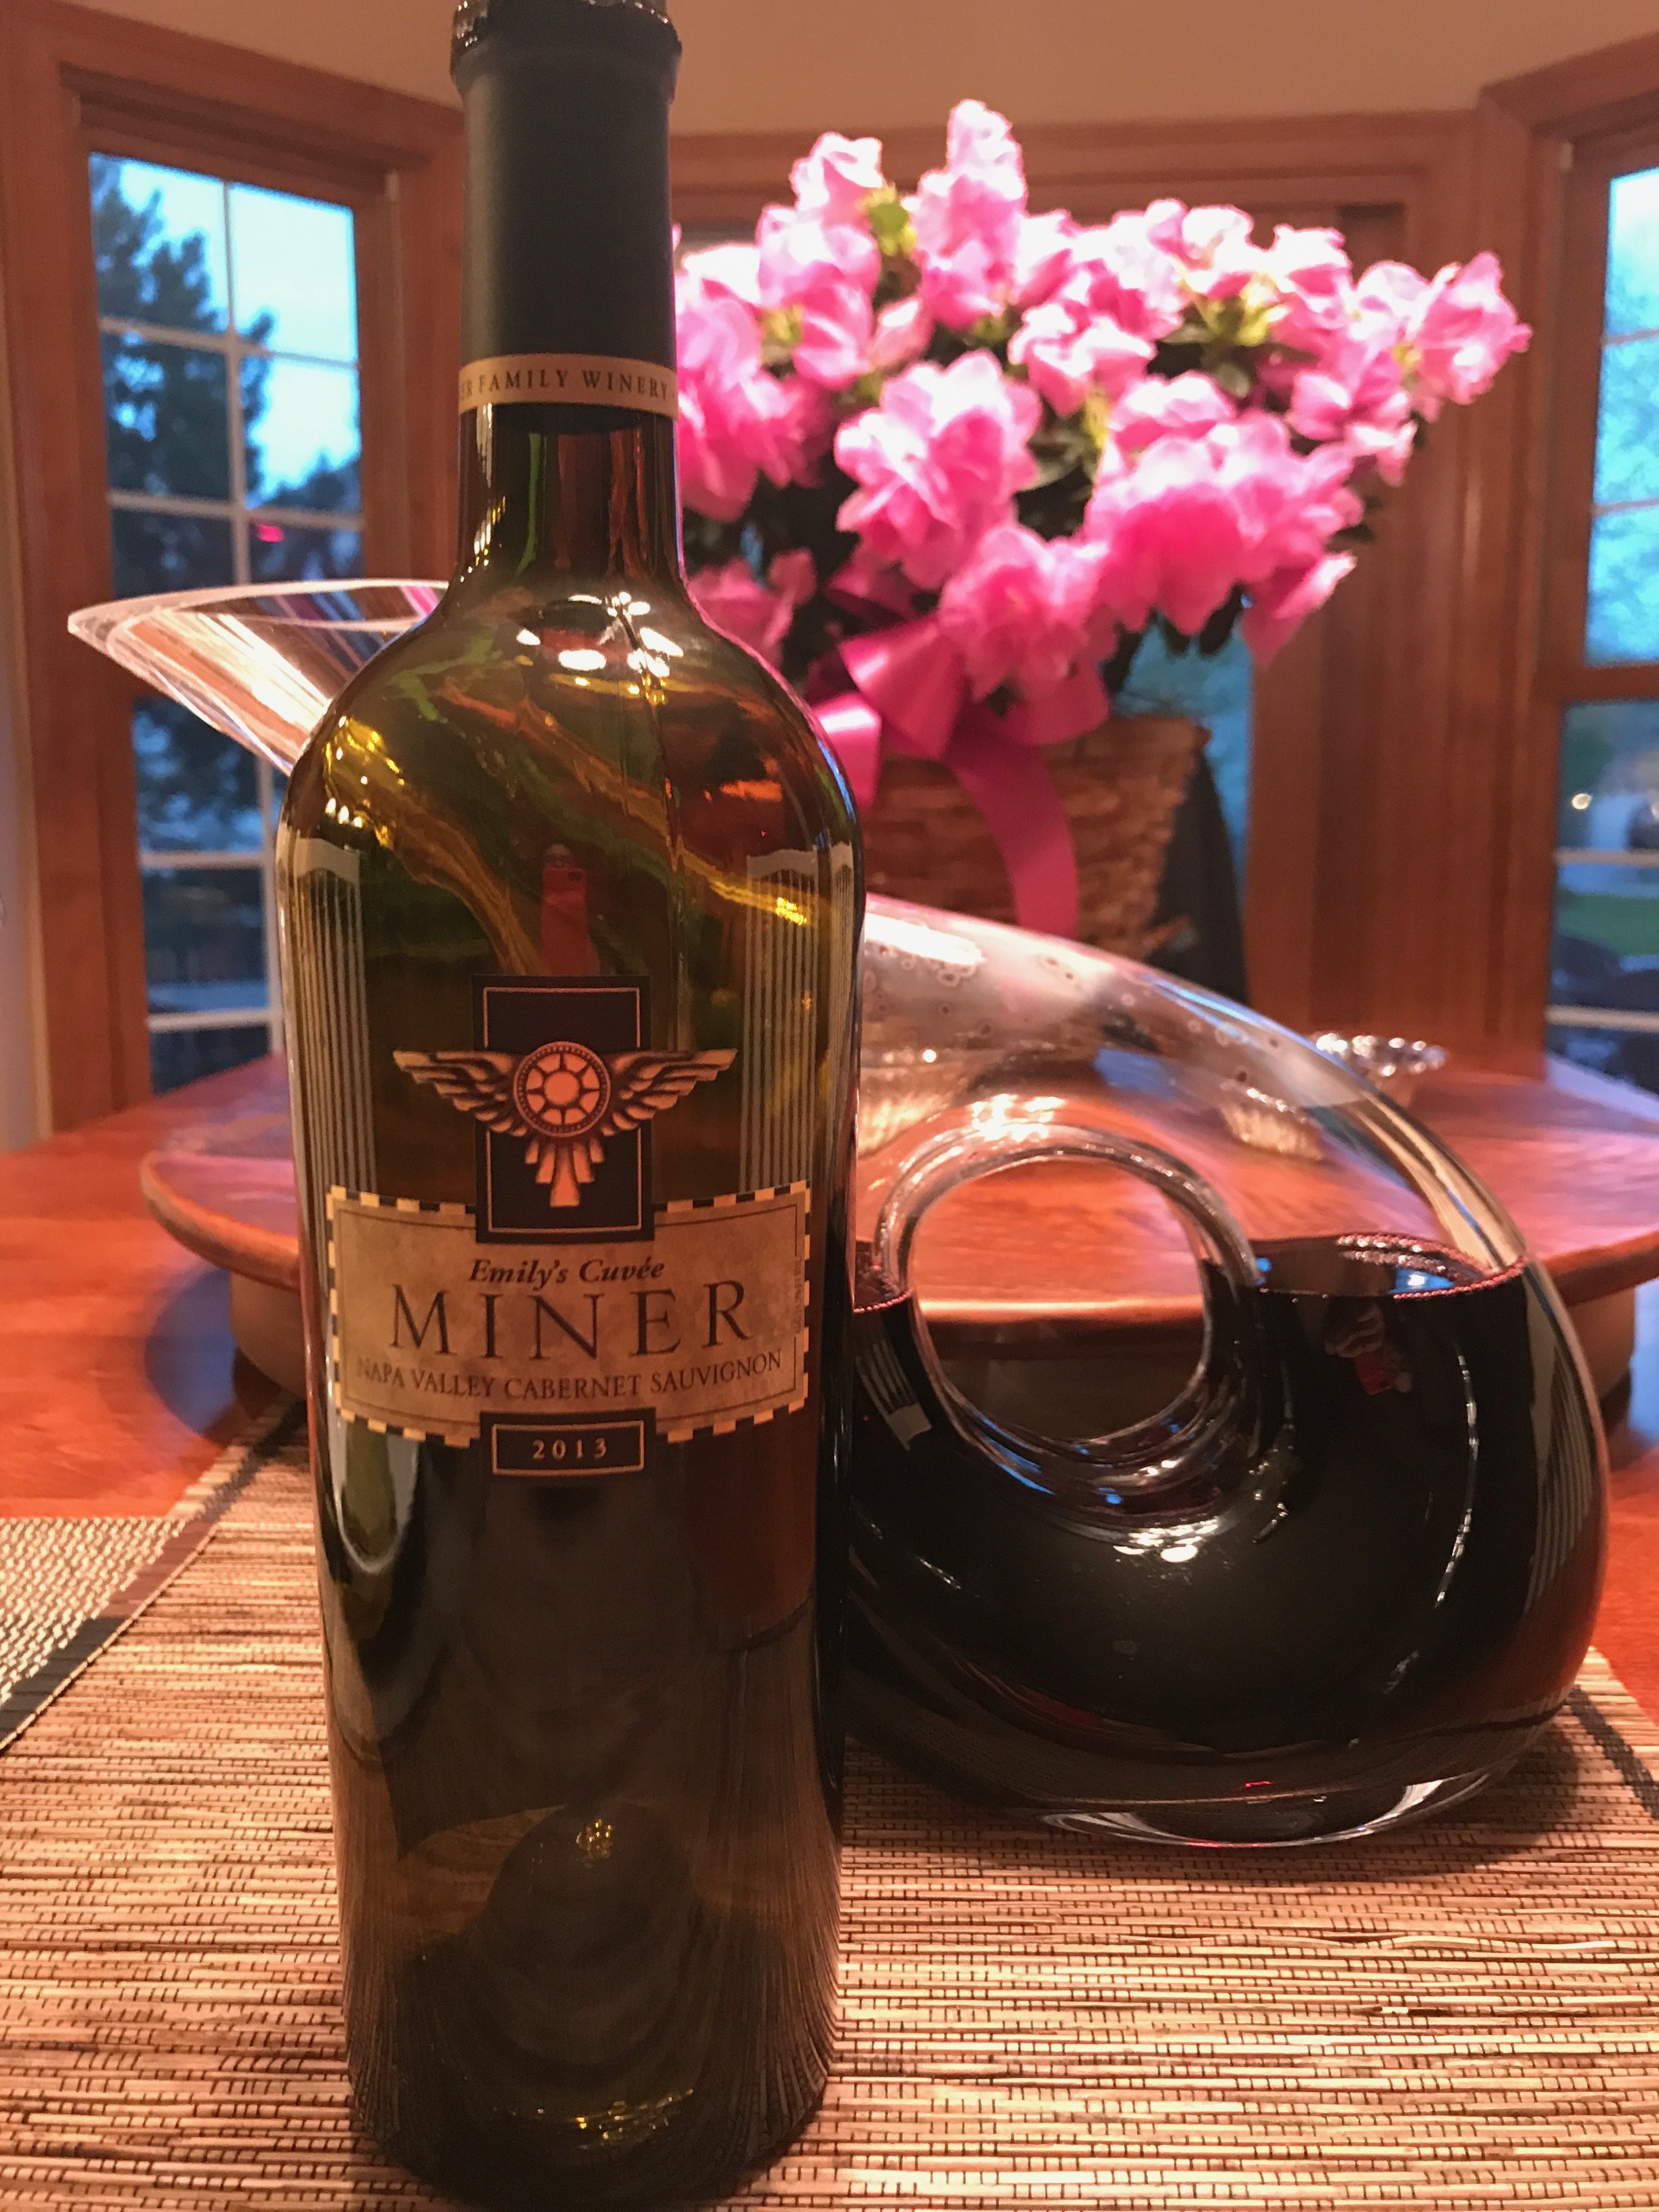
And, as you can see, we also enjoyed a bottle of Emily's Cabernet Sauvignon (2013) from the Miner Winery.  Love Miner wines! 

Enjoy everyone!

Hoppy Easter!

Easter is my sister Lia's holiday.  She hosts both sides of the family every year - upwards of 20 people. She starts her cooking the day before, attends Easter Sunday mass with her family, then starts cooking again before we all descend on her house!  In our family, Lia is definitely the more laid back of the two of us.  She is a good sport when we all try to take over in the kitchen, offer our two cents on tweaking recipes, and arrive early or late (or both).   

Photos courtesy of Genta Mecolli - thank you Genta!

Lia's meal is delicious, and beautiful, every year.  One of the most memorable dishes this year was her pork leg.  She was taught how to make this succulent pork by the best - Lety Garcia - but this year, Lia outdid herself.  Just looking at the pictures over a month later, my mouth still waters. The au jus that remains after removing the pork has such a depth of flavor, you would have thought she cooked it for days!

I hope you will enjoy these recipes!  Thanks to Lia, Lety, and Genta for contributing to this post.

Lia (and Lety's) Pork Leg

  • 1 leg - fatty later removed (22 -25 pounds)
  • 1 bulb garlic
  • Granulated chicken bouillon powder
  • Limes (4-5)
  • Chicken stock (2 quarts)
  • Black pepper
  • Sugar
  • Olive oil

Directions:

Score the leg and place 1 clove of garlic in each slit, then rub olive oil all over the leg.  Squeeze 3-4 limes over the leg and sprinkle with bouillon powder and pepper.  Use a heavy hand with the spices; you want the meat well covered.  Cover the leg with plastic wrap and place in the refrigerator overnight.

Remove the leg from the fridge and let sit at room temperature for 20 minutes before cooking. Preheat the oven to 450 degrees.  When the over reaches temperature, cook the leg uncovered for 30 minutes.  Lower the heat to 350 degrees and let cook for another 90 minutes. Pour 2 bottles of beer (your choice) over the leg and add 2 quarts of chicken broth, the juice of another lime, and 1 teaspoon of sugar to the juices in the pan.  Tent the leg with foil and cook the leg for another 2-3 hours, basting every 30 minutes, until the leg reaches 160 degrees internal temperature in the thickest part of the leg.

Braciole

  • 4 tablespoons olive oil
  • 1 garlic clove
  • 2/3 cup Pecorino Romano
  • 1/3 cup grated Provolone 
  • 2 tablespoons fresh Italian parsley, chopped
  • 1/2 cup dried Italian bread crumbs (Whole Foods Italian bread crumbs are her secret!)
  • Salt 
  • Black pepper
  • 4 tablespoons olive oil
  • 1-1/2 pounds of flank steak - pounded flat
  • 6-8 cups gravy (red gravy that is!)

Directions:

Mix the first six ingredients together in a bowl and set aside.  Season the steak with salt and pepper, then place the bread crumbs mixture evenly over the meat.  Roll the meat up like a jelly roll and tie with kitchen twine in several places to secure the meat and bread crumb mixture.

Place a dutch oven or a large saute pan with sides on the stove top and heat on medium high. Once the pan is hot, add an additional 4 tablespoons of olive oil to the pan until it starts to shimmer.  Brown the meat on all sides, then add 6-8 cups of gravy.  Cover and place in a 350 degree even and cook until the internal temperature of the meat is 140 degrees (medium). Remove the pan and let it sit covered for another 10 minutes.

Remove the kitchen twine and cut the meat into at 2 inch slices.  Cover with gravy and serve!

Jicama Salad

  • 1 Jicama, peeled and sliced into strips
  • Fresh lime juice, to taste 
  • 1 onion, diced
  • 1 jalapeño, diced
  • 1 bunch of cilantro, chopped
  • Salt 
  • Pepper

Directions:

Mix all of the above ingredients in a bowl.  Add salt, pepper, and additional lime juice to taste.

Pizza Frittes

One of foods I can never pass up is pizza.  It doesn't matter if it is a slice or a square (for us Chicago people), thin crust, Sicilian, or deep dish, with red sauce or just plain white.  Sometimes though, pizza just doesn't quite hit the spot and I have to heat up some oil and fry some dough!

When you fry dough, you are either making Pizza Frittes (savory) or Zeppole (sweet).  Zeppole is usually tossed with sugar and cinnamon and served warm.  My dad used to say that my grandmother put the hot Zeppole in a paper bag with just regular sugar and shook up the Zeppole to coat them. That is actually, a very good system (for you Goodfella fans out there)!

You can make your dough or buy it from your favorite pizzeria or Italian store, but I tend to lean towards making my own.  Notice I use the word tend because last night I had a craving and limited time, so I picked up some dough from Caputo's in Naperville when I made my Easter antipasto run!

Here are the ingredients for the pizza dough I make, handed down to me by Grandma Pat!

  • 2 1/2 cups all purpose (unbleached) flour (I use King Arthur's)
  • 1 package (or 2 1/4 teaspoons) active, dry yeast (I use Red Star)
  • 1 cup warm water
  • 2 tablespoons olive oil
  • 1 pinch of salt
  • 1 pinch of sugar
  • Canola oil

First, you need to activate your dough, so put your yeast in the warm water with a pinch of sugar and let it hang out.  Once it starts to bubble, you are ready to go (about 5 minutes).  Put the yeast and half of the flour in a standing mixer with the dough hook attachment. Once the flour starts to get incorporated, add the oil, salt, and the rest of the flour.  Continue to mix the dough until it starts to form a ball and there is not a lot of excess flour remaining to be incorporated. Remove the dough from the bowl of the mixer and place it on a floured surface.  Flour your hands before doing this step.  Next, knead the dough for about 5 minutes, until the ball of dough is nice and smooth.  Place the dough in a bowl that has been rubbed with oil, set it on top of your stove, and place a towel over the top.  Let is sit for about an hour or until the dough has doubled in size.

After an hour, flour your hands again, remove the dough and place it on a floured surface.  Knead the dough again, just for a few minutes. Then, make the sign of the cross in the dough, place a towel on top and let it sit for about 30 minutes.  Yes, the sign of the cross is a requirement and makes a difference!

Next, get out your Pizza Fritte pot and fill it 3/4 of the way up the side with canola oil.  What's a Pizza Fritte pot?  Just a small pot that you don't mind beating up a bit.  I got mine from Grandma Pat and you can tell that I have had to scrub it many times with steel wool.  Still, it is the ONLY pan I will use for frying Pizza Frittes.  I've used larger pots or multiple pots, but they don't come out the same.  So I have stopped messing with different methods and stuck with what works!

Before you start to fry your dough, flour the bottom of a glass.  Flatten each ball of dough before you fry it.  Some people like the dough in the ball shape, but I think the dough cooks better this way and leaves more surface area for the "pizza" part of Pizza Frittes.

When the oil is hot enough that you can see it shimmer and touching a piece of dough causes a sizzle sound, go ahead and start frying your dough.  The dough will puff up as soon as you drop it in the oil; that's OK.  Watch the dough and when the bottom gets golden brown, flip it. Keep an eye on the dough and when the next side starts to brown, remove the dough and let it drain on paper towels.  The second side takes half as long as the first side.  Given my pan, I do one piece of dough at a time.  It takes longer, but each piece comes out perfect!

I usually serve my Pizza Frittes room temperature with a side of pizza sauce that I doctor up with extra oregano and pepper and top them with some shredded mozzarella.  You can dip the Pizza Frittes in the sauce or sauce the Pizza Fritte like a real pizza.  I prefer to tear mine open and put the sauce and mozzarella inside the Pizza Fritte.  This is your personal Pizza Fritte, so there is not right or wrong answer here! My favorite sauce is also another recommendation from Grandma Pat - Pastorelli's.  

So next time you are considering pizza, why not give Pizza Frittes a try instead?  I promise you, you will love them!

Enjoy!


Roasted Chicken with Roasted Poblano and Lime-Ancho Chile Butter

This weekend, I had planned to start cooking my way through the Dinner, Changing the Game cookbook by Melissa Clark.  On the menu was Chile-Rubbed Chicken.   

My first step was to visit Sages Meat Market, a new specialty meat market in Oswego.  The shop may be small, but the options are plentiful! The display cases are full of meats farmed from local sources, some already prepared in super flavorful marinades, in individual, vacuum-sealed servings.  Today I had one of the butchery staff spatchcock two chickens for me.  One for this recipe and one for later in the week.

While I was there, I saw that they had fire roasted poblano compound butter in the case. Although the Melissa Clark recipe called for more of a lime-chipotle rub, I couldn't pass up the butter and figured I could easily incorporate it into the recipe.

Ingredients:

  • 1 whole chicken, spatchcocked (butterflied) 
  • 1 tablespoon kosher salt
  • 1 tablespoon fresh ground black pepper
  • 1/2 tablespoon ancho chile powder 
  • 4 individual portions of roasted poblano compound butter (about 2 tablespoons per portion)
  • Zest of one lime, plus lime wedges for serving

Pre-heat the oven to 450 degrees.  Mix three portions of the compound butter with the lime zest and ancho chile powder.  Season the chicken with salt and pepper and then rub the butter all over the chicken (season and butter both sides).  Set the chicken skin side up on a sheet pan, drizzle with a little bit of canola oil, then cook the chicken for 45-55 minutes, or until the meat is no longer pink and the juices run clear.  Let the chicken rest 10 minutes on a cutting board before slicing and serving.

I roasted potatoes on a separate sheet pan while the chicken was cooking.  I cut the potatoes into cubes and tossed those with about 10 whole shallots.  I seasoned the potatoes and shallots generously with salt, pepper, garlic powder, ancho chile powder, and the remaining portion of the compound butter.  I added a few tablespoons of canola oil, just to make sure the potatoes were well coasted. The potatoes will (and did) burn at 450 degrees if you leave them in the full cooking time.  At 450 degrees, they probably only need 35-40 minutes.  Check them at 20 minutes and flip them.  Keep an eye on them after that or...you can guess what happens.  I also squeezed a bit of lime on the (burnt) potatoes before serving them.  The flavor was good, but I would probably NOT use the butter until the end next time.  I would let the potatoes cook with the oil only, then toss them with the compound butter when they came out of the oven. 

Enough about the unsuccessful potatoes!  The good news is that the chicken turned out super moist with crispy skin.  The hint of lime was present in every bite and the heat from the poblano and ancho was subtle but left a nice aftertaste.  As you can see above, I poured the pan juices on the chicken before serving.  Melissa Clark's recipe calls for an herby avocado sauce, which I didn't make this time, but it sounded delicious!  Will do my best to follow the recipe more closely next time!

Enjoy!


How about a nice Braaaaciole?

I was watching a You Tube video posted by Clemenza Caserta on how to make real Sunday Gravy. I didn't know who Caserta was, but after a quick google search, saw that he was on Hell's Kitchen. I never watched the show, but I will definitely watch more of his videos.  Seriously, you have to watch this!  It reminded me of every older Italian relative and family friend I know making gravy and meatballs, probably in their basement kitchen, because they didn't want to get the main floor kitchen to get dirty!  Shout out to the Sacinos for those of you who may remember them!

The video made me laugh and brought back some nice memories of the past.  But, it also inspired me to make braciole!

So, here is my braciole recipe.  Let's start with the ingredients.

  • Two 1-pound pieces of skirt steak, pounded thin
  • One bunch of parsley, chopped
  • One whole bulb of garlic minced
  • 1/2 cup panko breadcrumbs
  • Zest of one lemon
  • Shaved parmesan cheese
  • Salt and pepper
  • Canola oil
  • Beef stock
  • Kitchen twine

I have always used flank steak for braciole in the past, but after trying the skirt steak, I'll never go back. The steak is easier to role, more tender, and doesn't take as long to cook.  Don't knock it until you try it!  Also, don't forget the lemon zest. It adds this nice, bright, surprising flavor. Definitely makes a difference!

So let's get started!  First, get your Sunday Gravy warmed up in a pot.  Need a recipe? Scroll through my blog posts because I have a great one!  I know everyone thinks their gravy is best, but I'm pretty proud of mine!

Next, salt and pepper your steak, then set aside. Mix the parsley, panko, garlic, and lemon zest in a bowl.  Cover each piece of steak with the parsley mixture, leaving a small (very small) border on each side. Drizzle the steak and parsley mixture with a small amount of olive oil.  Then cover with parmesan.  How much should you use?  Enough so that the mixture is pretty much covered with cheese (see the picture for a good visual). Roll the steak with the parsley and parm mixture, then tie the meat with kitchen twine.  Now, you have braciole!  Let that sit for a few minutes.

Pre-heat your oven to 350 degrees.  Heat the canola oil in a large pan that has sides.  Use enough oil to coat the entire bottom of the pan.  Brown the braciole on all sides; about 1-2 minutes per side.  Once browned, remove the braciole and deglaze the pan with the beef stock.  Use just enough to coat the entire bottom of the pan. Scrape up the brown bits and then just let things simmer for about 2 minutes. Add your gravy to the pan, stir, then add the braciole back into the pan.  Coat the braciole with the gravy and put it in the oven, covered in foil, for 30 minutes.  Remove the pan, turn and baste the braciole, cover, and cook for another 30 minutes.  Repeat the basting process.  In total, you will cook the braciole for about 1.5 - 2 hours.  I think I was near the 1.5 hour mark, but you won't ruin anything if you cook this for the full two hours.  Just remember to baste the braciole every 30 minutes.

Serve the braciole with a side of pasta; spaghetti was my choice!  And of course, a nice bottle of Chianti would go well with this.  I didn't have Chianti on hand, but I did have a great bottle of Fiddlestix Pinot Noir by Fiddlehead Cellars.  

Mangia my friends!


Merry Christmas 2016!

Well, another Christmas has come and gone, but my memory of another great Madonia-Mentz-Garcia-Hrinowich-Farrington Christmas remains strong!

The Menu

The Memories

We kicked off our Christmas celebration with mass at Ascension Church on Christmas Eve and then dinner at LaBella Pasteria, our family tradition. Our family has been eating dinner at LaBella for over 13 years and I don't see that changing anytime soon! The dinner attendees may change from time to time, but the tradition lives strong. Special thanks to Dave, Ann and Guillermo for making this evening so special every year. We appreciate you sharing your Christmas Eve with us every year.

Although we got a late start Christmas morning, we managed to wash the floors, vacuum the carpets, set the tables, make the Parker House rolls (twice, since the first time I forgot to add the yeast), prepare the appetizers and the pork, have a champagne toast and open presents, all before our guests arrived! Unfortunately, my husband and I were both sick, Christmas being the worst day of our colds. Luckily, we had the entire next day to recover!

The evening went great, the food was delicious, and it was good to see our family. Here is to another great Christmas!

Recipes and Links

Soppressata from West Loop Salumi

Orange Fig Jam sold at Standard Market

Poached Shrimp recipe from Bon Appetit

Spicy Horseradish Cocktail Sauce sold at Whole Foods

Spiced Pork Tenderloin recipe appears on this blog; Apple Bourbon Sauce recipe from Southern Living

Stuffed Shells recipe courtesy of my husband!


Beef Bourguignon

Sunday was the first snow of 2016 and one of my favorite days so far this year. Watching the snow fall was so peaceful and I indulged myself by laying in bed longer than I should have and watching one of my favorite movies, Julie and Julia.

The snow inspired a Jeep drive with my husband, a stop for breakfast, and an escort to the grocery store. We spent over an hour deciding on what to make for dinner and were finally inspired by Julia Child herself. The meal? Beef Bourguignon.

Truth be told, I wasn’t super excited. Beef stew seemed to be an uninspired, boring meal to me. Luckily, the cold weather and the 5 inches of snow made me rethink my opinion. Two pounds of beef, a bottle of wine, and some pancetta and onions later, the Beef Bourguignon sat bubbling on my stove. To my surprise, this was one of the best meals I have ever had!

So, here is the recipe, with my twist.

Ingredients

  • Two pounds of stew meat, cut into cubes (I would recommend steering clear of grass fed meat for this recipe. You need the fat!)
  • 1 ½ cups beef stock, hot
  • 1 1/3 cups red wine (I used a French Burgundy)
  • 4 ounces pancetta
  • 1 large Spanish onion, diced
  • 6 garlic cloves, minced
  • ¼ cup flour
  • 1 bouquet garni (2 bay leafs, 6 sprigs Italian parsley, 8-10 sprigs fresh thyme)
  • 2-3 ounces of baby portabella mushrooms, diced
  • Kosher salt
  • Black pepper
  • Canola oil

Note: What is a bouquet garni? Just a bunch of herbs tied together! Leave enough length on the kitchen twine so that it hangs outside of the pot you are cooking in. Just pull out the garni when you are ready to serve!

Preparation

Remove your stew meat from the refrigerator and pat dry with paper towels. Salt and pepper your meat well. Set aside.

Heat a tablespoon or so of canola oil over medium heat in a large dutch oven (I used my 7 ¼ quart Le Creuset for this). Add the pancetta and onions and cook until browned. Remove the pancetta and onion mixture and set aside. Leave the fat from the pancetta in your dutch oven. If there is not a lot of fat remaining, add some additional canola oil and let it heat in the dutch oven until the oil starts to get shiny.

Brown the stew meat. You may need to do this in multiple batches. Once all of the meat is browned, return all of the meat to the pot and add the flour. Stir until the flour is incorporated and has started to brown. Add the hot stock and stir, scraping the bottom of the pan to loosen all of the browned bits. Stir in the wine and the pancetta/onion mixture. Add the bouquet garni and bring to a simmer. Cover your dutch oven and let it simmer on the stove top for two hours. Remember that simmering and boiling are two different things. You want to see only a few bubbles popping up before you cover the pot. Turn your heat down to medium low to achieve this. The bubbles are the key; adjust the heat to get the right amount of bubbles!

This next step is the most important…pour yourself the remaining Burgundy, plant yourself in front of a nice warm fire, and breathe in the most amazing aroma from that pot cooking on the stove! There are not words to describe what happens during that time. You will fall in love with that deep pancetta/wine/onion essence that will invade every corner of your house!

After two hours, remove the cover, add the mushrooms, cover the dutch oven, and cook for another 30 minutes. This is your opportunity to warm up some bread, make some buttery mashed potatoes, and set the table. Once that 30 minutes have passed, remove the bouquet garni, give the stew a stir, pour yourself another glass of wine, bring that dutch oven to the table, and serve!

I’m not someone who loves french food, but after making this meal, I fell in love first with the aroma of the meat cooking and then next with the flavor. Make this on the next cold and snowy day. You won’t regret your decision!

And, like every great meal, top it off with a warm, gooey dessert. Our choice? Apple crisp with vanilla cranberry ice cream!

As always, in the spirit of Julia, Bon Appetit!

Have a comment?  You can reach me at Tina@Madonia.Kitchen


Happy Thanksgiving!

First, I wanted to say thank you to everyone who has been reading and sharing the blog. I really appreciate your support and all of your kind words! I apologize for letting those Thanksgiving followers down at “T minus 3” but as we got closer, I had to pick either sleeping or blogging, and sleeping won out!

Just to summarize, here is what the two days before Thanksgiving looked like:

T minus 2…Tuesday was an early day! I got up at 5am to shred my Mississippi Roast that cooked overnight. The house smelled wonderful when I woke up and yes, I had a taste before showering and heading to Maryann’s for a hair cut and color at 7:30am. Headed to work after that for a full day of meetings. After work, I picked up my turkey and the last few grocery items that I had missed from my previous trips. We heated up the leftover Chicken Parm from the weekend, I wrote out my to do list for Wednesday, washed all of my crystal and barware, then headed to bed!

T minus 1…Wednesday was my big prep day! I was up by 6:30am and started by washing every fruit and vegetable that I bought over my 4 trips to different grocery stores! Next on the docket was Apple Bourbon cake. I’m not a baker, so following the recipe exactly was a bit of a challenge for me. It wasn’t hard, but there were a lot of steps. The outcome was delicious and it made my house smell great all day. This cake was time consuming, but totally worth it! Next was the pie dough. I have to say that traditionally, I make the best apple pie. This year, things didn’t quite work for me. I made 3 pie doughs and they all failed. After the third fail at 7pm, I abandoned the apple pie idea and made an apple crisp instead.

The herb butter for the turkey came next. I love this herb butter but it is definitely a commitment! I then prepped and baked 12 potatoes for my Auntie Pat potato recipe and headed out to pick up the Thanksgiving flowers and get a manicure. My hands deserved a manicure after the last 4 days of washing dishes, glasses, and fruits and vegetables! Once I got home, I started baking my sweet potatoes for my Sweet Potatoes with Hot Honey recipe (had to sub Serrano peppers for Fresno since I couldn’t find them), put my ice cream base in the ice cream maker, made Mississippi Roast sandwiches with shredded Provolone cheese for dinner, swept and washed the floor, setup my tables and chairs, put out fresh candles, filled my vases with candle oil, and then finally headed to bed!

Thanksgiving Day!!!

After a week of prep, it finally arrived! I was up by 7am, made coffee, and got started on setting the tables. I prepared my antipasto, defrosted the meatballs and gravy, put my turkey stock on the stove to warm, washed my mushrooms, chopped some pancetta for the gravy, prepped my turkey breasts, and got all of the white wine, Pelligrino, and soda chilling. My husband, and faithful assistant, vacuumed the house, got the Green Egg going, and roasted some red peppers for me! We topped things off with a Champagne toast with the boys, then all went to shower and get ready for our family.

The day went awesome! Had one blip with the turkey (cooked too fast and was way ahead of schedule for serving), but otherwise, things came together nicely. I got my turkey gravy done and delegated my cousin Bill to make the mushrooms (they were awesome by the way!). I thought the food was delicious and my family seemed to agree. The gravy made up for the slightly dry turkey. Wine was flowing all night with a couple of spills and a broken glass or two, but everyone had fun.

We ended the night with a full sweet table - apple crisp, apple bourbon cake, chocolate ganache cake, swiss roll with carmel, apple, and cream cheese filling, cannolis, lemon knots, and snickerdoodles. Thanks to my sister Lia, my mom Geri, Auntie Pat, and my cousins Bill and Ann for bringing all for the delicious desserts!

I was so happy to have all of my family together for Thanksgiving! The night ended up a few too many drinks, my bad DJ skills, and some dancing. I don’t think I ever laughed so hard! It will be hard to erase the memory of my brother-in-law Miguel doing the “wash yourself” dance or the Soul Train line that we formed. Thanks to my wonderful family for making this Thanksgiving memorable. I am grateful for all of you…Tony, Anthony, Michael, Mom, Lia, Miguel, Diego, Lili, Auntie Pat, Bill, Ann, Lindsay, and Kelly. I am looking forward to many more Thanksgiving celebrations with all of you!

Thanks for indulging me on my Thanksgiving recap! Recipes that I didn’t include links to in this post will follow, so keep scrolling! Happy Thanksgiving every one!

The Final 2016 Thanksgiving Menu

Starters

  • Titi and Uncle Tone’s meatballs with gravy
  • Roasted sweet peppers with chiles
  • Antipasto with spicy soppressata, serrano ham, mozzarella, fontinella, heirloom cherry tomatoes, and spiced olives
  • Sea-salt dusted crackers with port wine cheese
  • Cool ranch doritos (for Diego) and Lays’ Limon chips (for Lili)

Entree

  • Lemon-herb turkey breast with lemon-garlic gravy
  • Twice roasted sweet potatoes with hot honey
  • Auntie Pat’s double-baked potatoes (v 2.0)
  • Green beans with chiles and lemon oil
  • Sautéed mushrooms with red wine, thyme and garlic
  • French rolls (store bought - just ran out of time to make from scratch!)

Sweet Table

  • Apple crisp with cranberry and orange ice cream
  • Apple bourbon bundt cake
  • Chocolate ganache cake
  • Swiss roll cake with carmel, apple, and cream cheese filling
  • Cannoli
  • Anginetti (Italian lemon knot cookies)
  • Snickerdoodles

Lemon Herb Turkey with Lemon Garlic Gravy

So let’s start with the main meal, shall we?

Full disclosure. This is NOT the turkey breast I made for Thanksgiving, but it is very close! I forgot to take a picture of the finished turkey breast, so I’m using a picture of my “practice” turkey breast.

I originally found this recipe back in 2007 from Bon Appetit magazine. It is SO good that I make this turkey every year. I have talked about doing something different a few times, but my son Anthony has been adamant about not changing things up. There are several steps, but the outcome is worth it. I’ve incorporated my modifications into the recipe below.

Lemon Herb Butter

  • 2 lemons
  • 2 heads of garlic
  • 4 sticks of unsalted butter at room temperature (leave out overnight)
  • 1 bunch of chopped Italian parsley
  • 3-4 tablespoons of fresh fennel fronds
  • 2 small shallots
  • 2 tablespoons of chopped fresh sage
  • 2 tablespoons of fresh thyme
  • 2 tablespoons of chopped fresh rosemary
  • 1-2 large pinches of saffron threads
  • 2 pinches of kosher salt
  • 10-12 cranks of fresh ground pepper

Make 4 long ½ inch deep cuts in the lemons and place in a bowl in the microwave. Microwave for 2 minutes. Squeeze the juice from the lemons into the bowl and reserve all of the juice for the gravy. This next part is kind of a PIA. Scrape all of the fruit and rind (white parts of the peel) from the peel. I’ve tried using a grapefruit spoon to scrape the fruit and pith, but found it easier to just take a sharp knife and run it along the peel. Get as close to the peel as you can. Set the peels aside.

Next, put two heads of garlic in a bowl and cover them with water. Microwave for about 3 minutes or until the garlic is soft. Remove the garlic from the water, let the garlic cool, then peel the garlic.

Place the garlic and lemon peel into a food processor. Pulse a few times to chop the peel and the garlic. Add the butter and the rest of the ingredients. Process until combined. Place the butter into a Tupperware container and place in the refrigerator. You can make the butter 2-3 days ahead, but you need to bring it back to room temperature before using it on the turkey.

My version of this recipe is actually double what the recipe calls for. I use a lot of butter on my turkey. I also reserve about 4 tablespoons to make the gravy. Keep this in a separate container so that you don’t forget it!

Turkey Breasts

Wash and dry two 6-8 pound turkey breasts, then let the breasts sit out until they come to room temperature. Place the skin side down on a sheet pan. Drizzle the bottom of the turkey with olive oil, kosher salt, and some fresh ground pepper. Flip the turkey over, loosen the skin from the breast, then insert the butter between the skin and the breast. Use a lot of butter. Push the butter down into the breast as much as possible. Drizzle the top of the breast with more olive oil, kosher salt, and fresh ground pepper. Place any leftover butter in the microwave and melt it (not fully, just so that it is a smooth paste). You can use this to baste the turkey breast.

We cooked the turkey breasts on the Green Egg, with the place setter, at a temperature of 325 degrees. Place the turkey breasts directly on the grate, facing in opposite directions. The breasts will cook for about 15-20 minutes per pound until they reach an internal temperature of 160 degrees. The cooking time for two breasts is the same as it is for a single breast. I know that is hard to believe, but it is true. This is the mistake that I made. If you are cooking 2 eight pound breasts, the cooking time will be about 2 hours. Make sure to rotate the breasts half way through the cooking time. When you rotate the turkeys, baste the breasts with the leftover butter.

Let the breasts cool for about 15 minutes before cutting. Unfortunately, the time mistake I made meant that we started cooking the breasts too early and they were ready well in advance of dinner. As a result, the breasts were a little dry, but luckily, the kickass gravy recipe below saved the meal!

Lemon Garlic Gravy

  • 9 cups of turkey stock (see my previous post on how to make this recipe, or use 3 boxes of chicken stock)
  • ¼ pound of diced pancetta
  • 6 garlic cloves, minced
  • 2 shallots, minced
  • ¼ cup all purpose flour
  • Reserved lemon juice
  • Lemon herb butter

Heat the turkey stock in a pot until it comes to a simmer. In a separate pot on medium heat, cook the pancetta with the lemon herb butter and a little olive oil, until the pancetta starts to crisp. Add the shallots and cook two minutes longer. Add the flour and cook until the flour mixture is a nice golden color. Add the garlic and the turkey stock, one ladle full a time, while continuously whisking the gravy. It will be thick at first, but don’t worry. Keep adding the stock and whisking until all you have used all of the stock. Add the reserved lemon juice and let the gravy simmer on a low heat. Taste the gravy and add more salt and pepper to taste. You can also add some additional fresh thyme if you like.

When you are ready to serve the gravy, strain it through a fine mesh sieve, then serve!

Enjoy!

Auntie Pat Potatoes v 2.0

Ingredients

  • 12 russet potatoes (1 per guest)
  • 4 pounds shredded mozzarella
  • 4 sticks unsalted butter, cut into pieces
  • Milk
  • Kosher salt
  • Fresh ground pepper
  • Paprika

Prepare the Potatoes

Preheat the oven to 400 degrees. Pierce the potatoes all over, run them under cold water, then wrap them in aluminum foil. Place the potatoes on two sheet pans, then bake in the oven for at least one hour or until soft to the touch. Switch the pans half way through the baking time.

When the potatoes are soft, remove them from the foil, one at a time, peel the skin, and place the potatoes in a large bowl. Peel about half of the potatoes at one time. Add milk, maybe ¼ cup, two sticks of butter, and mash the potatoes with a potato masher. If the potatoes are not smooth enough, add more milk. You add the milk by feel; just a little at a time until you get the right consistency. Add some freshly cracked pepper to taste and a pinch of kosher salt. Fold in about 1 ½ pounds of the shredded mozzarella. Once the mozzarella is incorporated, taste the potatoes and add salt as necessary.

Transfer the potatoes to a 13 x 9 pyrex baking dish, smooth out the potatoes, then place the rest of the shredded mozzarella on the top of the potatoes. Once the potatoes have cooled, cover with plastic wrap, and refrigerate overnight.

Repeat with the remaining potatoes.

Reheat the Potatoes

The potatoes can be prepared 1 day ahead. On the day you are going to serve them, take the potatoes out of the refrigerator and let them come to room temperature. Sprinkle paprika over the top of the potatoes. Cook the potatoes at 325 degrees for about 45 minutes, or until the cheese has melted and is bubbly. Then serve!

T minus 3...

Monday, November 21st

Things I can check off my Thanksgiving to do list:

  • Standard Market - done, but couldn’t find sweet potatoes or haricot vests
  • Name cards and napkins - done, my not so crafty handiwork is below
  • Decide what to do about the “roll situation” - done, going to try my hand at the Parker House roll recipe sent to me by my friend Maryanne
  • Buy flowers for the dining room table and kitchen - done, thank you Standard Market!

Things to do tomorrow:

  • Make the ice cream base (forgot to buy the dark chocolate today, so had to postpone my original plan)
  • Pick up the turkey breasts, sweet potatoes, and green beans
  • Make the kids’ beds
  • Clean the oven
  • Buy wine and other alcohol for Thanksgiving - delegated to my husband!

I did make time tonight to make a couple of different meals for dinner the next few nights. I wanted to make sure the refrigerator was stocked with leftovers so that I could focus the next two days on Thanksgiving.

For dinner tonight, I made steak tacos. Simple recipe - skirt steak, a little canola oil, kosher salt, pepper, and cumin. I seared the steaks on a flat griddle on the stovetop for about 2-3 minute per side and then let them sit covered with foil, until I was ready to serve them. I served the steak tacos with Spanish rice. Plenty of leftovers - check!

Tomorrow night we will have the last few pieces of chicken parmesan that I made on Friday night. I might (no promises), cook a pound of rigatoni as a side so that we have something to snack on for lunch on Wednesday. After all, I made gravy on Saturday, so I might as well put that to use. Oh, by the way, here is the results of that effort…

Wednesday is my main Thanksgiving prep and cooking day AND the kids arrive. I have a Mississippi Roast cooking in the slow cooker right now and I’ll reheat that on Wednesday night with some shredded Provolone. Not sure what I’ll serve as a side right now, but I’ll worry about that Wednesday night. Mississippi Roast just sounds gross, right? You can admit it! At first, I wouldn’t even read the recipe but I have to say, this roast rocks! It is a cross between pot roast and Italian beef. It has this really nice tangy flavor and I serve it like I would a beef sandwich and it is amazing. Got this recipe from the New York Times, so just follow the link. The only thing that I do different is that I use a whole stick of unsalted butter (only a sissy would use 4 tablespoons - come on!) and I add a bottle of beer and some of the extra pepperoncini juice. You MUST try this recipe!

Oh, did I mention that I subscribed to Sam Sifton’s Turkey Text from the New York Times? Yup - he has texted multiple times a day for the last four days. Don’t know why I chose to subscribe to the added pressure! It has been nice to receive reminders though to let me know how far behind I should feel!

Alright, I’m checking out for tonight. Sorry for the short post, but I’m up at 5am to shred my roast and get ready for my 7:30am haircut appointment. THAT is the most important item to check off the list tomorrow (um, besides the turkey breast pickup)!

Good night!

T minus 4...

Sunday, November 20th

Today has been a slow cooking day at madonia.kitchen. In fact, except for some soft scrambled eggs with cottage bacon, I haven’t spent anytime cooking. It’s been a busy day cleaning and reorganizing the kitchen for the most part. Mostly ad hoc projects that totally didn’t need to get done today, but my ADD got the best of me.

The only cooking going on this evening is meatball prep for our Thanksgiving appetizer, and it is not even being done by me! The chef wishes to remain anonymous, but I will say that his meatballs are the best I have ever tasted. They are so go that I have not even tried to replicate them. Here is his secret recipe…

Ingredients

  • 3 ½ pounds grass fed, 85% lead, ground chuck
  • 3 eggs
  • Italian bread crumbs (Cento is his favorite)
  • Garlic powder
  • Onion powder
  • Italian seasoning
  • Kosher salt
  • Pepper

Time to Make the Meatballs!

Crack the eggs and put them in the bowl of a standing mixer with the paddle attachment. Mix the eggs on low with a lot of the seasoning. How much? Good question, but there is not a good answer. Use several “shakes” of onion and garlic powder - equal parts - and double the amount of italian seasoning. Use a pinch of salt and a couple of cranks of the pepper mill to start. Mix the seasoning and the eggs well, then add the meat. Add the bread crumbs until the meat starts to bind together. Again, I don’t have an exact measurement, so just keep an eye on it. You will know by the look of the mixture.

Heat a frying pan with a couple of tablespoons of olive oil on low on the stove. Start to make your meatballs - we are making mini meatballs today (this recipe produced about 60). As the meatballs cook, add additional seasoning - garlic powder, onion powder, italian seasoning, and pepper. The chef says he over seasons the meatballs. As the meatballs start to get color, flip them. Keep your pan moving so that the meatballs don’t stick. Cook them until they are “crusty brown.” Cut into one, to test that they are done. We tasted a lot of meatballs during the meatball making process around here!

This is a recipe you will just master by feel. You just got to jump in and try this one!

We shared a great bottle of wine during the process - our favorite - a San Andreas Pinot Noir from Hirsch Vineyards.

So what’s on the agenda for tomorrow? Well, tomorrow is a work day, but I do have some prep work planned…

  • Final round of grocery shopping - hitting Standard Market after work
  • Making the ice cream base for the Cranberry, Orange, Chocolate ice cream
  • Writing out the name cards and making my place settings
  • Deciding on what to do about the “roll situation” - the recipe last night was just meh. I just don’t have a knack for bread. I think the rolls will be store bought again this year!

That’s probably all I can handle for one evening. Since we can’t eat the meatballs, we need to come up with a dinner plan. I need a rest tonight, so I think we are going to Portillos. Doesn’t seem like the best plan but I’m tired and hungry and need a night off.

Until tomorrow - stay tuned…

And the Countdown Begins..."T - 5" Days

Saturday, November 19th

I’m 5 days and 14 people away from Thanksgiving! I had a brief panic attack yesterday, but feel back on track now. My turkey breasts are ordered (all 12-16 pounds of them), my tablecloths are washed and ironed, and my new burlap table runners from FairStreetCrafts have arrived!

Grocery shopping started yesterday with trips to Whole Foods and Jewel. Today, I added a trip to Caputos along with a visit to Celidan Florist, to drop off vases for my Thanksgiving centerpieces. I have a batch of Sunday Gravy and my turkey stock both simmering on the stove and I just made the dough for my butter and parsley rolls (this is my test batch). I’m taking my first break since 6:30am - sitting on the couch in front of a nice warm fire with a glass of Cabernet Sauvignon from Tin Barn and some soppresseta and crackers. It’s nice to finally get a break!

Well, I guess it is time to share some recipes, huh? Well, I used the Sunday gravy recipe already on this page, but I did make a couple of minor tweaks. This time, I added three anchovies packed in oil to the pot while I sautéed my onions. The anchovies melted completely and just sort of rounded out the flavor. I’m only 5 hours into the cooking process, so we will see what the final product tastes like! This time, I also used ¾ bottle of Chianti and a full box of beef broth. The tomatoes just didn’t have as much juice as normal, so it needed the extra liquid to get a good simmer going.

For my turkey stock recipe, I borrowed Sam Sifton’s Serious Turkey Stock recipe from the New York Times. I made a few changes to the original recipe:

  • I used 4 turkey drumsticks instead of the combination of drumsticks and wings. Why? Because Whole Foods only had drumsticks!
  • I tossed the drumsticks with canola oil, salt and pepper before roasting them in the oven. I also cut up two two slices of cottage bacon and placed that under each drumstick.
  • I added the onion, celery, carrot, and thyme to the stock pot before even bringing the water to a boil. It was early and I hadn’t had any coffee yet, so this was just me, not fully reading the recipe.
  • Instead of using all water, I used 6 cups of water and 2 boxes of chicken stock. I also added 6 cloves of garlic to the pot.

The recipe says “simmer as long as you can manage.” We are 5 hours in…I’ll let you know how long I managed!

I’ll add the recipe for the garlic parsley rolls once my “test” is complete. Right now, my break is over, so its back to the kitchen to stir the gravy and get those rolls in the oven!

More to come…

2016 Thanksgiving Menu

I can’t believe Thanksgiving is only two weeks away! I’m still working on my menu and haven’t yet ordered my turkey breast. Unfortunately (or fortunately for some), I have completely abandoned my ‘outside Thanksgiving’ plan again this year. One day, I’ll make that dream come true!

The good news is that I have pretty much decided on the table landscape (not important to most, but important to me) and have ordered my table runner and picked out my flower arrangements. I think I may have even picked out my place cards. Yes, I am THAT structured!

Here is the working draft of this year’s menu. I’ll post recipes as I go, but if you have any recommendations that you would like me to try, please let me know!

STARTERS
Titi and Uncle Tone’s meatballs with gravy
Roasted sweet peppers with chiles
Antipasto with spicy soppressata, serrano, mozzarella, fontinella, heirloom cherry tomatoes, and spiced olives
Sea-salt dusted crackers with port wine cheese
Special Lili & Diego snacks!

ENTRÉE
Lemon-herb turkey breast (on the Green Egg) with lemon-garlic gravy
Twice roasted sweet potatoes with hot honey, chiles and butter
Auntie Pat double-baked potatoes version 2.0
Green beans with chiles and lemon oil
Sautéed mushrooms with red wine, thyme and garlic
Garlic and parsley butter rolls

DESSERT
Apple pie with cranberry, orange, and chocolate chunk ice cream
Apple bourbon bundt cake
Chocolate ganache cake

Looking forward to my favorite holiday! More to come soon!

Happy pre-Thanksgiving!

Shredded Chicken (and Pork) Tacos

A friend and I were planning a lunch menu for an upcoming event and we wanted something quick and easy. She came up with the best idea - chicken tacos, cooked in a slow cooker. I realized that every time I made chicken tacos, I grilled chicken breasts or thighs on the grill. I had some chicken in the refrigerator, so I decided I would give the slow cooker idea a try.

That picture was the outcome of very little work! My recipe? Made it up on the fly. Here it is:

Ingredients

Cook the Chicken

Start by rubbing the taco seasoning on both sides of the chicken. Put everything into the slow cooker, set the temperature to low, then cook for 6 hours. When the chicken is done, take out the breasts, shred the chicken and you are ready to serve!

Carnitas sauce for chicken? Yup, seems weird, right? Well, I as shooting for the garlic and lime flavor and it actually tasted great. The chicken was very moist and you could taste that touch of lime. Adding the taco seasoning gave the chicken that extra spicy bite I was looking for.

I served the tacos with another squeeze of lime, shredded cheddar cheese, and then added a splash of Frontera Jalapeño Hot Sauce

Ugh! I really need to work on my pictures!

I’ve made a similar recipe in the past using pork shoulder (my favorite!). I used a 3 ½ pound pork shoulder, covered it with kosher salt, pepper, and cumin, then browned it on all sides. I added the pork to the slow cooker with the two packages of Carnitas sauce plus two cups of water (instead of chicken broth). I cooked the pork for 9 hours, then shredded it and served it the same way as the chicken. I also made pork nachos with this later in the week and added some green onions and cilantro to the nachos.

What is great about both recipes is that you can freeze the meat, defrost it, and reheat it at anytime. It definitely is a great quick meal!

Enjoy!

Getting Ready for Thanksgiving

It is no surprise that my favorite holiday is Thanksgiving. Thanksgiving is all about family and food, two of my favorite things!

I wait all year for the Thanksgiving editions of both Bon Appetite and Food and Wine magazines. I read every recipe and then build the perfect menu. The perfect menu seems to be about the same every year lately. It is all of our favorites: Lemon Herb Turkey Breast, Auntie Pat (double-baked) Potatoes, Geri’s Double-baked Sweet Potatoes with Brown Sugar and Maple Syrup, some kind of vegetable, and Rigatoni and Gravy. I make homemade apple pie and Fireman’s Apple Cake, another family tradition. I absolutely love this meal and I look forward to it all year long.

One of the things that I have always wanted to do is host Thanksgiving outside. A couple of years ago, I had an entire plan: tent, heaters, round tables with white table clothes, flowers, candles, etc. That plan was pretty costly, so I caved and kept it inside. This year, I’m revisiting “outside Thanksgiving” again, but am starting slowly. Step 1: cook my turkey breast on the Green Egg!

So, here is my first practice recipe for Thanksgiving…Lemon Herb Roasted Turkey Breast!

Ingredients

  • 5 pound turkey breast, bone in
  • 1 ½ sticks unsalted butter, room temperature
  • 1 shallot, mixed
  • 4 cloves of garlic, minced
  • ¼ cup fresh parsley, chopped
  • 1 ½ tablespoons fresh rosemary, minced
  • 1 ½ tablespoons fresh thyme, minced
  • 1 tablespoon lemon zest
  • 1 teaspoon freshly ground black pepper
  • Pinch of kosher salt

Prepare the Turkey Breast

Mix the butter and all of herbs together and let the herb butter sit overnight.

Rinse the turkey breast thoroughly and dry. Separate the skin from the breast and rub the inside of the breast with the herb butter. The goal is to use about ¾ of the prepared butter on the inside of the breast. Rub the remaining butter on the outside of the breast and then season salt and pepper. Make sure to salt and pepper the underside of the breast as well. Let sit, uncovered, while you prepare the grill.

Bring the grill to 325 degrees. The turkey will cook over indirect heat. If you are using the Green Egg, make sure that you insert the plate setter.

Place the turkey breast on a rack, skin side up on the grill. Cook the turkey 15-20 minutes per pound, rotating the rack every 20 minutes. Let the turkey reach an internal temperature of 160 degrees, then remove from the grill and let sit covered for about 5-10 minutes.

So what’s the verdict?

The turkey turned out perfect!

The breast was a beautiful golden brown on the outside and the skin was nice and crispy. The breast itself was incredibly moist; you could practically cut it with a fork! We used apple wood chips in the Green Egg, which we could have done without. The turkey was just a little too smokey with the chips, so I’ll leave those off for the big day!

For our Green Egg Turkey Test I made garlic mashed potatoes, with some of the same butter that I used for the breast. Incredible! I spent so much time worrying about the turkey breast, I completely forgot to make my gravy, so you will have to read my official Thanksgiving post to get the official gravy recipe!

Happy Test Thanksgiving!

LaBella Pasteria

My family and I have been going to LaBella Pasteria in Oak Park for at least 15 years. Over the years, they have had a couple of different owners and have moved to a different location, but LaBella is still home for us.

Every major life event has been celebrated at LaBella. My husband and I used to go there for dinner when we were dating and then later celebrated both our engagement and rehearsal dinners there. We celebrated both of our sons’ grammar school and high school graduations there and this past year, our oldest son’s college graduation. My niece and nephew both had their communion parties at Labella. We have celebrated birthdays there, Mother’s Day, Father’s Day, and anniversaries. And, we eat at LaBella every Christmas Eve after 6pm mass at Ascension. Both the restaurant and the people at the LaBella are part of our family.

It has been a few months since we have been to LaBella, so we decided to go there for dinner this past weekend. As always, dinner was delicious, but it was the people who really made the trip there worthwhile. Dave saved us the perfect table at the window and we settled in and waited for Guillermo to join us. Guillermo has been our server for almost every meal and every event we have had at LaBella. No matter how busy the restaurant is, Guillermo always grabs a seat at our table and we spend a few minutes catching up on our crazy lives. He always asks about the kids, our parents, my sister and her family…he knows them all!

We spent a few minutes catching up with Dave and his wife who are the current owners of LaBella and just two awesome, gracious people. We have gotten to know them more over the last few years and really enjoy spending time with them. We also had the opportunity to say hello to some of the other staff that we have gotten know. LaBella to us is like Cheers to Norm; everyone knows our name and it totally feels like home!

This trip to LaBella, I tried a new dish on the specials menu: Lemony Alfredo Pasta with Shrimp Siciliano.

I wasn’t sure how the lemon and alfredo sauce would taste together, but the combination was delicious. The lemon really brightened up the alfredo sauce and the shrimp were huge and cooked perfectly. The crunch from the breading gave great texture to the dish. And kudos to the chef at LaBella - the homemade pasta was cooked to a perfect aldente!

We finished our meal (as always) with my favorite…Pinot Cake! This is the most moist cake I have ever eaten. It has just the right amount of sweetness. I’m not exaggerating; I end every meal with this cake!

So, thank you to everyone at LaBella for a great evening and an amazing 15 years! We appreciate your friendship, your service, and your amazing food! We will be home again soon!

Gravy Time!

Its gravy day!

My husband is the main gravy maker in our house, but this week, I decided to pull out my recipe for a change. I’m confident that all y'all know what gravy is, but just in case, I want to be clear. This is the kind of gravy that you use for spaghetti, not the kind you put on mashed potatoes! Some people call it “red sauce,” but I grew up calling it gravy.

Gravy is an all day project. It cooks for 4-6 hours, sits covered in the gravy pot for another couple of hours, and then is finally strained through a tomato press or what my family calls the “monkey grinder.” Given the time commitment, when I make gravy, I make a lot of gravy. That requires having just the right gravy pot. Here is mine…

Ingredients

  • 2 medium onions, thinly sliced
  • 2 bulbs of garlic, peeled and “smashed”
  • 1 ½ pounds Italian sausage (mix both mild and hot sausage; you can buy it ground or in links, but make sure to remove the sausage from the casing before cooking)
  • 4 28-oz cans of crushed tomatoes
  • 4 28-oz cans of San Marzano crushed tomatoes
  • 8 6-oz cans of tomato paste
  • Approximately 16-oz (½ box) of low sodium beef stock
  • 1 bottle of Chianti
  • Kosher salt
  • Pepper
  • Italian seasoning
  • Red pepper flakes
  • Fresh thyme
  • Fresh oregano

Make the Gravy

I think the order of the steps is really important, but I might be in the minority of the gravy-making population. Here goes…

Heat the gravy pot over medium-high heat. Once the pan is hot, add about 1 ½ tablespoons of canola oil. Once the oil has a nice shine, add the sausage. and brown. This can take about 7 minutes. Once browned, remove the sausage from the pot with a mesh strainer or a slotted spoon. The goal is to let the fat drain from the sausage. You want to use the fat from the sausage to cook your onions and garlic. Reserve the sausage in a bowl.

Add the sliced onions to the gravy pot and cook until they start to soften. While the onions are cooking, add a good pinch of salt, some black pepper and a 3 tablespoons of Italian seasoning. Add the garlic once the onions start to soften and cook for another 1-2 minutes.

Add all of the tomato paste into the gravy pot and mix it in the onion and garlic mixture. Add another good pinch of salt and pepper, along with 3 more tablespoons of Italian seasoning. Let the paste cook for about 2-3 minutes. You want to make sure you keep stirring the paste/onion/garlic mixture so that it doesn’t stick to the bottom of your gravy pot and burn.

Add a half bottle of Chianti. Then, pour yourself a small glass! Let the wine cook for about 4-5 minutes, then add about half of the beef stock. Let the stock cook for another 3-4 minutes.

Now its time to add the tomatoes. Add all eight cans of tomatoes and stir well to incorporate the tomatoes into the paste/onion/garlic mixture. Add another good pinch of salt and pepper, along with 3 tablespoons of Italian seasoning and about a 1 tablespoons of red pepper flakes. Don’t overdo the red pepper flakes. You can always add more later. Once everything is well incorporated, turn your heat up to high and let the gravy cook until it just starts to come to a boil.

Reduce the heat to medium and add the sausage back to the pot. Mix well, place the lid half way on the pot, then reduce the heat to low and let it sit!

The gravy should cook at least four hours, but six is better. Stir the gravy every 30 minutes, making sure to scrape the bottom and sides of the pot every time. Taste the gravy every time you stir. Add additional salt, pepper, Italian seasoning, and red pepper flakes to taste. Add the seasoning slowly throughout the cooking process.

About half way through the cooking, add the remaining wine, and if you have some fresh spices available like thyme and oregano, add a few springs to the gravy. Every time you add something in, make sure to stir the gravy a few times, scraping the bottom and sides of the pot.

At the end of the cooking time (4-6 hours), turn off the heat and transfer the pot to a cool burner. Stir the gravy one more time, then put the lid back on the pot. Let the gravy sit at least one hour, completely covered. I actually let my gravy sit overnight and it was still a little warm the next morning!

Monkey Grinder Time!

Once you figure out how to setup your monkey grinder, start pouring your gravy into the contraption. I usually add about 3 ladles of gravy to the grinder before starting to grind. When you start to grind the gravy, there will be two outputs: the strained gravy and the waste.

After you have strained about 9 ladles of gravy, pour the waste back into the grinder and grind that one more time. The “new” waste should be disposed of. Continue to repeat this process until you have strained all of the gravy from the pot.

I usually use 5 cup plastic containers to store my gravy. I fill each container with 4 ladles of gravy. Once the gravy has cooled, cover the gravy and freeze.

Gravy Tips

Using 8 cans of tomatoes yielded about 10 ½ containers of gravy. For two people, this is 10 meals!

When you are defrosting gravy, take it out of the freezer the morning you want to use it. Let the gravy defrost in the refrigerator. If you forget, just run the gravy container under cool water for about 5 minutes, then put it in a medium sized pot and cook on low. It will take about 30 minutes to return to a liquid state, but if you have the time (or just forgot), this method works!

Mangia!

Spiced Rubbed Pork with Bourbon Chipotle Sauce

If you are a regular reader of this blog, you know I’m a fan of Bobby Flay and his Vegas restaurant, Mesa. My first meal at Mesa was Bobby’s Spice Rubbed Pork Tenderloin in a Bourbon Chile Sauce. I made this last year for Christmas and recently for a birthday celebration for friends. I missed a great photo opportunity to take a picture of the whole tenderloin, which was nicely charred and had a beautiful color from the deep red and brownish-orange hues from all of the warm spices.

Here’s the recipe:

Spiced Rubbed Pork

2 pork tenderloins (about 1 ½ - 2 pounds each)

3 tablespoons paprika (I used sweet, but smoked paprika would be good too!)

2 tablespoons light brown sugar

2 teaspoons ground cumin

2 teaspoons dry mustard powder

1 tablespoon kosher salt

2 tablespoons black pepper

1 teaspoon cayenne pepper

Combine all of the spices, then coat the pork with the rub. Heat the grill to approximately 400 degrees. Cook the pork on indirect heat for approximately 40 minutes, turning every 10 minutes. The pork is done when it reaches an internal temperature of 145 degrees. Take the pork off the grill and let it rest, covered with foil, for about 5 minutes.

Bourbon Sauce

2 tablespoons olive oil

1 medium red onion, finely chopped 2 cups bourbon

4 cups chicken stock

1 cup apple juice concentrate, thawed (about ¾ of a can)

¼ cup brown sugar

8 whole black peppercorns

1 chipotle in adobo sauce, chopped

Kosher salt, to taste

Heat the oil in a medium sauce pan, over medium high heat. Add the onions and cook until softened. Add the bourbon and let it reduce to a few tablespoons. This takes awhile, so don’t get anxious.

Add the chicken stock, apple juice concentrate, brown sugar, peppercorns and chipotle until the mixture if reduced by half. Again, this does take some time so just keep stirring and be patient!

Strain the sauce and then add it back to the pan. Continue to cook the sauce until it gets to a “sauce consistency.” I’m never sure what that means, so I cook it until it is thicker than a broth but not thick like a paste. Bobby Flay says to add another 2 tablespoons of Bourbon, which I usually forget, but I do tend to add about a tablespoon of butter, which makes the sauce nice and shiny.

Also, I start the sauce when the grill is heating up. That gives me about 70 minutes of total time to make the sauce. Don’t worry if the sauce is ready before the pork, just lower the heat, or shut if off completely, then bring it back up to temperature as soon as you take the pork off the grill.

Accoutrements

I served this with risotto and roasted asparagus (just a little salt, pepper, olive oil, and lemon). If I remember correctly, it was served with sweet potato mash at Mesa. I’m not a sweet potato fan, but it does seem like sweet potatoes would be great with this (maybe with a maple bourbon glaze?)! Any kind of roasted veggie would also be awesome!

At Mesa, we drank Fiddlestix Pinot Noir Seven Twenty Eight from Fiddlehead Cellars. The last time I made this meal, I served it with Decoy Cabernet Sauvignons and it was perfect!

Bon Appetit!