greenegg

I never met a Lobster I didn't like...

I really like lobster.  Lobster tails, lobster rolls (butter, no mayo), lobster bisque, lobster mac and cheese...I think you get my point.  But, despite my admiration of this crustacean, I have never tackled cooking lobster at home.

I often spend Saturday and Sunday mornings thinking about what to cook while lying in bed. That process includes looking through recipes I saved earlier in the week, reading or watching videos on the NYT Food page, or indulging in new addiction, the HowToBBQRight YouTube channel.  I don't know what it is about Malcolm Reed, or his food, but there is something endearing about him.  I started reading his recipes and watching his videos when we first bought the Green Egg, but a year in, something about his food keeps me coming back.

So, when I came across Malcolm's Grilled Lobster Tail video, my worlds collided!  Lobster on the grill?  My time had come!

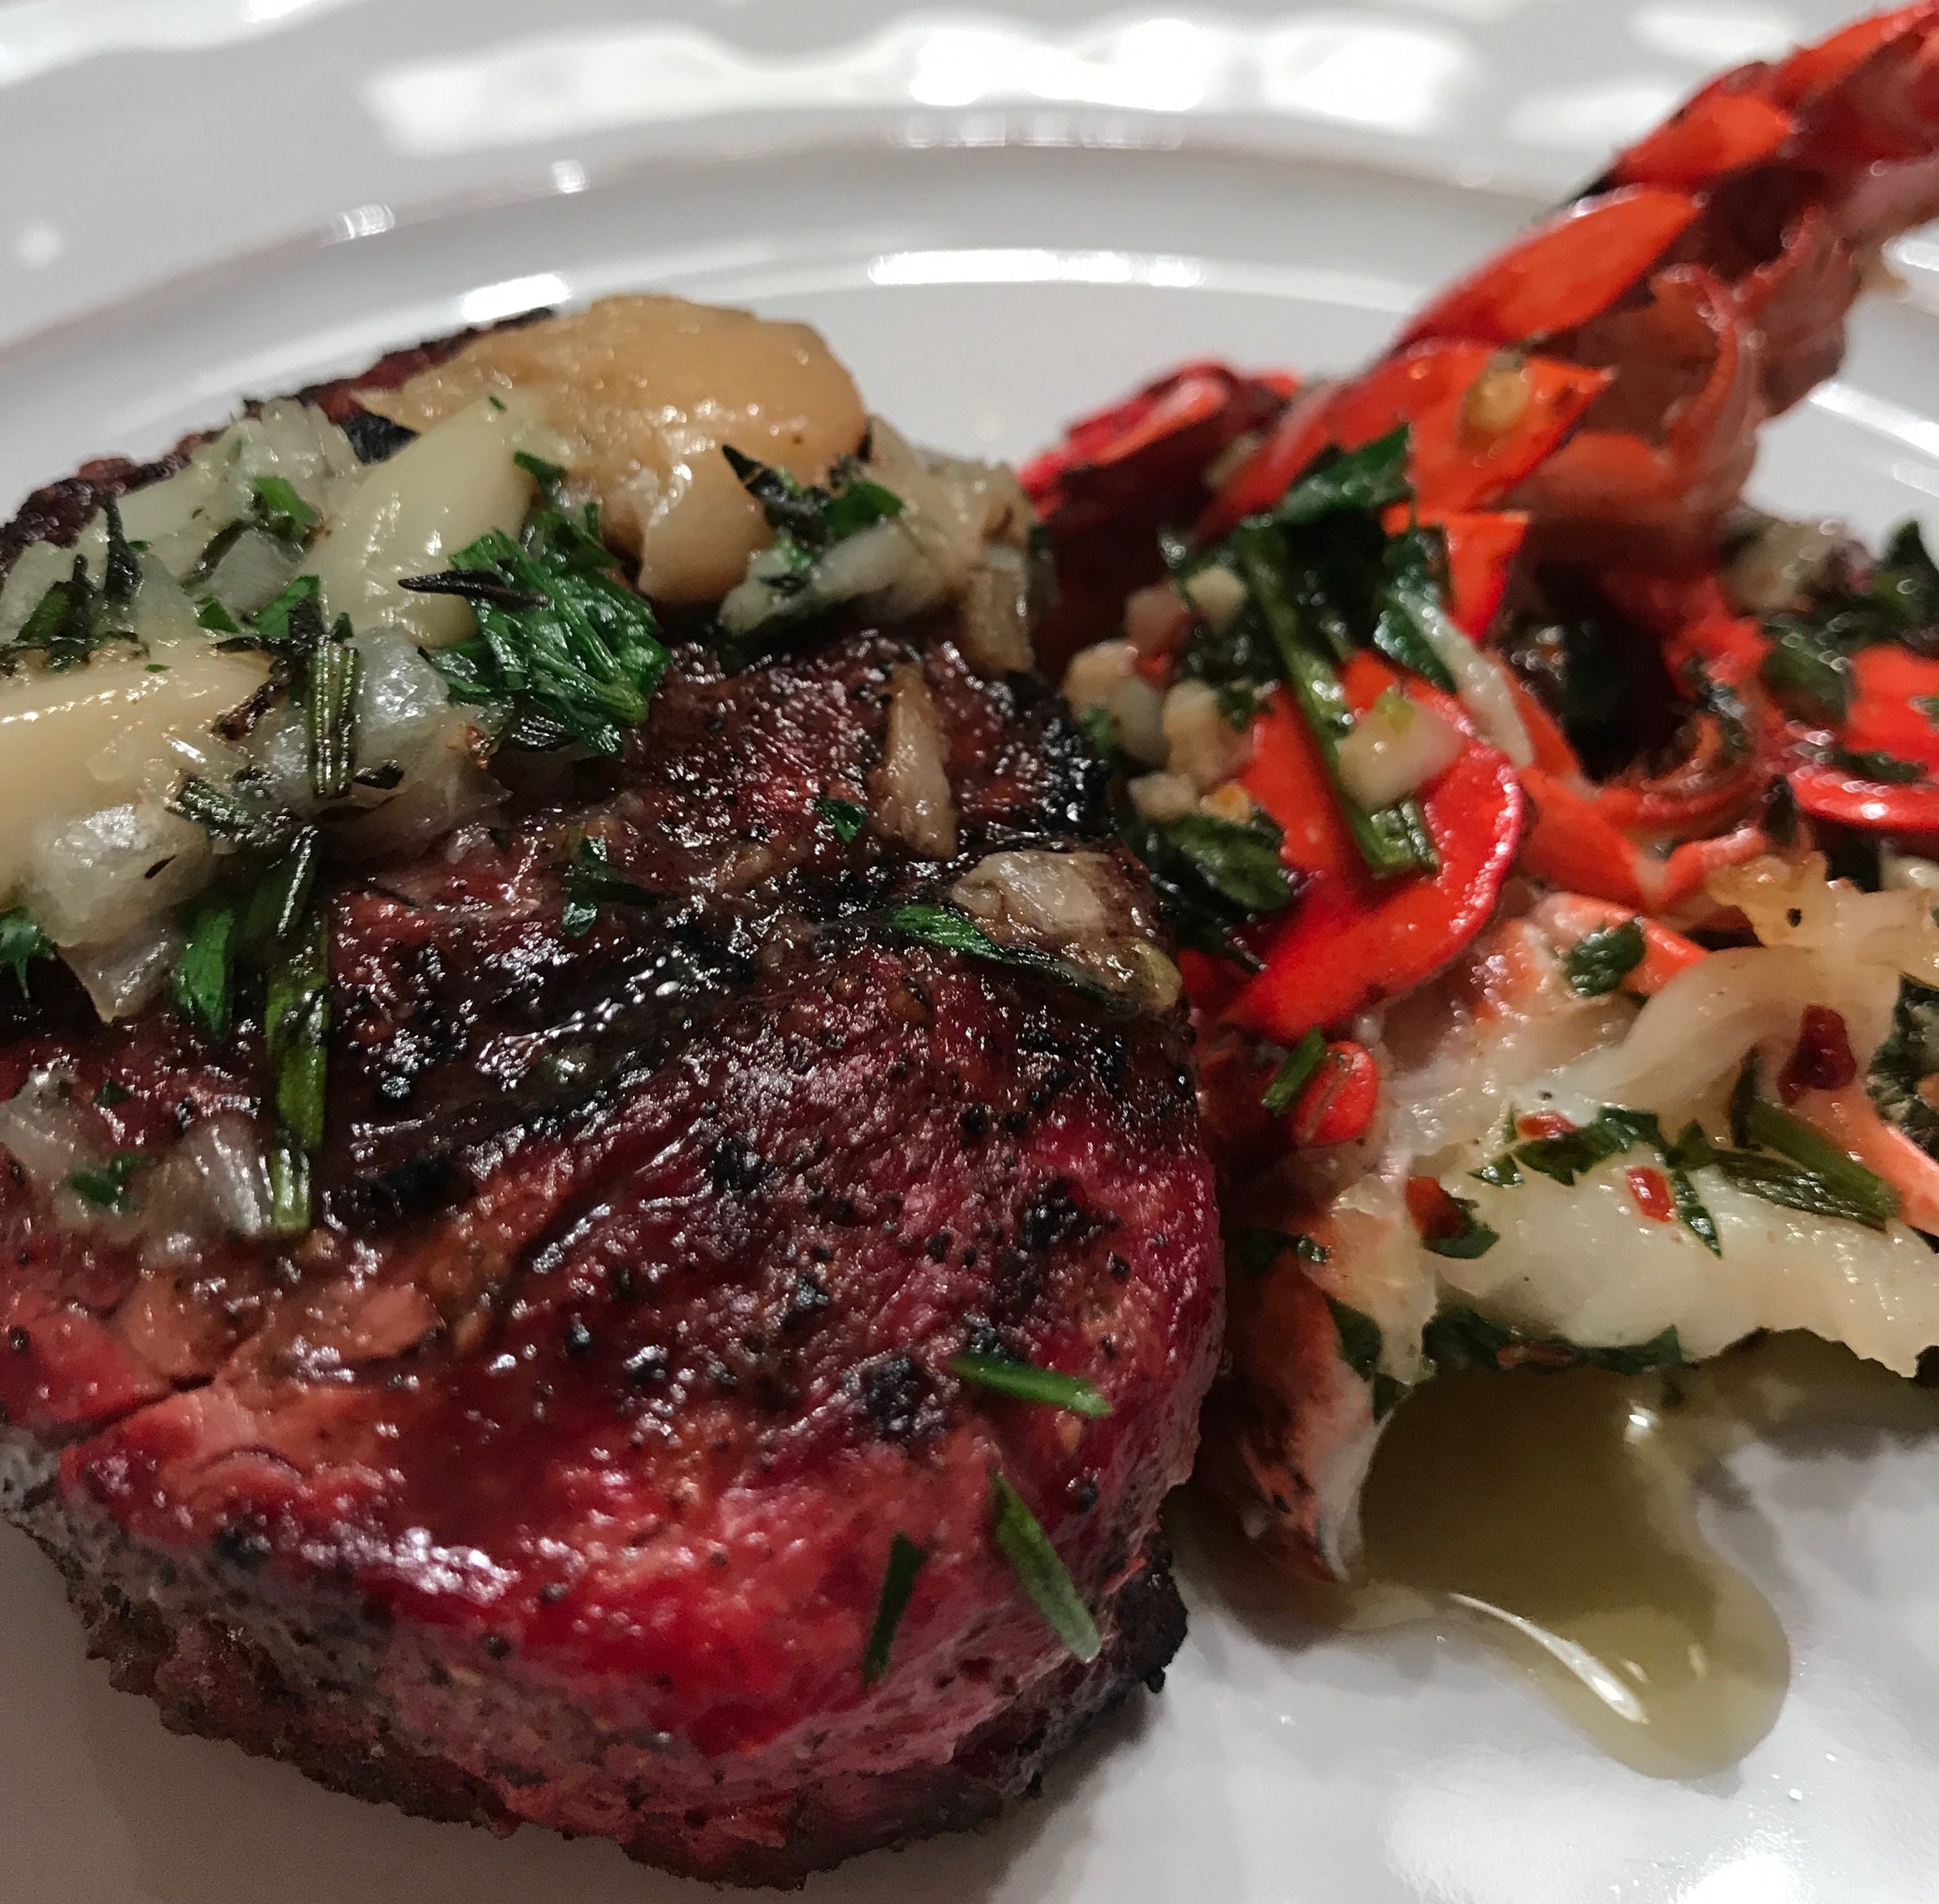
As you can see, our lobster dinner turned into surf and turf night.  The lobster itself was easier than I thought to make, but the timing of the lobster and the steak was hard using one grill.  We solved that problem by firing up both the Big Green Egg and our Weber Performer grill.  

For the Surf

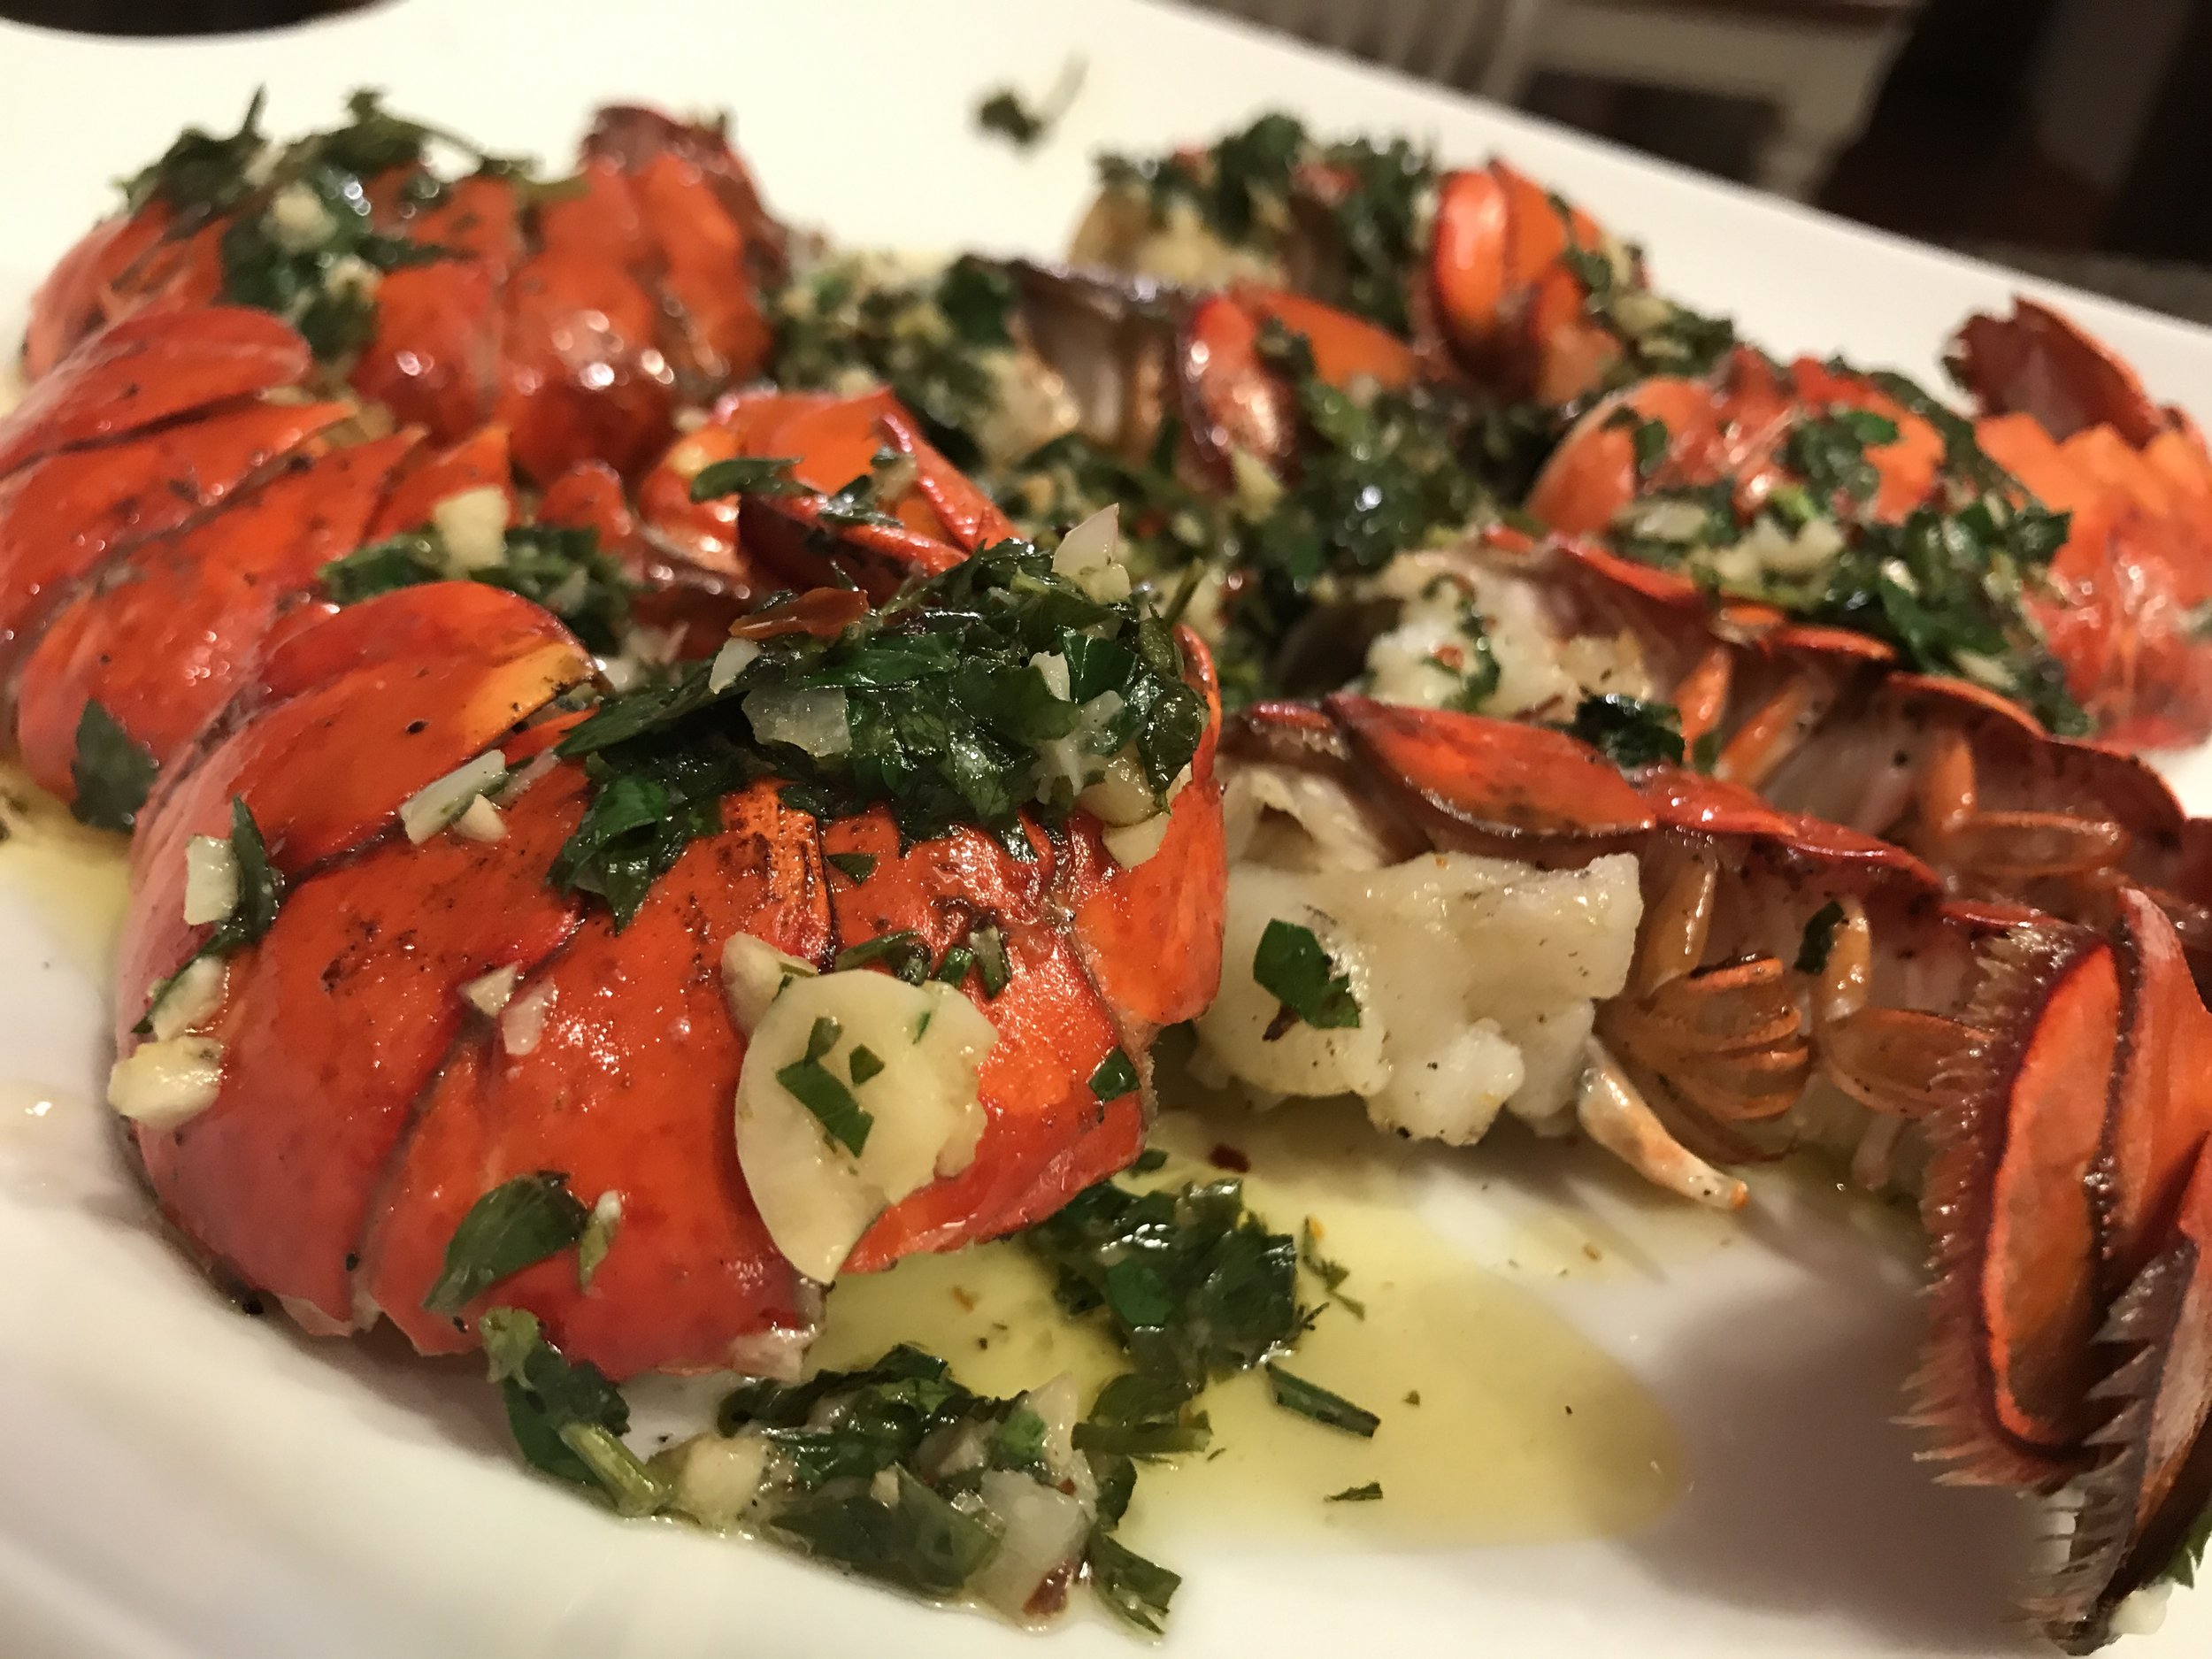
We followed the Grilled Lobster Tail recipe exactly, using the Weber Performer grill.  I bought lobsters that were flash frozen from Whole Foods and ran them under cold water for about 10 minutes to completely defrost them.  The most important step in Malcom's video is to cut down the shell of the lobster to exposure the flesh. No matter what size lobsters you get, do not skip this step.  You need to expose the flesh for cooking and you need to be able to get the flesh out of the shel after it is cooked.  This step makes sure that both happen!

We cooked the lobster at 375 degrees, indirect.  The cooking times in the video are spot on. Adjust the amount of butter you use in the butter basting sauce based on the amount of lobster you are cooking.  I cooked two 4-ounce tails and only used one stick of butter, with plenty of the butter basting sauce left over.

For the Turf

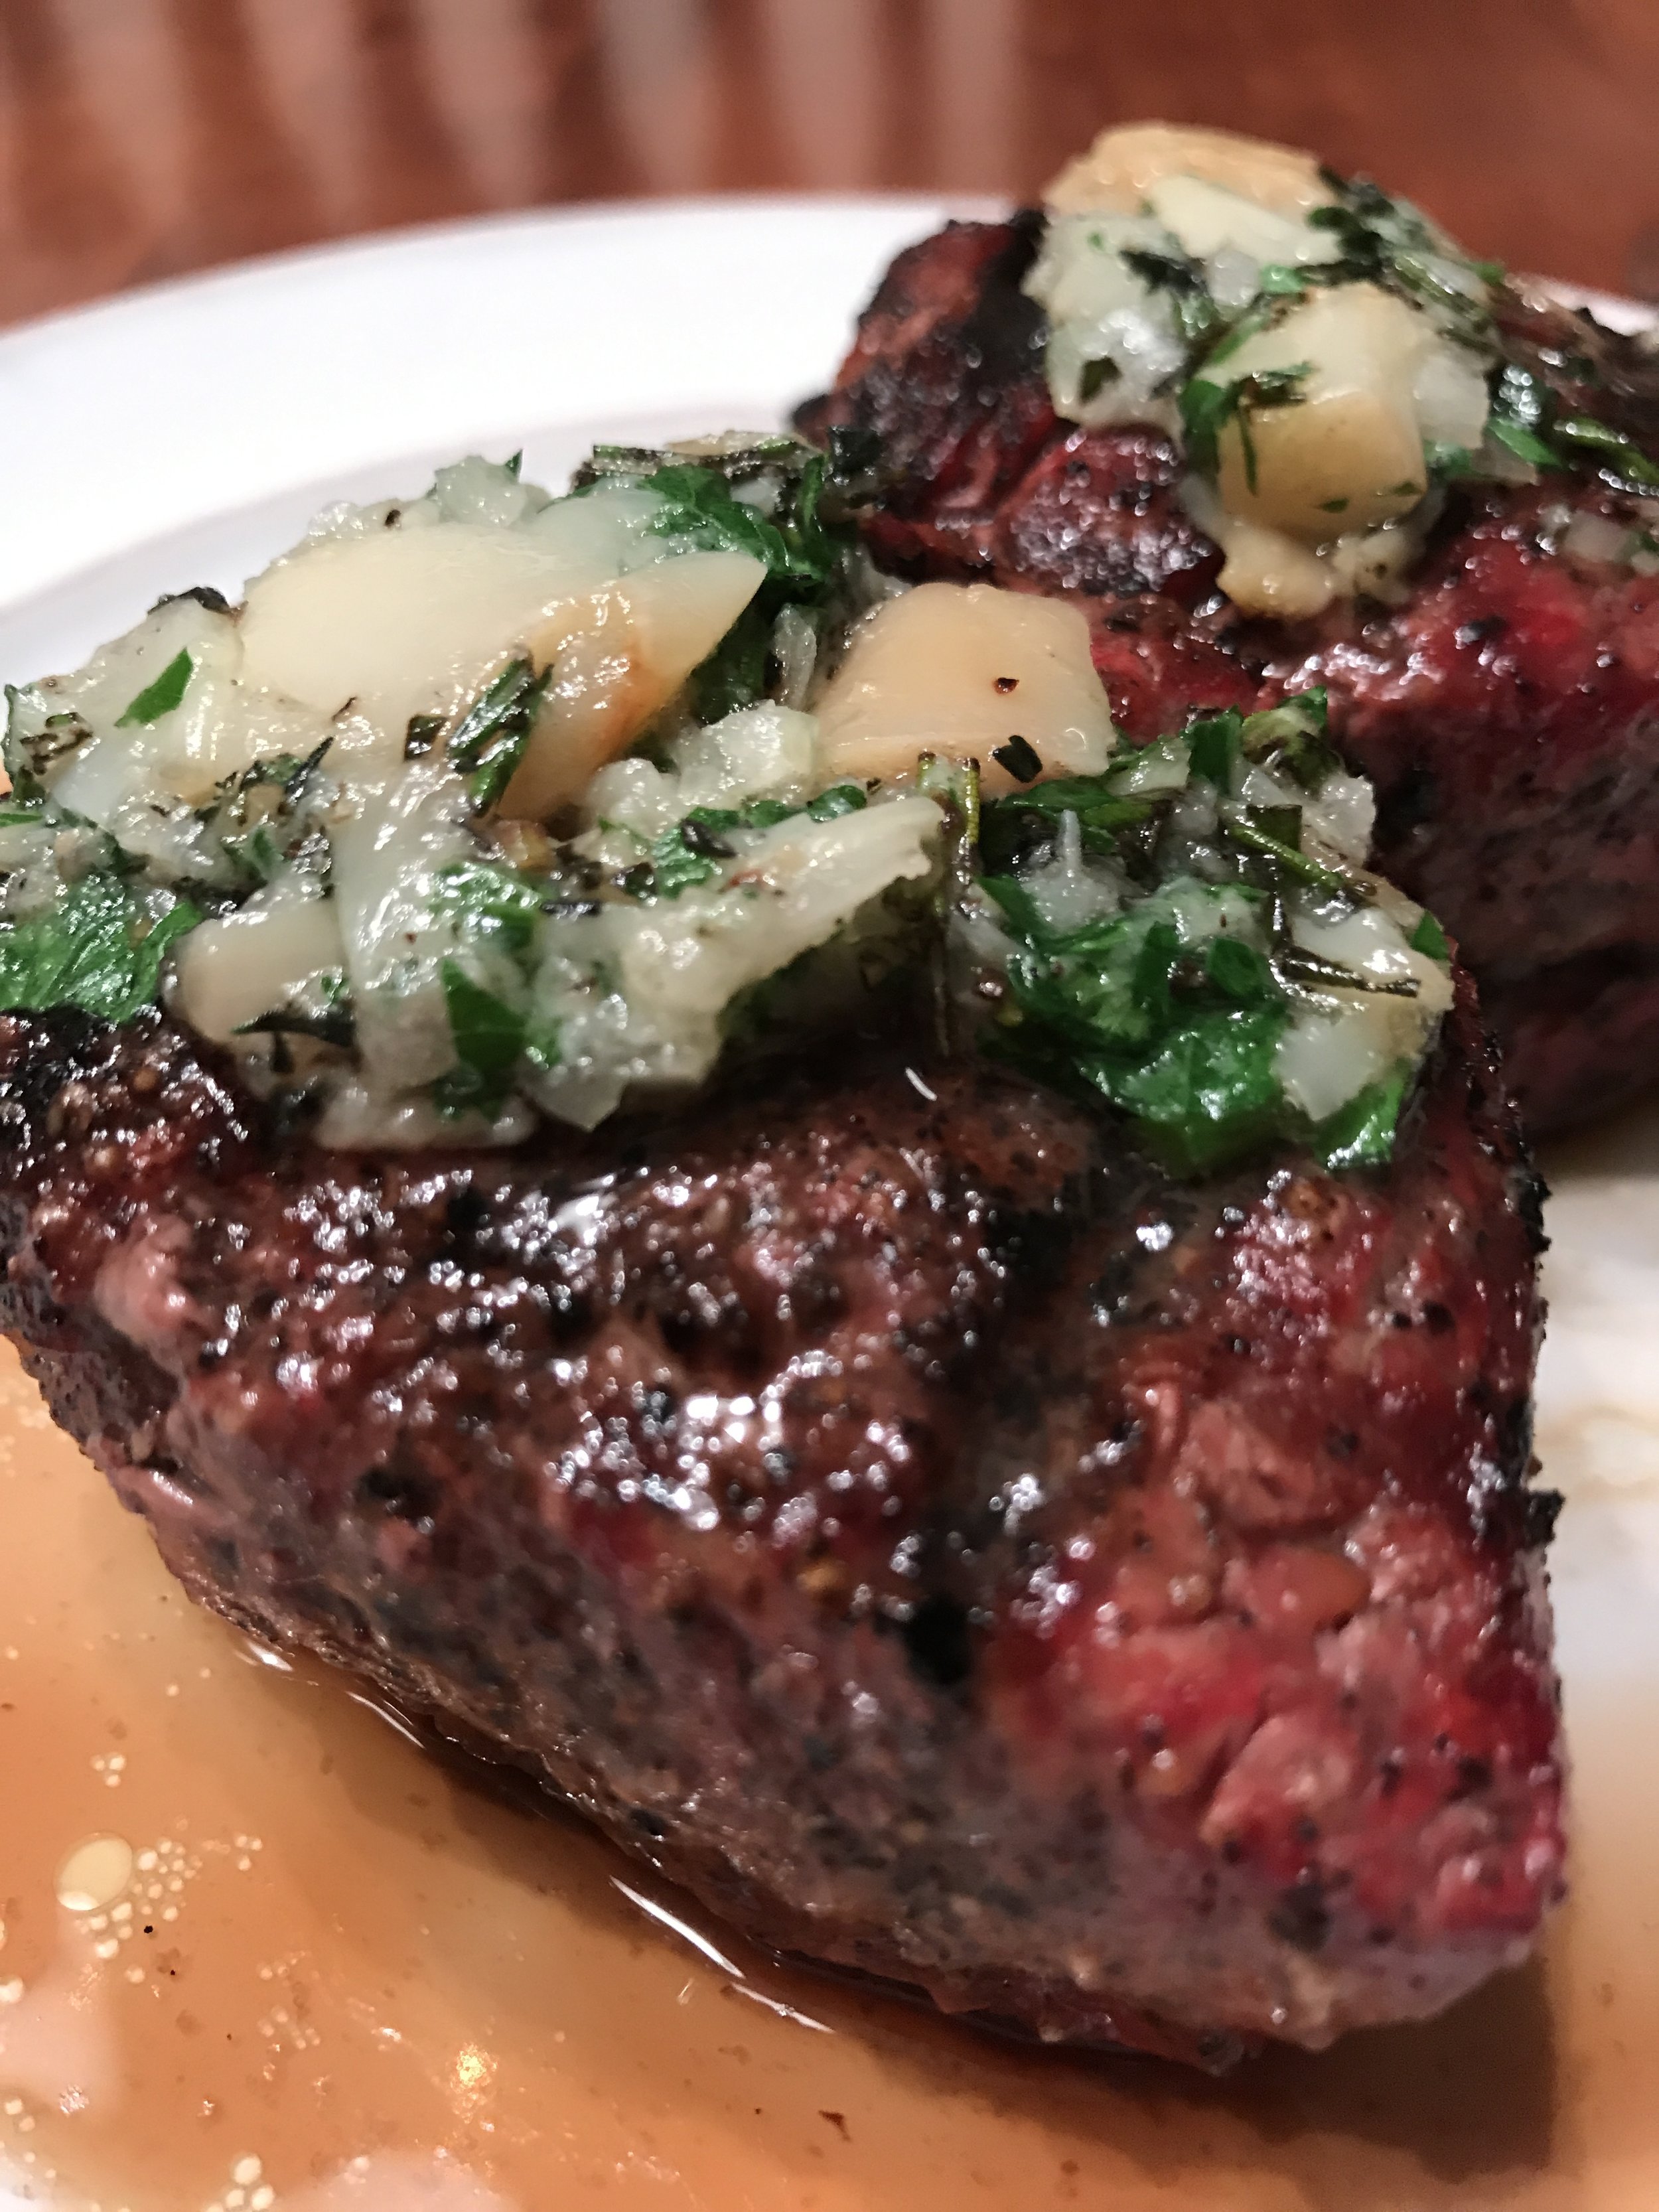
Malcolm was the inspiration here, once again!  We followed his Grilled Filet Mignon on the Big Green Egg recipe, using two 4-ounce filets.  We rubbed them in olive oil, salt and pepper while the Green Egg was getting hot.  The cooking time was the easy part - two minutes each side on direct heat (grill was at 650-700 degrees) - then shut off the heat and let the steak sit for 3-4 minutes in the grill and another 10 minutes off the grill, covered in foil.  

Malcom made a compound butter, but my advice is to make the butter recipe your own.  I only used one stick of softened, unsalted butter, one head of roasted garlic, one shallot, salt and pepper, and a mix of fresh parsley, rosemary and thyme.  I threw all of the ingredients in a bowl and mashed it together, although as you will see, my butter was a little chunkier than Malcolm's. My knife wasn't super sharp and I wasn't in the mood to totally mince everything perfectly, so you will see some small chunks of shallot and garlic in there.  It still tasted great and to me, that is what mattered!

If you are crazy enough to have two grills, or if you have an easier time controlling your temperature on one, make sure to cook your steaks first.  While the steaks are resting for 10 minutes, cook your lobster.  Timing wise, this should work out perfectly.  Once you pull those lobsters off the grill, you are ready to eat, so get everyone to the table toot sweet!

One last thing, this meal has a lot of butter.  I did use less than what was in Malcom's recipe, including the dollop of butter I put on our steak.  A small amount goes a long way.  And, you won't need extra butter to dip that lobster meat in.  The butter bath that you give it on the grill is more than enough.

Serve this with a red wine that is super juicy and has a lot of fruit.  We had a 2014 Syrah from Kobler Estate Winery that was amazing!  It cut through the butter and just brought out the succulence of both the lobster and filet.  It was the perfect pairing!

This meal seems like a lot of steps, but it sounds more involved than it is.  When you are in the mood to indulge, try this meal.  I promise you that it will be worth it!

Getting Ready for Thanksgiving

It is no surprise that my favorite holiday is Thanksgiving. Thanksgiving is all about family and food, two of my favorite things!

I wait all year for the Thanksgiving editions of both Bon Appetite and Food and Wine magazines. I read every recipe and then build the perfect menu. The perfect menu seems to be about the same every year lately. It is all of our favorites: Lemon Herb Turkey Breast, Auntie Pat (double-baked) Potatoes, Geri’s Double-baked Sweet Potatoes with Brown Sugar and Maple Syrup, some kind of vegetable, and Rigatoni and Gravy. I make homemade apple pie and Fireman’s Apple Cake, another family tradition. I absolutely love this meal and I look forward to it all year long.

One of the things that I have always wanted to do is host Thanksgiving outside. A couple of years ago, I had an entire plan: tent, heaters, round tables with white table clothes, flowers, candles, etc. That plan was pretty costly, so I caved and kept it inside. This year, I’m revisiting “outside Thanksgiving” again, but am starting slowly. Step 1: cook my turkey breast on the Green Egg!

So, here is my first practice recipe for Thanksgiving…Lemon Herb Roasted Turkey Breast!

Ingredients

  • 5 pound turkey breast, bone in
  • 1 ½ sticks unsalted butter, room temperature
  • 1 shallot, mixed
  • 4 cloves of garlic, minced
  • ¼ cup fresh parsley, chopped
  • 1 ½ tablespoons fresh rosemary, minced
  • 1 ½ tablespoons fresh thyme, minced
  • 1 tablespoon lemon zest
  • 1 teaspoon freshly ground black pepper
  • Pinch of kosher salt

Prepare the Turkey Breast

Mix the butter and all of herbs together and let the herb butter sit overnight.

Rinse the turkey breast thoroughly and dry. Separate the skin from the breast and rub the inside of the breast with the herb butter. The goal is to use about ¾ of the prepared butter on the inside of the breast. Rub the remaining butter on the outside of the breast and then season salt and pepper. Make sure to salt and pepper the underside of the breast as well. Let sit, uncovered, while you prepare the grill.

Bring the grill to 325 degrees. The turkey will cook over indirect heat. If you are using the Green Egg, make sure that you insert the plate setter.

Place the turkey breast on a rack, skin side up on the grill. Cook the turkey 15-20 minutes per pound, rotating the rack every 20 minutes. Let the turkey reach an internal temperature of 160 degrees, then remove from the grill and let sit covered for about 5-10 minutes.

So what’s the verdict?

The turkey turned out perfect!

The breast was a beautiful golden brown on the outside and the skin was nice and crispy. The breast itself was incredibly moist; you could practically cut it with a fork! We used apple wood chips in the Green Egg, which we could have done without. The turkey was just a little too smokey with the chips, so I’ll leave those off for the big day!

For our Green Egg Turkey Test I made garlic mashed potatoes, with some of the same butter that I used for the breast. Incredible! I spent so much time worrying about the turkey breast, I completely forgot to make my gravy, so you will have to read my official Thanksgiving post to get the official gravy recipe!

Happy Test Thanksgiving!

Back to Basics!

We are continuing to enjoy the Green Egg!

Last weekend, we went back to basics…

Yup! Hamburgers and hot dogs!

You can’t get more basic than a char dog and a good cheeseburger and that is exactly what we enjoyed. We topped off the evening with some grilled peach and vanilla ice cream with crumbled Cranberry Oatmeal cookies.

Diego, wait to you get a taste of Uncle Tone’s new burgers! They are A-W-E-S-O-M-E!

Pizza ala the Green Egg

Pizza Dough

The best dough recipe I have found so far has been Roberta’s Pizza Dough. The dough comes out perfect every time. Definite props here to the 00 flour; it totally makes the difference. I’ve found 00 flour pretty regularly at Whole Foods, Standard Market and even Caputos. I haven’t had good luck at either Jewel or Marianos, so make sure to plan ahead.

Just a tip. I made the dough in the morning and let it rise pretty much the entire day, covered with a wet towel. I think making and using the dough the same day is better than leaving it in the fridge overnight.

Assemble the Pizza

I stretched and shaped the dough until the pizza was about 10" in circumference. I created a little edge or lip (like the video said) and added a thin layer of pizza sauce. I cheated here and just used a jarred sauce from Standard Market and added a little chopped garlic, oregano and pepper. I shredded some basil on the top and used part-skim mozzarella, which I hand shredded.

If you watched the NYT video above, the recipe calls for fresh mozzarella. I have made this using fresh mozzarella too, but honestly, I like the flavor of aged mozzarella better. And, if I am being completely honest, I actually forgot to look for the fresh mozzarella, so the aged mozzarella had to do! I drizzled a little olive oil on the top of the pizza, just before placing it on the peel and putting it on the Egg.

Cooking on the Green Egg

My “assistant” and I heated up the Egg. Once the fire started to burn, put the place setter in Egg, upside down. We added the grate and then the pizza stone on top of that. We raised the heat to about 550 degrees, put the pizza on the stone, and cooked the pizza for about 7 minutes. The crust was nice and crispy and the cheese was melted perfectly. It was the perfect first time recipe. Next time, white pizza with garlic, soppresatta, and arugula. My favorite!

Tonight’s Wine

Tonight’s wine is Casal Da Coelheira Reserva 2012 from Portugal. I don’t recall having wine from Portugal before so I did a little research. Here is great site that speaks to the Tejo region, in the heart of Portugal, where this delicious wine was from.

Buon Appetito!

Shout Out to Rustic Road Farm!

Thanks to Rustic Road Farm for helping me make this…

I found Rustic Road Farm about two years ago. I started going for the fresh veggies and eggs, but kept going back for the amazing pork they produce. Tonight, we made pork chops from Rustic Road on the Green Egg.

Recipe

This recipe was extremely simple. I seasoned the pork chops (after bringing them to room temperature) with sea salt, pepper and cumin.

Cooking Method

We (my Green Egg assistant and me) bought the Green Egg up to about 400 degrees. We seared the chops for about 1 minute, rotated the chops 90 degrees, then seared the chops for another minute to get a nice cross hatch. We flipped the chops and did the same on the opposite side.

We took the chops off the Green Egg, inserted the plate setter, and waited until the Egg reached 400 degrees again. We finished the chops on indirect heat for about 15 minutes, flipping them twice during that time.

We took the chops off once they reached 140 degrees, let them sit for about 5 minutes, then served them once they reached 145 degrees.

Accoutrements

I served the pork chops with lemon orzo. You will find that recipe further down in my blog!

This is such a simple recipe, but the delicious flavor of the pork and the smoke and juices that the Egg seals into the meat is impossible to describe. Rustic Road Road Farm is located in Elburn and for you city folk, it is worth the drive! Take some time to watch the goats at the front of the farm and then visit the pigs behind the actual farmstead. I’m not a farm girl, but visiting this place makes me feel like Eva Gabor in Green Acres (most of you youngsters probably won’t remember that show, so click on the link)!

Bon Appetit!

Best Ever BBQ Ribs...V 2.0

It was another weekend spending time with the Green Egg!

This weekend, we revisited the Best Ever BBQ Ribs recipe from Bon Appetit Magazine.

The recipe was pretty similar to the original version on this site. Here are just a couple of tweeks:

Rib Prep

First, rub the ribs with Canola oil (instead of Chili Oil). Next, create a rub for the ribs that consists of:

  • 1 tablespoon each: mustard powder, sweet paprika, garlic powder, black pepper
  • ½ tablespoon each of: cayenne, cumin, and sea salt

Cooking Method

We placed 2 slabs of St. Louis style ribs in a rib rack, on the Green Egg, over the plate setter (aka the “convEGGtor”). In addition to using the plate setter, we soaked apple wood chips in water for about 30 minutes and then drained them and placed them into the charcoal right before we started cooking.

The ribs cooked at a temperature of 275 degrees for about 2.5 hours.

After the slow cooking time, we removed the plate setter, brought the grill up to a temperature of approximately 350 degrees, smothered the ribs with BBQ sauce and then grilled them at the higher heat for about 5 minutes per side.

The Sauce

We used the same BBQ sauce recipe as before - equal parts Sweet Baby Rays Honey BBQ and Famous Daves Sweet and Saucy. I added a touch of water and some Makers 46 (for obvious reasons). I let them come to a quick boil before starting to spread it on the ribs.

Bottom Line…

These ribs were even more tender than the Best Ever BBQ Rib recipe I posted previously (V 1.0). The smokey flavor was just perfect - not too much; not too little. As usual, I made more than we could eat,so later this week we are having pulled BBQ rib sandwiches on garlic sourdough bread. Have you had garlic sourdough bread? If you haven’t, you are missing out!

Bon Appetit (V 2.0)!