nyt

Beef Tenderloin Stuffed with Herb Pesto

What do you do when you have a taste for pesto but aren't sure what to serve it with?  Just look at Wednesday's Food Section from the NYT and something is bound to inspire you!

This week's front page of the section was perfect: Beef Tenderloin Stuffed with Herb Pesto.  I skimmed the recipe and then headed to Whole Foods.  I probably should have thought twice about that trip because beef tenderloin is expensive...very expensive! The tenderloin is the most tender piece of meat you will ever eat, but its an investment.  It is also easy to very easy to overcook, so even if you are someone who loves their meat well done, do yourself a favor and follow the cooking guidelines below.  A well done tenderloin will bring you to tears; especially after you paid all of that money!

Here are the ingredients:

  • Three pound beef tenderloin, butterflied (you can do this yourself, but I asked the butcher to do it for me)
  • 2 packages basil (I used Gotham Greens basil - so good!)
  • 1-2 bunches flat leaf parsley
  • 6-8 cloves garlic 
  • 8 green olives, pitted
  • 2 tablespoons parmesan
  • Kosher salt
  • Black pepper
  • Crushed red pepper
  • Juice of 1/2 lemon
  • Olive oil

Use a food processor to blend the basil, parsley, garlic, green olives, parmesan, lemon juice and about 2 tablespoons of olive oil together. When the mixture starts to come together, give it a taste and add salt, pepper, and red pepper flakes to your liking.  Turn the food processor back on and add the olive oil slowly, until the mixture turns into a paste.  This recipe will yield more than you actually need, but the good news is, you have extra pesto!

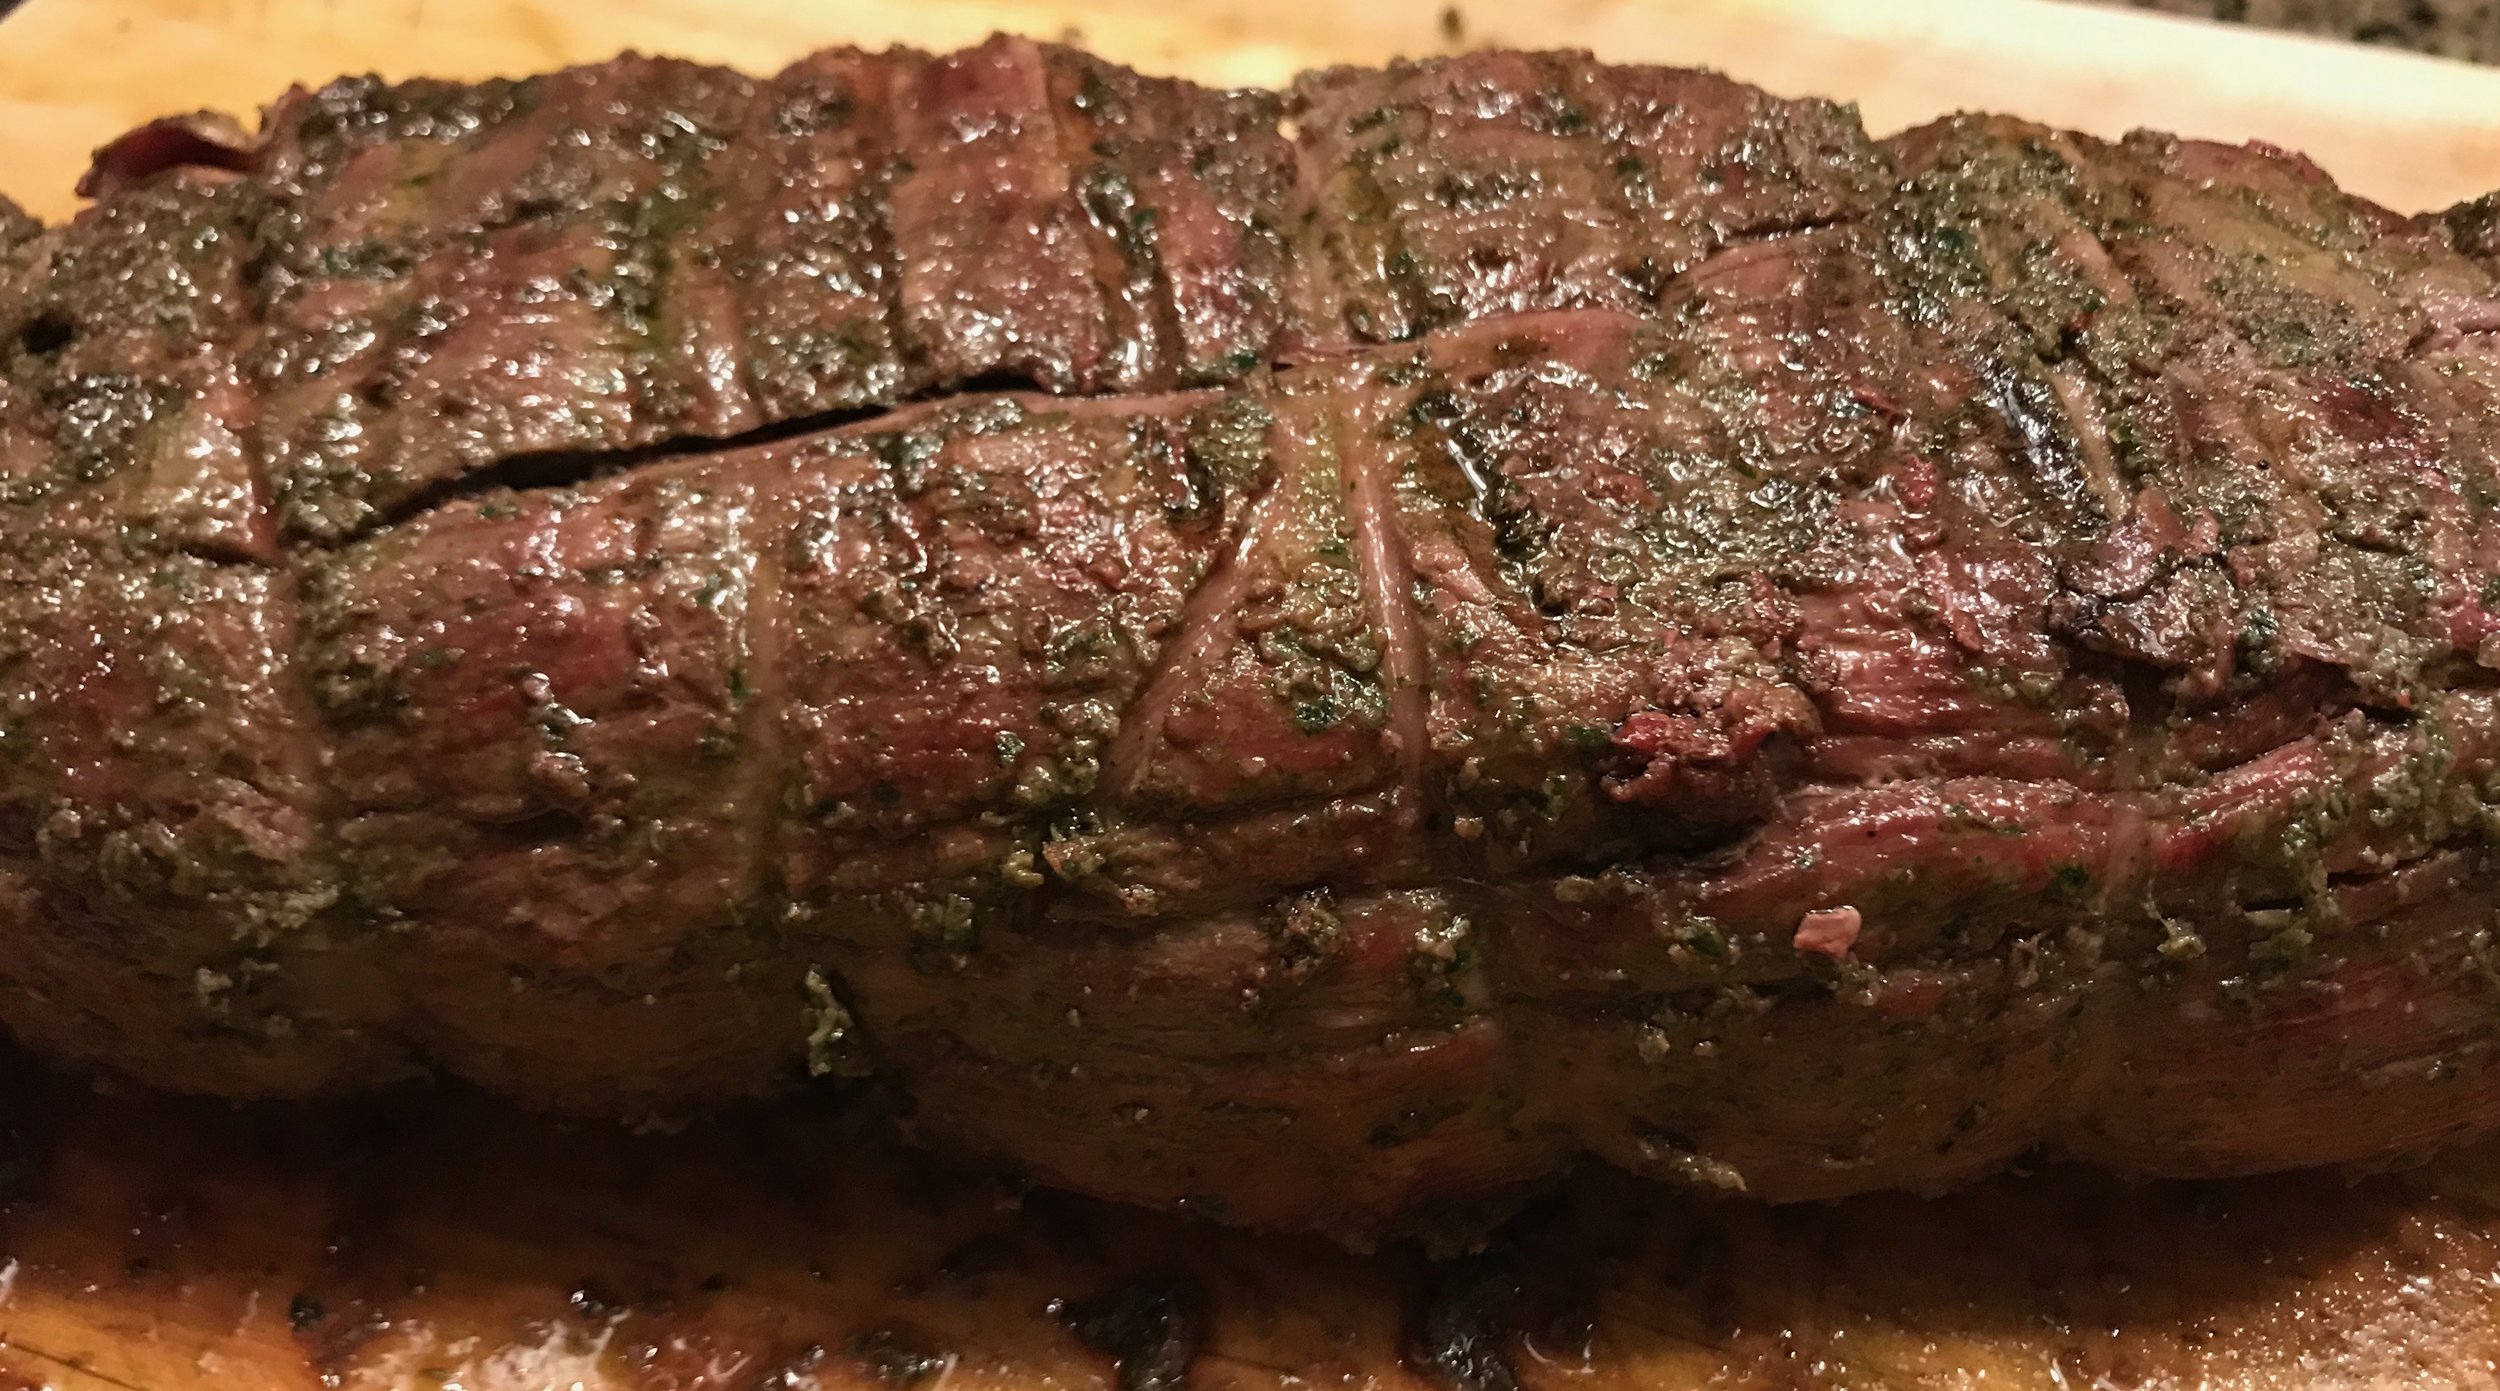
Pound the beef tenderloin until the roast is an equal thickness.  Don't worry about getting it too thin; just try and achieve an even thickness across the entire roast.  Spread the pesto over the inside of the tenderloin.  Roll the tenderloin like a jelly roll (long ways) and tie it with butcher's twice every two inches.  I also rubbed the entire outside of the roast with pesto as well.  I'd love to say that this was an original thought, but a lot of my pesto oozed out of my tenderloin because I had made it too thin.  I didn't want the pesto to go to waste, so I rubbed every inch of the meat with the excess pesto.

To cook the tenderloin, you will need to setup your grill for both direct and indirect cooking. I used the Green Egg (of course) at 400 degrees direct for about 2 minutes a side to get a nice sear.  Then, I added the convEGGtor to get the indirect heat that I needed.  I cooked the tenderloin about 30 minutes, until the internal temperature reached 130 degrees.  I checked the tenderloin every 10 minutes to make sure I didn't overcook it. I turned the tenderloin each time I checked it.  

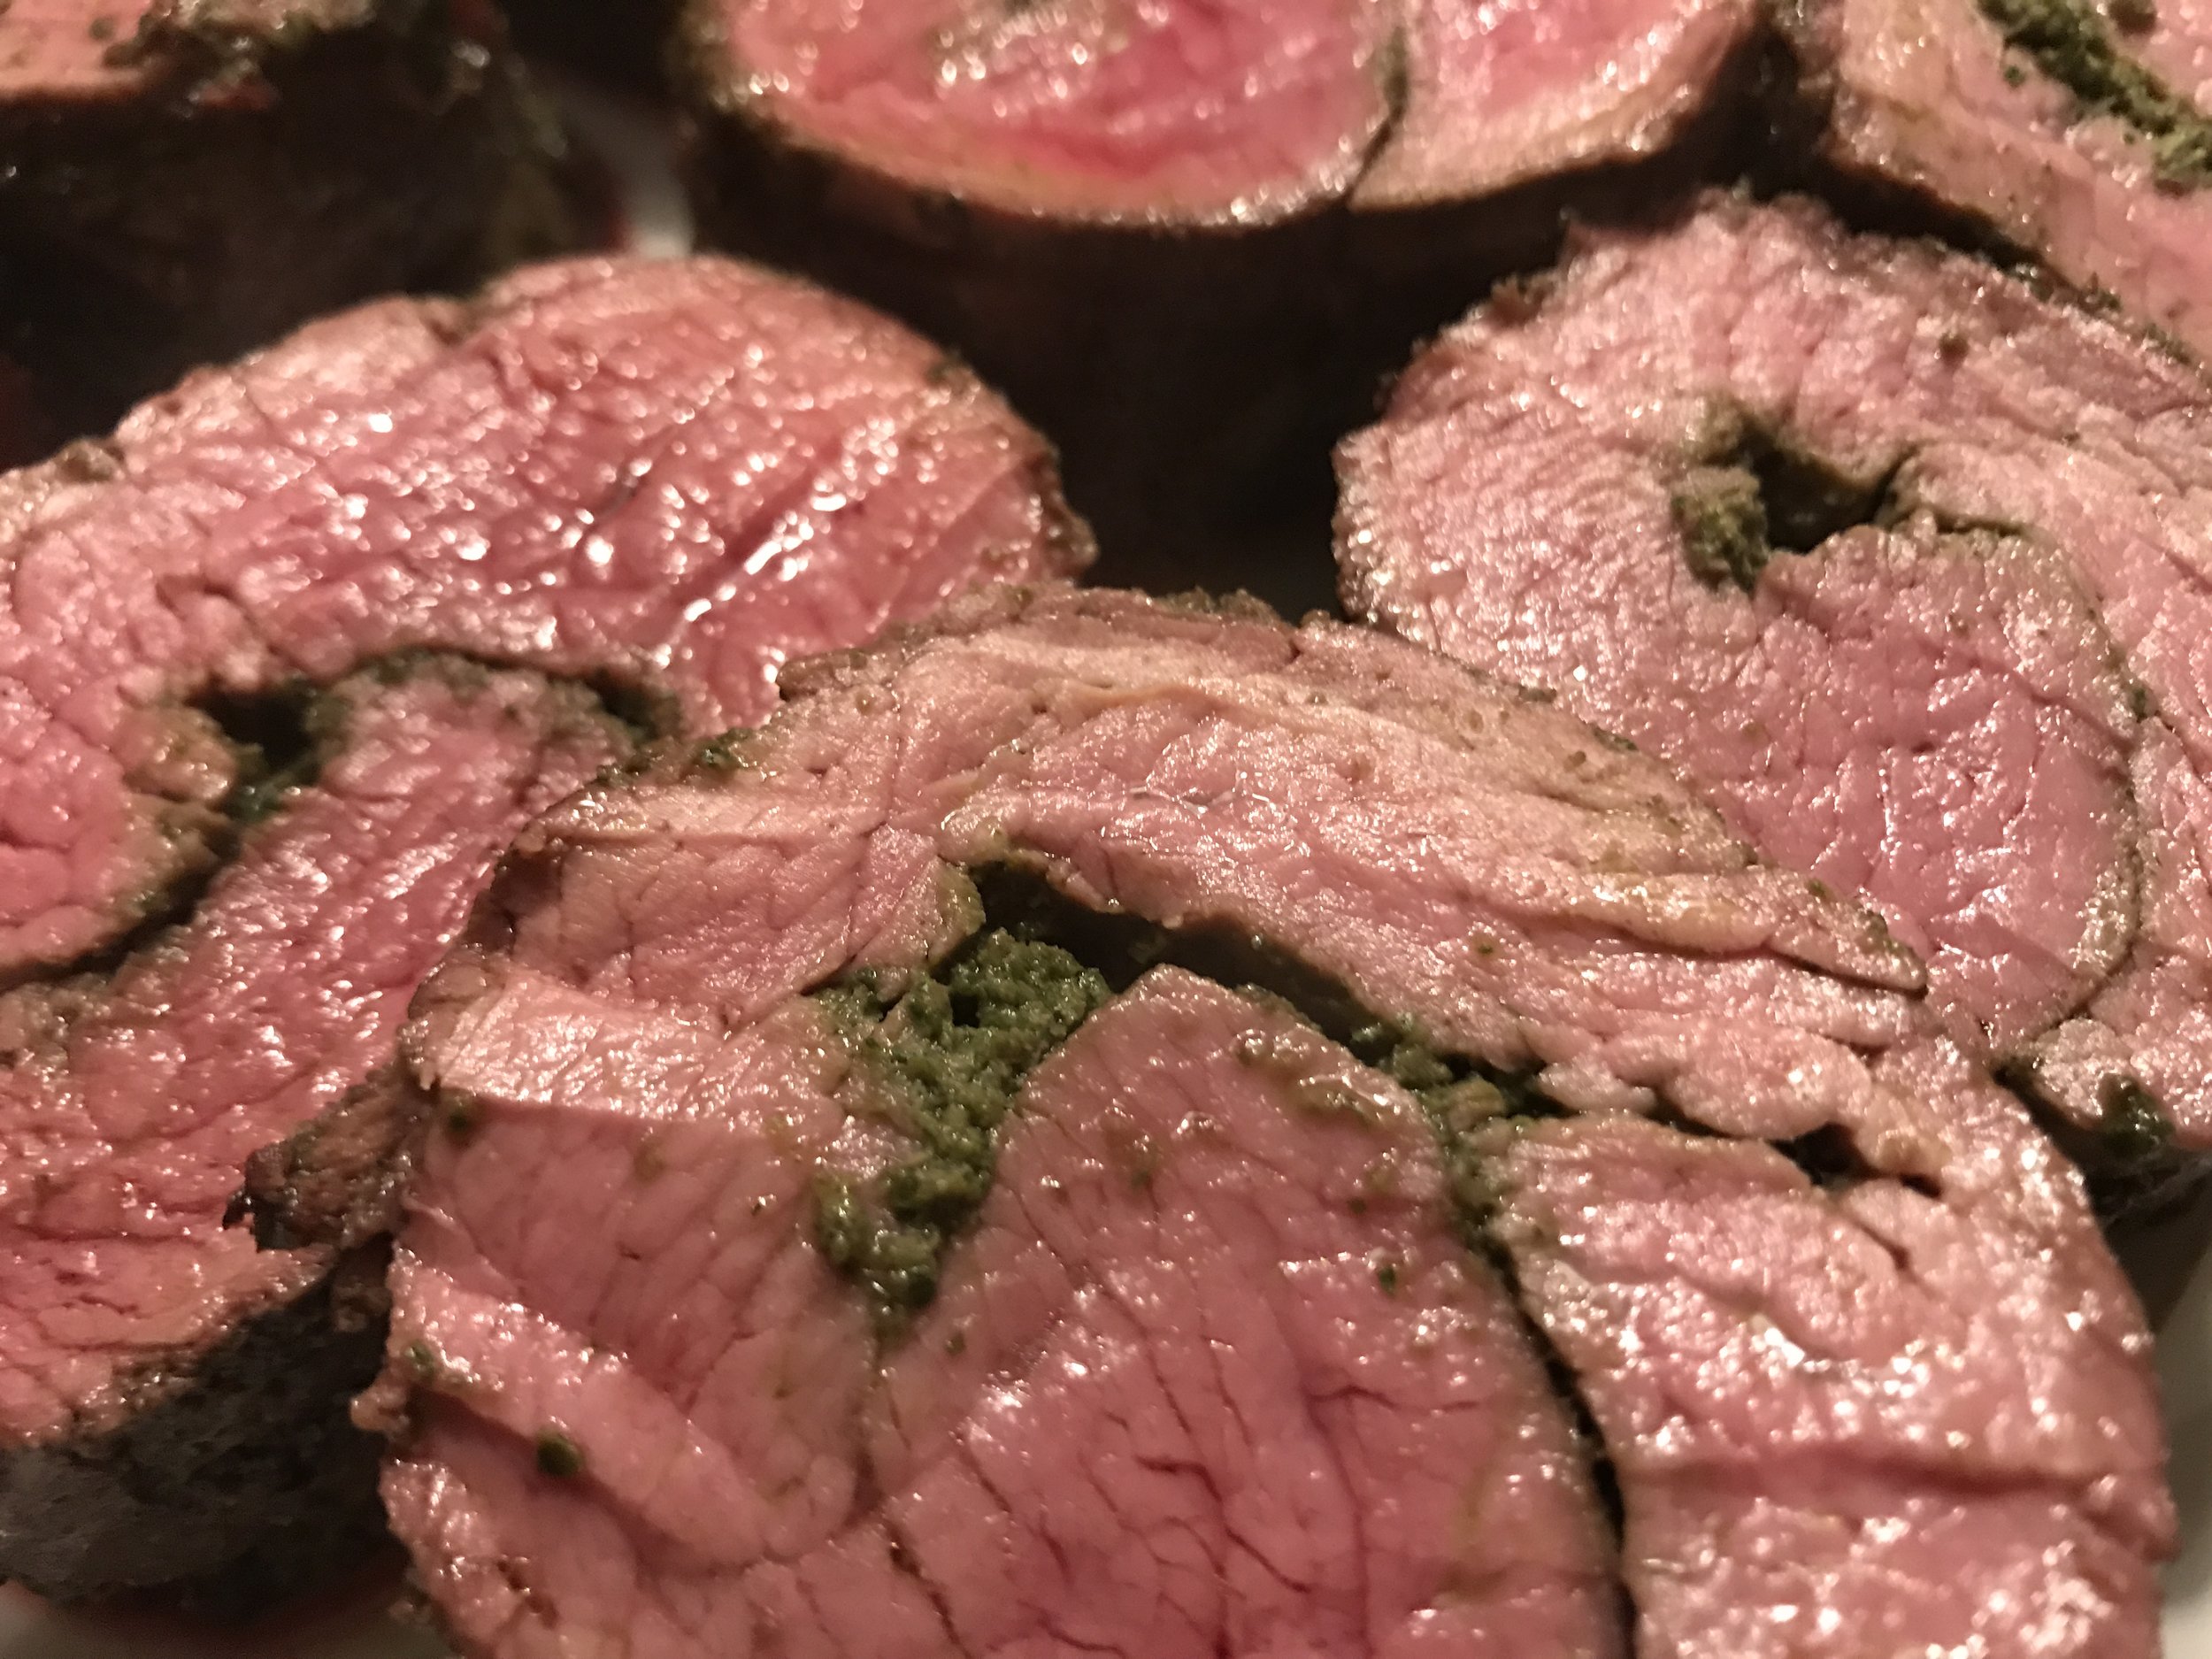
When the tenderloin reached the 130 degree mark, I took it off the Green Egg, covered it with foil, and let it sit for about 10 minutes.  After removing the butcher's twice, I cut the tenderloin into 2 inch pieces and served it with extra pesto on the side and potatoes roasted with herbs and shallots.

I served this with a great bottle of 2015 Martin Ray Tina Marie Pinot Noir.  I'd love to believe I inspired the name, but I think we all know better, right?


Middle Eastern Chicken Dinner

Yup…still on my NYT kick!

I saw this recipe a few weeks ago in the Thursday Food section.

Middle Eastern food is new to me, so I followed the recipe exactly. In fact, it was so exact, I’m going to send you directly to the NYT Cooking Page for the recipe!

Sumac was a little hard to find. Trips to Whole Foods, Standard Market, and Mariano’s proved unsuccessful. Finally found it at World Market.

This chicken had and incredible depth of flavor. I cooked this on the Green Egg on direct heat at 500 degrees for about 15 minutes total. The recipe calls for chicken thighs, but I am sure you could also use chicken breasts. I would cook the breasts on indirect heat though, to avoid them drying out.

I served the chicken with yellow rice and a really hearty Cabernet. We didn’t have a lot of leftovers, but I think this chicken would be great for tacos or even in a panini with some pepper jack cheese. If you give this try, let me know how it turns out and how you served it! I’m always looking for new ideas!

Enjoy!

Spicy Garlic Rosemary Grilled Chicken

When I was making dinner last Sunday, I decided to add some chicken to the grill so that I would have something for lunch during the week. I ended up eating this chicken several days last week - plain, on a salad, and in a taco. It was a great quick lunch with a lot of flavor.

Here is the recipe:

Ingredients:

  • 4 boneless, skinless chicken breasts
  • Zest of 1 lemon
  • 4-5 rosemary sprigs, finely chopped
  • 2 cloves of garlic, grated
  • Pinch of crushed red pepper flakes
  • Pinch of salt
  • 3 grinds of black pepper
  • 3 tablespoons olive oil

Preparation:

  • Mix all of the ingredients, except the chicken, together in a measuring cup.
  • Place the chicken breasts in a Ziplock bag and pour the olive oil/herb mixture over the chicken.
  • Seal the bag and rub the marinade into the chicken. Place the chicken on a dish in the refrigerator for 4 hours.
  • Remove the chicken from the refrigerator and heat your grill to 400 degrees.
  • Cook the chicken over direct heat for 3 minutes per side. Check the temperature and continue to cook for 1-2 minutes per side until the internal temperature reaches 165 degrees.

This recipe was inspired by the NYT’s recipe Grilled Chicken Salad with Green Beans, Olives and Capers. Since I was making this recipe in advance for the week, I just focused on cooking my chicken and then adding it to what I had in the house throughout the week. The chicken was juicy and full of flavor. The red pepper was a nice kick. a

Enjoy!

Grilled Pork Chops with Cherry Sauce

As you can probably tell, I’m on a New York Times recipe kick. I’m not sure how I found this recipe, but it is definitely one to save and make again!

The pork chops are rubbed with a very flavorful herb mixture. Take a quick look before you read the ingredient list.

You can find the original recipe on the NYT website, but here is my modified version of the recipe.

Ingredients:

  • 2 pork chops, bone-in, thick cut
  • 4-5 sprigs rosemary, finely chopped
  • 6-7 sprigs thyme, finely chopped
  • 2 cloves of garlic, grated
  • 1 cup fresh cherries, organic if possible, pitted and halved
  • ½ cup “fruity” red wine (see note below)
  • 1 shallot, finely chopped
  • 3 tablespoons unsalted butter
  • Kosher salt
  • Freshly ground black pepper

So, I had to look up what “fruity” red wine meant. Based on what I read, my recommendation is to buy a Pinot Noir from California or New Zealand. I shopped at Whole Foods that day, so I also looked at the categories that were checked for each wine and picked something that said “fruity.”

Preparation:

Cook the Pork Chops

  • Combine the garlic, rosemary, thyme, 3-4 grinds of black pepper, and two small pinches of salt. Rub all over the pork chops. Marinate anywhere from 2 hours to overnight in the refrigerator. I marinated mine for about 4 hours.
  • Remove the pork chops from the refrigerator and let them get to room temperature. I often forget to do this, so my goal is to have the chops out at least 30 minutes before I cook them. That is usually how long it takes to heat up the grill. Speaking of which, heat the grill to 400 degrees!
  • We cooked the chops over direct heat, about 3 minutes per side to start. We kept checking the temperature until the internal temperature reached 140 degrees. I cannot remember the actual cooking time and to be honest, the cooking time is going to vary depending on how thick the chops are. If you start with 3 minutes per side as a rule of thumb, then go to 2 minutes per side until you reach the correct internal temperature, that usually works well. Once you take the chops off the grill, let them sit, covered, until they reach 145 degrees. They will continue to cook, so don’t worry. It should take about 5-7 minutes.

One thing to note. The NYT recipe calls for a combination of direct and indirect heat. That actually is a great method. We were a little lazy last week, so we did everything over direct. Also, if you have a Green Egg and are going to use the direct/indirect method, try starting with indirect heat first, then sear the chops on direct heat at the end for only 2 minutes per side. After watching a lot of the videos on the Green Egg site, this sees to be the most common method. This made me uncomfortable at first, because it is against everything I have learned to date. However, we have cooked steaks like this multiple times now and they turn out like butter, with the perfect amount of char.

Make the Cherry Sauce

  • Add a tablespoon(ish) of butter to the skillet. When the butter stops foaming, add the shallots and cook until tender. This will take 2-3 minutes.
  • Add the cherries and wine and let that cook until the mixture reduces to a thin syrup. This will take about 5-6 minutes.
  • Add another 2 tablespoons of butter, one at a time, until it is incorporated Add another pinch of salt and a couple of grinds of black pepper. Give the sauce a taste and adjust the flavor to your liking.

I wasn’t sure if I was going to like the sauce, so I served the sauce on the side. It definitely added something to the dish, but the chops alone had a great garlicky-herb flavor and didn’t need the cherries. It is a great way to use cherries that you have not finished eating yet for sure!

And, here is the final product…

I definitely recommend giving this recipe a try. The herb rub is versatile and could be used on anything. I think this would be great to serve on steaks!

Bon Appetit!

Blackberry Cobbler and Peach Ice Cream

All I can say…F*&^ING YUM!

So my “enabler” subscribes to the New York Times and as a result, I have the opportunity to read the Food section every week. A couple of weeks back, we saw a recipe for Crunchy Berry Almond Crumble. Since we have a tree nut allergy in our family, I decided to modify the recipe a bit. The result? Well, I already said it above…f*&^ing yum! (Yes, Lili & Diego…I owe you $5 for those words!) Here is my version of the recipe.

Ingredients:

For the fruit

  • 3 pints blackberries (use organic if you can)
  • Zest of one orange
  • 2-4 tablespoons granulated sugar (will depend on the sweetness of the blackberries; I used three this time)

For the crumble

  • 1 2/3 cup flour
  • 1/3 cup brown sugar (light or dark - whatever your preference is)
  • 1/3 cup granulated sugar
  • 1 teaspoon ground cinnamon
  • 1/8 teaspoon allspice
  • Pinch of salt
  • 1 stick of unsalted butter, melted

Preparation:

  • Preheat the oven to 350 degrees.
  • Mix all of the ingredients for the fruit together and set aside.
  • Whisk together the dry ingredients for the crumble.
  • Add the butter to the crumble ingredients. Mix the butter and the dry ingredients with your fingers until crumbs form. Feel free to “smush” the crumble pieces together to form larger chunks.
  • Add the fruit to a shallow dish (e.g., pyrex dish or a gratin dish). Cover the fruit with the crumble mixture.
  • Cook the crumble for 50-55 minutes. You can serve hot, but I prefer to let the crumble get to room temperature and serve it then.

Serve the crumble with ice cream or freshly whipped cream. I served this a few times this past week; first with peach ice cream, then with cherry ice cream. The ice cream recipe is available on the blog. Substitute peeled and finely chopped (lightly pureed) peaches for the cherries. SOOOO GOOD!

Bon Appetit!